Showing posts with label tutorial. Show all posts

Tuesday, July 26, 2011

EOTD: Katy Perry Grammy’s 2011 makeup & Sleek Monaco palette

Hey everyone!

Did this look today after seeing this picture from Katy Perry at the 2011 Grammy awards. I loved the purple and green combination with the glitter and decided to recreate it.


(Click for larger view)


For eyeshadows I mainly used the Monaco eyeshadow palette from Sleek from their Mediterranean collection.


Here’s a list of all the products I used and how I used them:

- Urban Decay Primer Potion: all over the lid up to the brow, blended out with my finger.

- MAC Brun: to fill in my brows, with an angled brush (MAC 268).

- Sleek Bamboo (Monaco palette): as a browbone highlight, applied with a flat shader brush (MAC 239)

- Sleek Martini (Curaçao palette): inner corner highlight, applied with a pencil brush (MAC 219)

- Sleek Sand Walker (Monaco palette): applied with a blending brush (MAC 217) right above the crease, as a transition colour between the purple and the brow highlight.

- Sleek Lotus Flower (Monaco palette): on the lid and blended into the crease, applied with a flat shader brush (MAC 239).

- Sleek Midnight Garden ( Monaco palette): softly applied with a tapered blending brush (MAC 226) in the outer corner over the purple to make it a little darker and add some depth. Also on the outer forth of the lower lashline over the lime green with a pencil brush (MAC 219).

Sleek Kiwi Zest (Monaco palette): on the lower lashline with a short bristle shader brush (MAC 214).

Urban Decay 24/7 eyeliner in Mildew: on the lower waterline and smudges between the lashes.

- NYX cream glitter (Paradise palette): applied over the purple with my finger.

- L’Oreal Super Liner: along the upper lashes.

- Max Factor False Lash Effect mascara: few coats on the top lashes, one coat on bottom lashes.

- False Eyelashes from Claire’s (no name or number) with Duo lash glue.


Hope you like it and thanks for stopping by!

X
Tanja

Sunday, July 24, 2011

EOTD (Eye Of The Day): MAC Rare Find

Here’s a look I did with MAC’s Rare Find mineralized eyeshadow from the Semi Precious collection. I’m actually really glad I picked this up cause it’s so pretty. It looks even better in real life than it does on the picture.


These are the products I used and how I used them:

- Urban Decay Primer Potion: all over the lid up to the brow, blended out with my finger.

- MAC Brun eyeshadow: to fill in my brows, with an angled brush (MAC 268).

- MAC Vanilla eyeshadow: as a browbone highlight, applied with a flat shader brush (MAC 239) and  inner corner highlight with a pencil brush (MAC 219).

- MAC Rare Find mineralized eyeshadow: all over the lid, applied with a damp flat shader brush (MAC 239, I used Fix + to wet my brush, but you could also use water) and used dry to blend it out just above the crease with a fluffier brush ( MAC 217).
Also applied wet on the lower lashline with a short bristle shader brush (MAC 214)

- Urban Decay 24/7 eyeliner in Zero: on top and bottom waterline and smudged between the lashes.

- Max Factor False Lash Effect mascara: few coats on the top lashes, one coat on bottom lashes.

- False Eyelashes from Claire’s (no name or number) with Duo lash glue.


I love the shimmer in this eyeshadow and I think it looks great on its own!
You could make this look a little darker and more smokey by adding some black on the outer corner.
Thanks for stopping by!

X
Tanja

Tuesday, July 19, 2011

Tutorial: Sunset on the Beach Look

Hey guys,

This is the latest tutorial that I've decided to re-upload from my old channel. This is one of my favorite looks when I created it last year, I love the contrast of the gold and purple. This is also one of my sister's favorite looks which she often asks me to recreate on her.


EYES:
- Two Faced Shadow Insurance
- Indianwood paint pot
- Amber Lights eye shadow
- Inglot #430 (true gold) eye shadow - Goldmine eye shadow would work too, although it wouldnt be as dramatic
- NYX "Milk" jumbo eye pencil
- Naked "Blue Duochrome" pigment - this comes from the Ivory Stack and actually has a number but I don't remember what it is. If you have Vellum eye shadow it would work too
- Cork eye shadow
- Brown Down eye shadow
- Carbon eye shadow
- Vanilla eye shadow
- Non-Conformist fluidline
- Inglot #379 (matte blue-purple) eye shadow - you could also use Parfait Amour eye shadow
- Smolder eyeliner
- Blacktrack fluidline
- Ardell "Demi Whispies" lashes (optional)


CHEEKS:
- Inglot #35 (neutral cantaloupe with silver shimmer) blush
- Inglot #57 (neutral pink-based brown with silver shimmer) blush

LIPS:
- Plastique lipstick
- Pupa Ultra Reflects lipgloss in "#07"


I hope you guys like this look as much as I do. Please send me photos if you try it out and I'll feature them on my blog. Thanks again


Thursday, July 14, 2011

Colorful Eye Makeup Tutorial using Manly eyeshadow palette

Hey everyone!!
After the success of my first eye makeup Tutorial I thought of coming up with another one. This one was really fun to do & it's a bit dramatic. I've taken all the shades from my 80 color Manly eyeshadow palette from KKcenterHK which i reviewed yesterday- HERE.
Take a look & hope you like it & it helps!
Step I

Step II


Step II
I

Step IV
The final look

And now if you are wondering that what sort of a full look would match a colorful eye makeup like this then you can surely check out what i did, keeping the lips & the cheeks light:

So girls hope you enjoyed this colorful look & tutorial as well!!! Don't forget to try out some colorful makeup looks with your big palettes!!!

Wednesday, July 6, 2011

Smokey eye tutorial n°2 (using MAC eyeshadows)

Hey everyone!


So here's my second smokey eye tutorial.
I'm going to do kind of the opposite of what we did l did for the first smokey eye where I put the darkest shades on the lid and the lighter one in the crease. This time I'm keeping the lid light and putting the darker shades in the crease.
I'm using All That Glitters as my lightest shade, Twinks as my medium shade and Beauty Marked as the darkest (all from MAC). The other products I used are the same ones I used last time: Zero 24/7 eyeliner pencil from Urban Decay, False Lash Effect mascara from Max Factor, lashes from Claire's and Select Cover-up concealer from MAC. 


(BTW: all pictures are clickable for larger views!)


I started off with my brows (using Brun eyeshadow / MAC), brow highlight (using Vanilla eyeshadow / MAC) and primed my eyes with Urban Decay Primer Potion.


Next I applied the lightest shade, 
All That Glitters from MAC, on the lid with a flat shader brush (MAC 239) and the inner corner with a pencil brush (MAC 219), fading it towards the crease.


I then put the medium shade, Twinks from MAC, in the crease and outer corner with a blending/crease brush (MAC 217) and smudged it along the lashes with a pencil brush.


I lined my upper lashline with a black eyeliner pencil (Zero / Urban Decay). This doesn't have to be perfect cause we're going to smudge it out anyway.


I used Beauty Marked from MAC and a pencil brush to smudge out the liner and darken the outer corner.


On the lower lashline, I applied the same eye pencil to the waterline and smudged it in to the lashline. Again, doesn't have to be perfect, just make sure the line is thicker on the outer corner and thinner towards the inner corner.


I then put All That Glitters on the inner half of the lower lashline and Twinks on the outer half.


Finally, to finish the look I applied mascara (False Lash Effect / Max Factor) to the top and bottom lashes, added false lashes (Claire's, they don't have a name or number sorry) and concealer (Select cover-up NW20 / MAC).


And that's it, all done!


Hope this helped and if you have any questions, feel free to ask!


x
Tanja

Monday, July 4, 2011

Smokey eye tutorial n°1 (using Urban Decay's Naked palette)

Hello!
Remember me :)?  I've been super busy, but I'm back and I have a tutorial for you!

This is gonna be a tutorial on one way of doing a smokey eye. For this look u only need 3 shades in whatever color you choose, a light one (Toasted / Urban Decay), medium ( Hustle / Urban Decay) and a dark shade (Creep / Urban Decay), a highlight color (Virgin / Urban Decay),an eyeliner pencil (Zero / Urban Decay) and mascara (False Lash Effect / Max Factor). The light color doesn't really have to be light. You can go as dark as you want, the light color just has to be lighter than the medium color and the medium color has to be lighter than the darkest one. Did that make sense? Yes? Good :)


I put my Tumblr url on the pictures before I decided to post them on here too, so ignore that or go check out my Tumblr!

I started off by doing what I do before pretty much any eye look. I primed my eye with Urban Decay Primer Potion (UDPP), filled in my brow with Brun and highlighted my brow bone with Vanilla, both from MAC.
I then lined my top and bottom lashline and waterline (tightline) with Zero 24/7 pencil form Urban Decay. Doesn't have to be neat, we're going to smudge it out anyway.


Next, I smudged out the liner on the top and bottom with Hustle from Urban Decay (Naked Palette) with a pencil brush (MAC 219) and brought it up to the crease with a flat shader brush (MAC 239) and blended it out a little.


I then took my lightest shade, Toasted from Urban Decay (Naked Palette), and put it in the crease with a blending brush (MAC 217) and blended it upwards. You can go up to the brow as far as you like. Go back with your medium shade if you want to intensify it a little more after blending. I also smudged Toasted along the lower lashline with a pencil brush and put Virgin from Urban Decay (Naked Palette)in the inner corner as a highlight.


To make the lashline even darker, I used Creep from Urban Decay (Naked Palette) right along the top and bottom lashes. Add plenty off mascara. I used Max Factor False Lash Effect. I also applied false lashes (I used lashes from Claire's), but that's totally optional! Finish with concealer under the eyes, I used MAC's Select Cover-up in NW20. You can do your concealer before you do anything else, but I prefer doing it last so I can wipe away any fallout that might have dropped under my eyes.


Et Voilà! You're smokey eyes are done!

Hope this was helpful and I'll be back with the second smokey eye soon!

x
Tanja

Thursday, June 30, 2011

Tutorial: Smokey Olive and Gold Look

Hi guys,

This is the long awaited new tutorial that has been a long time coming. Sorry it has been so long since I have been able to upload one but I haven't been feeling up to doing much lately because the winter chill has really gotten to me. Anyway, enough excuses and on to the look!

This is a really simple gold and olive-green smokey look that would be perfect for any time of the day/night. It is created using a limited edition product (Techtonic mineralize eye shadow from the Flashtronic Collection ['07]) but this colour can easily be duped with any other olive gold eye shadow.


EYES:
- Indianwood paint pot
- Gorgeous Gold eye shadow
- Techtonic mineralise eye shadow
- Inglot #731 (matte olive) eye shadow
- Humid eye shadow
- Vanilla eye shadow
- Nylon eye shadow
- Blacktrack fluidline
- Smolder eyeliner
- Ardell "117" lashes

CHEEKS:
- Inglot #34 (peach with gold shimmer) blush

LIPS:
- Hug Me lipstick
- Inglot #545 (orange with multicolour reflects) lipsgloss


I hope you enjoyed this look, please let me know if you try it out :)


Monday, June 27, 2011

Pink Eyeshadow Makeup Tutorial


Products Used:

Bobbi Brown - Snow Eyeshadow
Too Faced - Boy Toy
MAC - Blacktrack Fluidline
MAC - White eyeliner pencil
MAC - Speed Dial Lipstick


Sunday, June 19, 2011

How To: Pedicure

The following post is a written example of how I perform my weekly pedicure on myself and on clients. Some of you may not know but I am a qualified nail technician and this is how I was taught to perform pedicures in my classes.


 Currently the items that I use for my manicure and pedicure are all from the company "Natural Look" because I feel that if you use products from the same line work better because they are designed to work together in the same step system.


I am in no way affiliated with Natural Look and I bought all these products with my own money. 
Step One - Cuticles:
 I use the spoon and of a cuticle pusher to push back my cuticles. I then apply the Natural Look Erase cuticle remover and wait 2 minutes before using the blade on the cuticle pusher to remove my cuticles.
I NEVER cut my cuticles. The cuticle protects the nail from bacteria that could infect the nail and cause damage and cutting it creates a risk of bacteria getting in.
 
 
Step Two - Filing:
 
 Next I file my nails using a 180/180 grit file, the one I use is the Grey Fox file from EzyFlow. I shape the free edge of my nail and then lightly file the surface of the nail to remove any ridges. I then use a nail brush to dust away any filing dust.
I then use a double sided buffer with a 220/280 grit, the one I use is the Sand Shark buffer from EzyFlow. I use the 220 grit side first to buff the surface of the nail and then do the same with the 280 grit side, brushing away the filing dust at the end of each step.
After the double sided buffer, I use a shine buffer to buff my nails to a high shine, the one I use is the Killer While buffer from EzyFlow.

NOTE: Make sure to remove the filing dust in between each file to prevent scratching the surface of the nail
Also, don't file to harshly or too often, this will make the nail thinner and more prone to breaking
 
 
Step Three - Soak Feet:
  Next, I fill a foot spa with warm water and pour some Natural Look Cool Feet Softening Soak. This softens the skin and cuticles and contains  tea tree, peppermint, eucalyptus, lavender and chamomile. which are used for their antiseptic and therapeutic qualities. To this I add a tablespoon of Natural Look Cool Feet Deep Sea Salts which also contains tea tree, peppermint and eucalyptus. I soak my feet in this for 15 minutes.
 
 
Step Four - Exfoliate:
I suffer from really dry feet so I use Natural Look Cool Feet Stimulating Scrub which contains papaya, to deep cleanse, remove and prevent rough, dry skin build-up. I massage this into my feet and then wash away using warm water.
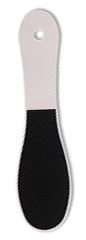
 After washing away the scrub, I the course side of a double sided foot file to remove any callused dead skin. I thin use the finer grit side of the file to smooth the skin. I then wash away the dead skin with warm water.


Step Five - Moisturize:
After drying off my feet, I apply Natural Look Cool Feet Massage Lotion and massage it into my hands. This moisturizers is thicker than any other I have used which I find better because you use less. It also sinks into the skin faster than any other hand cream I have used and protects from damaged caused by weather, water and chemicals. Massaging your feet will help to improve circulation. This contains peppermint to help nutralize foot odor, tea tree oil and chamomile to soothe rubbed toes and skin irritations and Lanolin and aloe vera to soften hard skin.
The final step to my pedicure is to apply Natural Look Nourish cuticle oil which helps to keep your cuticles soft and nourished. Using this will also help retain moisture in your nails so that they are more flexible and less prone to breakage.
 
 
 Hopefully this written tutorial has helped you, if I get enough interest in this I may film a video tutorial and post this later.