Showing posts with label Nail Art. Show all posts

Tuesday, June 21, 2011

Polka Dot Mani Fail with Essie Foot Loose

Edited to add: Get 10% off your Born Pretty Store purchase with coupon code MH10K31 - expires Oct 31, so you can purchase happily til then! (Note: I don't profit in anyway from the code. I'm just sharing it with interested readers.)

After seeing all those awesome cool manicures featuring dotting tools, I decided that despite my lack of hand-eye coordination and general clumsiness, I just HAD to try one out. That, and I wanted to bring on a summer colour on my nails. That's how I ended up with this monster of a manicure. I have to admit, while there wasn't anything wrong with the tools I used, my dotting skillz are teh suckz. Seriously.


I got my dotting tools from Born Pretty Store, which has been popular lately among bloggers and nail polish lovers for its ready availability of cheap and cheery nail art suppliers, including crackle polish, stickers, rhinestones, etc. The dotting tools I got were just under US$5 for a set, and are available here.

These dotting tools are of good quality, and quite handy to use. You get a set of 5 dual-ended dotting tools. All five have two ends.

dotting tool bornprettystore 1


One end is all the same size, a standard size that would be handy for most designs:

dotting tool bornprettystore 2


The other end of the tools is more interesting for girls who really want to dot in all sizes. The ends of the tools range from really big to positively tiny, and would definitely satisfiy any dotter's needs.

dotting tool bornprettystore 3


For the dot manicure below, I used Essie Foot Loose because it was such a lovely summer colour - girly, bright, and still a little spunky. And since it's in the colour family of pinks (in this case bright purply-pink), it's wearable to the office! And unlike other Essies which tend to be sheer and streaky, this is a one-to-two coater, depending on thickness of application.

essie foot loose wnw white 2


For the dots, I used the dotting tools and Wet n Wild White. One of the best white konading polishes ever, now used for dotting. FOr the variously sized dots on my nails, I used the large end of the green dotting tool, and the large end of the pink dotting tool. I also, for smaller dots, used the white dotting tool.

I know the dots don't looks as nice as they could be, but that's realy due more to my lousy application than anything else. After all, all dotting tools are the same right? But looking at these photos makes me feel like from far, they aren't THAT bad, right, right? *Crickets chirp*

essie foot loose wnw white 3


Anyway, I love the colour of my mani, even if my dotting skills suck. It kind of reminds me of summer - bright, and polka dotted, and just generally cheery!

(Dotting tools were sent for review. Review is my complete and honest opinion. I am not affiliated with/compensated by the company.)

Monday, May 23, 2011

Nails Inc Paddington + Nail Art Pearl Rhinestone = Classy But Fun NOTD

I don't always get to do nail art, so whenever I bling up my nails, I get all excited! So please humour me while I start off this post with a photo of my awesome blinged up nails.

Nails Inc Paddington Nail Art Pearls

The nail polish in question is Nails Inc Paddington, a gorgeous glossy deep red I bought in my craze to own as many Nails Inc colours as I possibly could before leaving the UK. It's distinct from Nails Inc's other famous colour, Victoria, in that Victoria is a jelly (sort of), while Paddington is a creme, and Victoria has a tinge more purple to it, whereas Paddington is more maroon.

Anyway, I first applied Paddington, which applies like a dream, as with most of my Nails Inc polishes. I loved how absolutely classic it looked. So I decided that if I wanted to bling it up, I would have to use something equally classy - and lo and behold, I took out this little baby.

nail art pearl 1


This humble-looking set of nail art pearls is available from Born Pretty Store, which has been quite popular among nail bloggers lately for their vast array of nail art products. The store simply has everything, from shatter polish to nail art tools, and of course, nail art decorations like this set of pearls. This set of pearls is the 3 sizes nail baby pearl rhinestone decoration wheel, available for a very reasonable price.

The pearls come in three sizes, so you can pick and choose to form various designs, or to suit very large or small fingers. I've taken the liberty of photographing a pearl of each size against a ruler, so you can guesstimate how large these are. The smallest pearl is really quite tiny, while the largest pearl is pretty big.

nail art pearl 2


For this look, I used just the medium-sized pearl. For round items like nail art pearls or rhinestones, I find it best to pick and place them on the nail by using a damp toothpick, a tip I learned from some other nail bloggers. Basically, you dampen the end of a toothpick, and touch the surface of a pearl or rhinestone. The pearl or rhinestone will then "stick" to the toothpick due to the surface tension of the water, thus allowing you to move the pearl and hover it over the nail until you are fully satisfied with its position. Then, you can lower the pearl or rhinestone on to the surface of the nail, and the wet nail polish will have a stronger surface tension than the water on the toothpick, so the rhinestone will stick to the nail even after you lift your toothpick. Nifty, right? Sometimes I also use a pair of tweezers, when I can't find a toothpick lying around.

nails inc paddington nail art pearl 2


Another tip I've found handy when working with nail art is that topcoat is needed over the pearls and rhinestones, otherwise they will fall off within a couple of days. I typically use two coat of topcoat over the nail art. I first use a slow-drying topcoat, and then apply a second coat of fast-drying topcoat, like Seche Vite, over it. That way, the pearls and rhinestones stay firmly in place for as long as possible, without me having to wait for hours for my manicure to dry. With this method of slow topcoat and fast-dry topcoat, my manicure is typically ready to go after half an hour. Meanwhile, in the interim half-hour, I can use my hands, but carefully.

nails inc paddington nail art pearl 3


Lasting power of the manicure was very good. If you've been a longtime reader of my blog, you'll know I'm an absolute hoor for all Nails Inc polishes, since they work very well on me. Nails Inc's Paddington applied smoothly, and stayed on for 3-4 days before chipping, which is about usual for me. I only wish that Nails Inc was cheaper, and available outside the UK! In my humble opinion, the Nails Inc formula is the best there is in nail polish - outstripping even - dare I say it - RBL. I personally find the consistency smoother in Nails Inc polishes, and the application less streaky. Okay, now I'd better run before the RBL fans stone me.

nails inc paddington nail art 4


I don't know about you, but I am absolutely loving my nail art, although it was a little more time-consuming than your average manicure. I love the combination of deep red together with white pearls, and I love how it looks classy with the deep red colour, but still a little fun with the pearls! I'm not going to lie - I simply couldn't stop looking at my nails when I had this manicure on.

(Nail art product was sent for review. Review is my complete and honest opinion. I am not affiliated with/compensated by the company.)

Monday, March 7, 2011

Beautiful New Style Cute And Easy Nail Polish

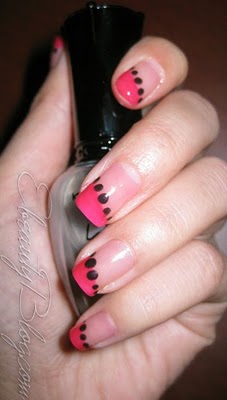
Pink And Black Beautiful New Style Cute And Easy  Nail Polish


Red Ans Black Beautiful New Style Cute And Easy  Nail Polish

Beautiful New Style Cute And Easy  White Glitter  Nail Polish

Beautiful New Style Cute And Easy  Red Nail Polish

Black Beautiful New Style Cute And Easy  Nail Polish

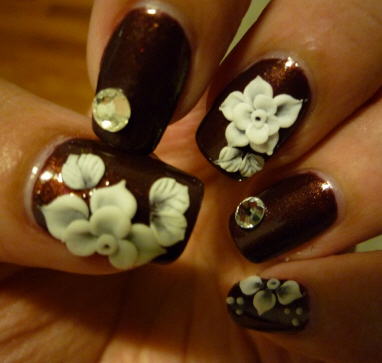
Beautiful New Style Cute And Easy  Nail Polish Black Flower Design

Blue Beautiful New Style Cute And Easy  Nail Polish

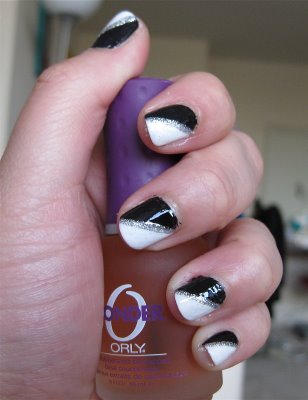
Black And White Beautiful New Style Cute And Easy  Nail Polish

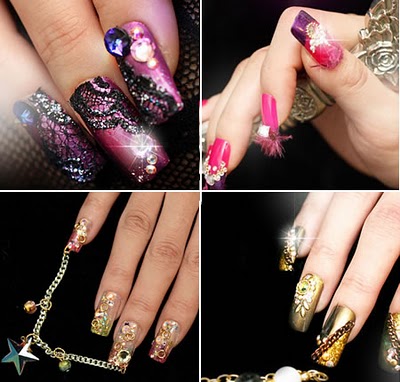
Beautiful New Style Cute And Easy  Long Nail Polish Four Fashion

Red Beautiful New Style Cute And Easy  Nail Polish

Blue,Green And Peacock Green Beautiful New Style Cute And Easy  Nail Polish

Red And Black Beautiful New Style Cute And Easy  Long Nail Polish

Purple And Black Beautiful New Style Cute And Easy  Nail Polish

Beautiful New Style Cute And Easy  Nail Polish Multi Colours

Wednesday, January 12, 2011

China Glaze For Audrey + Konad Fishnet = Awesome Nails!

It rarely happens, but I actually managed to wear un-boring nails to work for one entire week! It was during the Christmas season, so I didn't have any client meetings, and both my bosses were on leave for the holidays. So a thought popped into my head - since I wasn't going to be doing much work that required me to look professional, why shouldn't I jazz up my nails? Thus, I promptly combined China Glaze For Audrey with the awesome fishnet/lace print on my nails.

China Glaze has a few colours that are famous, and For Audrey is one of them. It's purportedly named after Audrey Hepburn for her role in Breakfast at Tiffany's, and the colour was apparently created to be the same shade of blue-green as a Tiffany's box. Now is that cool or what? I know most people who are more colour-shy won't see turquoise as a colour is classic, or for that matter, classy. But if you think about it, what can be more classy than a Tiffany's box? And if a Tiffany's box is classy, why shouldn't we wear that gorgeous colour on our nails?

So behold, my awesome manicure the colour of a Tiffany's box! It's absolutely gorgeous, and in some lights it looks more blue, but in others it looks more green. I can't quite decide whether it's more of a blue or a green.

China Glaze For Audrey Konad

Oh, right, I have to admit, that mani was made slightly awesome by the fact that I smudged the konad design on my ring finger after having painstakingly stamped it on. But it doesn't make it any less stunning, doesn't it? Right? *Awkward silence*

Alright, yes, I was a klutz with the konad. I used my all-time favourite (and oh-so-cheap) black nail polish for the fishnet/lace print, Wet n' Wild Black. And the design came from one of my favorite konad plates of all time, M57. Back then when konading was a new thing, the M57 plate was so hard to get hold of, because every nail polish fanatic wanted one, and it was perpetually out of stock.

chg for audrey konad


After applying China Glaze For Audrey, I can definitely see why it's a classic. This colour was trouble-free in it's application - in fact, it virtually applied itself. It was fully opaque in two coats, although I suspect if you do thicker coats, you could get away with one. And it didn't streak at all. I enjoyed painting on this colour. Wet n' Wild Black, which was used for this konad to imprint the lace/fishnet pattern, is one of the fan favourites of nail polish addicts for konading. It's cheap, it's black, and it works well with the konad stamp and plate set. What's not to like?

Lasting power was about average - it lasted about 4 days on me before the first chip appeared, which was pretty usual. I don't have any complaints about the lasting power of China Glaze polishes in general. Some brands have trouble staying on my nails (ahem, Zoya and Barielle, I'm looking at you!), but China Glaze isn't one of them.

ChG for audrey konad


I don't know about you, but I was in love with my nails for the time I wore it. Everyone I met commented on my nails, from fellow colleagues to sales staff I would encounter on the way hhome from work. It actually pained me to remove the colour when the holiday season was over and work started picking up again at the office. Of course I had to take it off and replace it with a more sensible, work-appropriate colour. But at least I got to have funky nails for awhile!

Friday, December 31, 2010

Inque Nails: My Customized Snakeskin Print Nails!

So we've just had Christmas, and now we're all moving into the new year! This period of time is so suited for reflection as well as looking ahead. And speaking of looking ahead, I seriously think Inque Nails is going to be one of the up-and-coming trends in the future - if not in the near future, then somewhere down the road in the next few years. The arrival of Inque Nails is going to make Minx so passe (and seem so expensive by comparison).

Inque Nails is like nail art - but better. For one, you don't have to spend time labouring over your nails (although I know some people like to!), and for another, the designs come out perfect, everytime (good for klutzes like me). Inque Nails comes in the form of stickers the size of your entire nail plate with designs on them, that you stick onto your nails.

But the unique selling point of Inque Nails is not just that they're nail stickers, but that they're custom-sized down to each individual nail, and that you can pick from over 180 designs, or even create your own. Cool right? The moment I heard about these, I absolutely HAD to try them.

Inque Nails Snake

Here's what a sheet of Inque Nails looks like. In order to size the vinyl nail stickers to your nails, you have to upload a photo of your nails according to their specifications. If you don't want to do that, they have standard-sized nail stickers available as well.


Inque nails have the coolest designs ever - I believe mine was Snake 4, a really awesome snakeskin print. Some of my favourites are Cheetah (cheetah print woo!) Freaky Zoo (giraffe print now), as well as Stars (literally stars in a night sky - very cool). They also print out whatever design you want - you could even upload Justin Bieber and Miley Cyrus and have your nails decorated with them, if you wanted to. *Starts puking*.

Anyway, before I get stoned by the Miley/Justin fanclub, I'd better mention that these nails are actually easier to apply than they look. They are in sticker form, so you have to peel and stick, and then set the stickers by passing them under a heat source (a hairdryer in this case) so that the stickers adhere better. Cool right? These actually stay on for pretty long - your nails will likely grow out before they fall off.

Here's how my nails looked with the nail stickers on. Look ma, cool nails!

inque nails snake)


If you can't already tell, I'm absolutely hyped up about this, because it's just so friggin cool. If you want customized nails (you know, like Justin Bieber or your dog on every single one of them), or if you want nail art that will stay on for a few weeks and not fall off, or if you just want to try the next big thing, this is it. And you can thank me for tipping you off later. Inque Nails are available from the Inque Nails Website, they ship internationally (YAY!) and cost USD$20 to size your nails, and US$15 for a set (which is cheaper than Minx, or even going to your nail salon to get them to paint your nails a boring pink).

(Product was provided for review. Review is my complete and honest opinion. I am not affiliated with or compensated by the company.)

Tuesday, December 21, 2010

Stargazer 232: Mirror-like Nails with Nailene Stickers!

Stargazer is an European brand of cosmetics, and they have a pretty awesome range of metallic nail polishes. The one that is most popular is 232, which is a silver metallic polish like China Glaze Millenium, but they also have the metallic polish in other colours, like gold and pink. They are all awesome colours, but I have an enduring love for Stargazer 232, just because it's silver.

I combined the Stargazer nail polish with some Nailene nail stickers, to disguise the fact that my nails aren't looking very good today. Today's NOTD is inspired by Lady Gaga's "Lovegame" song. In partiular, it's inspired by the lyrics of the chorus:

Let's play a love game, play a love game...Do you want love?...

Stargazer 232 Nailene Nail Stickers

...Or do you want fame? Are you in the game?

stargazer chrome 232 nailene nail stickers


See, see? Is that awesome or what? I guess you know someone's officially become a pop culture phenomenon when they influence your nails!

I absolutely love this colour - it's not Minx, but it's the closet nail polish equivalent of getting a mirror-like finish to your nails. When I was wearing Stargazer 232, I couldn't stop looking at my nails - it was like someone had plated them with metal!

Unfortunately, weartime wasn't as good as your average polish, and it chipped and peeled pretty fast. I suspect that this has to do with the smooth, metallic finish of the polish, and I have noticed that other polishes with such a finish also suffer from a similar lack of staying power.

If you want a mirror-like polish, this is definitely one to check out. You'll just have to be prepared for the chipiness of this if you do end up wearing it. If you can't stand polish that chips or peels easily, you're probably better off giving this a pass.

Friday, September 24, 2010

Wet n' Wild Blue Moon and Nailene Nail Art: Cheap and Awesome

Reading through my older blog entries, I realized I really love to use the term "like stars in a night sky" to describe makeup or nail polish - like you know, when describing a black eyeshadow with silver glitter, or a nail polish that's a blue jelly with glitter...I don't know why, but I guess it's just one of my pet phrases!

So in light of that, don't be surprised if I say this NOTD was inspired by stars in a night sky, LOL! But hey, it's a base of blue shimmer, and some really pretty star nail stickers with small gemstones! The base is Wet n' Wild Blue Moon, while the awesome nail stickers are from Nailene,(which, by the way, have a pretty awesome selection of nail stickers for cheap, and they're readily available at drugstores. I also really like their nail glue, and I use it whenever I have to fix a broken nail.)

Wet n Wild Blue Moon Nailene Nail Stickers

Anyway, I had no trouble at all with the Nailene nail stickers. These were easy to remove from the backing, were sturdy enough not to tear when subject to twisting from my tweezers, and stayed on until I removed them. A lot of people have issues with nail stickers, because they are worried that the nail stickers will fall off, but as long as you topcoat over your nail stickers, they'll be A-Okay.

The Wet n' Wild polish, on the other hand, kind of disappointed me. I loved the application, and the colour - oh how I loved the colour! - because it was a kickass deep navy blue with a unique green shimmer. But as is typical for WnWs, the wear really got to me, and it chipped the very next day. I was absolutely heartbroken!

If anyone wants to suggest a dupe of Blue Moon that won't chip as easily, I'm all ears!

(Nailene stickers were provided to me for review. I am not affilated/compensated by the company. This review is my full and honest opinion.)

Sunday, September 19, 2010

Nail Art Fun: Essie Chinchilly and Viva la Nails!

I love nail stickers and nail gems, because they can really dress up a manicure, and they accommodate people of all sorts of inclinations. If you don't have much time, simply slapping on a sticker will do. On the other hand, if you want to do intricate little designs with nail gems, that's also perfectly possible!

For this NOTD, I wanted to make a girly, yet not all pink-and-swirly NOTD, so I dressed what was otherwise a boring grey NOTD. I used these nail stickers and nail gems from Viva la Nails. Aren't they absolutely adorable? I used a pack of nail stickers that had teeny tiny little rhinestones on some of the stickers, and a pack of black gemstones.

viva la nails

For the base I used Essie Chinchilly, which by the way is the most gorgeous grey creme I've seen. It's grey, but it doesn't have much blue in it, and in fact it does seem to have a tinge of green compared to other greys, so it's perhaps the most ideal grey I've seen for warm-toned people. I love this one because it's not too cool-toned. And application and pigmentation was excellent, to boot.

Then, using a pair of tweezers, I picked up the black gemstones one by one and stuck them along my smile line on the nail, parallel to the free edge. Or at least attempted to, since not all my lines were perfect. And then I stuck on some flower nail art stickers for interest.

This is the final result:

Essie Chinchilly and Viva La Nails

I don't know about you, but I'm absolutely in love with it! I loved how the Viva la Nails art stuff totally glammed up my grey mani. And I love how it's fun and feminine without being OTT, you know? It's a very happy medium as far as nail art is concerned.

I wore these for a good while before I finally decided to remove them, and I didn't have any problem with them falling off or peeling off my nails. I applied two coats of topcoat (one slow-dry and Seche Vite on top of it), so I think that really secured them.

essie chinchilly and viva la nails

I'm totally enjoying the Viva la Nails nail art stuff, I have a bunch of their stuff, and it's really good quality - no tacky stuff that falls apart here! I love that they have individual gemstones, stickers, and even some less conventional items like feathers! (I'm still trying to figure out what to do with a feather on my nails, but if I ever do, you can bet you'll be hearing about it!) They're UK-based, and shipping is cheap (2.95GBP and up) and fast when I placed my order, so if you want to get anything from them, I highly recommend it!

Sunday, August 8, 2010

NOTD: Happy National Day Singapore - Sorry I Ruined Your Present

Part of the reason why I don't do Youtube videos is because I don't think many people would understand my English accent easily. I'm not American, and thus widely understandable (thank you MTV and Hollywood), and I'm not British, and thus slightly less comprehensible but still forgivable on account of having a cute and adorable accent. (Yes, I've come across many a non-Brit who think the Brit accent is cute. Believe it! :P ) Instead, I'm from a tiny country in Asia, called Singapore. And though English is the default language I use (I study, think, work, curse, and converse with just about everyone I know in English), I seriously doubt anyone outside of Southeast Asia would be able to understand my accent with ease, despite my fluency in the language. And although three years of living in Chicago have given me the ability to quite passably imitate an American accent, well...I don't wanna, even if it's just on Youtube. I'd feel like I was selling out, somehow. I mean, after all, how you talk is a part of who you are, right?

Anyway, I'm telling you this because my NOTD (Nail of the Day) has something to do with my native Singapore! This is because it's a Singapore-themed mani! You see, 9th of August is Singapore's National Day - the Singaporean equivalent of America's 4th of July, so it's a meaningful date in Singapore's history. And, it's a public holiday, which makes it awesome! :P

So, to display my love for my country (and for public holidays, LOL), I thought I'd base my NOTD on the Singapore flag, step out of my comfort zone, and try some freehand nail painting for the first time.

This is what the Singapore flag looks like:


You'd think it would be easy, right? I mean, the Singaporean flag doesn't have 50 stars and 13 stripes, and it doesn't have a red-on-white-on-blue Union Jack. It consists of two colours, and a handful of geometric shapes. So, I thought, it should be easy! This would be the perfect way to try out freehand nail art for the first time!

Well, turns out I suck at freehand nail art. That, and also, one should not begin a mani at 12.30am in the morning. This is the proof:

Singapore National Day Mani

Yeah, well, I know it sucks. Sorry Singapore, but I tried my best. I mean, the moon looks like a 5-year-old drew it on for me, and those squidges of nail polish are supposed to be stars, and I blurred whatever design was there because I didn't wait long enough before putting on a topcoat (hey, I did say I started my mani at 12.30am!). Still, happy birthday, I guess. It's the thought that counts, right? Right? *Crickets chirp*

For the base I used Eyeko Saucy Polish. That polish is really pigmented and thick. It's opaque in 1 coat, and I think I should konad with it next time. For the really horribly drawn on crescent moon and pseudo-stars, I used LA Colors Art Deco white art polish, which I'm ambivalent about. While I have no problems itself with the polish formula, which is thick, viscous, and dries quickly, thus making it ideal for nail art, I don't really like the brush. The bristles are a bit too long and thus hard to control. And I'm saying that because I actually mean it, and not because I'm trying to make up excuses for my sorry NOTD. :P

Singapore National Day Mani

Well, what can I say, except maybe please don't laugh at me? I know it's bad. Oh well, at least I got the colours right.

Tuesday, May 11, 2010

Nail Bling: Nails Inc Dover Street Market and Nail Crystals NOTD

I like my bling and I cannot lie! You other fellas can't deny! OK, I'm going to stop channeling my inner Sir Mix-a-Lot right now. LOL. But you gotta love that song (and if you don't know it, go on youtube and search for Baby Got Back - it was like THE song of the 1990s at some point...Gee, I'm old). The bling in question is from today's NOTD, which is my first attempt at using little crystals on my nails.

I have to say, it does take a bit of practice. It isn't as hard as running regressions using Stata (haha!) but it requires a LOT of attention to detail and patience. I didn't use nail glue for these. I just used a pair of tweezers and popped the crystals onto my nail when they were still wet, then sealed them in with two coats of topcoat - I used a random slow-drying one under Seche Vite to prevent shrinking while still ensuring a fast dry time. For me, the really difficult part was positioning the crystals on your nail in the right spot, and nudging them to where you want them to be without messing up the still-wet polish on your nail.

The base is Nails Inc Dover Street Market, a much-vaunted medium-to-dark purple creme, and I can see why this is so popular among nail fanatics, and was all the rage like a year back. It's smooth, gorgeous, and applied well. The crystals were some random no-brand plastic ones my friend brought over from Asia because they're a lot cheaper in Asia than elsewhere for some reason - thanks Rachel! I just chose a simple pattern of three crystals down the nail, like coat buttons, because I didn't feel up to doing intricate flowers and hearts and shapes, since it was the first time I was trying them out. I really really want to try making shapes one day though.

Here's the NOTD pic. So, how'd I do? Fail, or yay?

Nails Inc Dover Street Market

As you can see from the picture, when I was moving the crystals around on my ring finger, I accidentally got some purple polish onto the crystal, which is why it doesn't look white like it should.

While I'm not really a nail art fanatic (the really intricate nail art is too impractical for my lifestyle, which involves lots of typing and cleaning my own toilet LOL!), I'm really liking these. In fact, I LOVE them, and for the past two days I've been shoving my nails in the face of all my friends. So far, I'm on my third day of wear, and the crystals are still holding up fine, even though I haven't refreshed my manicure by putting on an extra layer of top coat. I think the key is to seal them in with two layers of topcoat - one didn't seem quite enough to me.

I know this bling isn't quite everyone's cup of tea, but I'm really loving this one! Have you ever tried using nail crystals? Did you like how they turned out?