Showing posts with label Konad. Show all posts

Tuesday, February 8, 2011

Girly Punk Valentine's Day Nails: Neon Pink and Black Roses

Nothing says girly punk like hot pink and black. And nothing says romance like roses. So when I decided to do Valentine's Day manicure, I decided to combine these two aspects, although I'm not very girly, punky, or romantic. I keep seeing all these sterotypical reds, pale pinks, and sheers coming out near Valentine's Day, and I keep thinking - why shouldn't I do something different?

So here you are: neon pink, black, and roses. The horror!

Girly punk Valentine's Day nails

To be honest, I didn't quite like my nails when I first wore them. I thought they were ugly (and I'm sure some of my readers will think they ARE ugly), but for some reason they grew on me, and I can't quite figure out why either. Maybe I got used to the ugliness. Or maybe the hot pink colour matched my funky Valentine's Day eye look. LOL. But it did grow on me, and yes, I was walking around with blinding hot pink nails with OTT rose designs. Yeeha!

funky valentine day nails 2


For the neon pink base, I used Eyeko Punk Polish for Neon Nails, which is a one-coater if you're careful. Like other Eyeko polishes I've used before, the consistency is a little on the thick side, so if you prefer a thinner polish consistency, one or two drops of thinner would be more than sufficient. Oh, and this polish is NEON. Like eyeball searing, highlighter pink kind of neon. I know it doesn't look like it in the photos, but that's because I just couldn't capture the blinding neon-ness of it on camera.

For the black roses, I used my favourite konading black of all time, Wet n Wild Black. It's dirt cheap (if you don't count the cost of shipping it outside of the USA), easily available, and opaque in one coat. Perfect for konading!

The konad plate used was M65. I figured I could get away with such an OTT rose design only around Valentine's Day!

funky valentine day nails 3


So this isn't your traditional Valentine's Day sweetheart manicure. But I have those too! If this is making you puke, feel free to try some other sweetheart, Valentine-appropriate posts: there's one with girly chic, a feminine pastel purple that's holo to boot, a nude with a touch of flowers, and the near classic jewel pinky-purple holo. Probably more traditionally Valentine Day-ish than this sad excuse to wear hot pink, LOL!

I'm not much of a romantic, and I really couldn't care less for Valentine's Day. But I figured, since it was the occasion for it, why not go all out in dressing up my nails? It's the perfect reason to get away with whatever I want!

(Eyeko product sent for review. Review is my complete and honest opinion. I am not affiliated with/compensated by the company.)

Wednesday, January 12, 2011

China Glaze For Audrey + Konad Fishnet = Awesome Nails!

It rarely happens, but I actually managed to wear un-boring nails to work for one entire week! It was during the Christmas season, so I didn't have any client meetings, and both my bosses were on leave for the holidays. So a thought popped into my head - since I wasn't going to be doing much work that required me to look professional, why shouldn't I jazz up my nails? Thus, I promptly combined China Glaze For Audrey with the awesome fishnet/lace print on my nails.

China Glaze has a few colours that are famous, and For Audrey is one of them. It's purportedly named after Audrey Hepburn for her role in Breakfast at Tiffany's, and the colour was apparently created to be the same shade of blue-green as a Tiffany's box. Now is that cool or what? I know most people who are more colour-shy won't see turquoise as a colour is classic, or for that matter, classy. But if you think about it, what can be more classy than a Tiffany's box? And if a Tiffany's box is classy, why shouldn't we wear that gorgeous colour on our nails?

So behold, my awesome manicure the colour of a Tiffany's box! It's absolutely gorgeous, and in some lights it looks more blue, but in others it looks more green. I can't quite decide whether it's more of a blue or a green.

China Glaze For Audrey Konad

Oh, right, I have to admit, that mani was made slightly awesome by the fact that I smudged the konad design on my ring finger after having painstakingly stamped it on. But it doesn't make it any less stunning, doesn't it? Right? *Awkward silence*

Alright, yes, I was a klutz with the konad. I used my all-time favourite (and oh-so-cheap) black nail polish for the fishnet/lace print, Wet n' Wild Black. And the design came from one of my favorite konad plates of all time, M57. Back then when konading was a new thing, the M57 plate was so hard to get hold of, because every nail polish fanatic wanted one, and it was perpetually out of stock.

chg for audrey konad


After applying China Glaze For Audrey, I can definitely see why it's a classic. This colour was trouble-free in it's application - in fact, it virtually applied itself. It was fully opaque in two coats, although I suspect if you do thicker coats, you could get away with one. And it didn't streak at all. I enjoyed painting on this colour. Wet n' Wild Black, which was used for this konad to imprint the lace/fishnet pattern, is one of the fan favourites of nail polish addicts for konading. It's cheap, it's black, and it works well with the konad stamp and plate set. What's not to like?

Lasting power was about average - it lasted about 4 days on me before the first chip appeared, which was pretty usual. I don't have any complaints about the lasting power of China Glaze polishes in general. Some brands have trouble staying on my nails (ahem, Zoya and Barielle, I'm looking at you!), but China Glaze isn't one of them.

ChG for audrey konad


I don't know about you, but I was in love with my nails for the time I wore it. Everyone I met commented on my nails, from fellow colleagues to sales staff I would encounter on the way hhome from work. It actually pained me to remove the colour when the holiday season was over and work started picking up again at the office. Of course I had to take it off and replace it with a more sensible, work-appropriate colour. But at least I got to have funky nails for awhile!

Tuesday, December 14, 2010

Christmas Plaid Konadicure


More Holiday themed manicures!  I love this color, I used Emerald city from Sally Hansen as a base.  I'd been looking for something like this for a while.  I really like Sally Hansen Xtreme Wear, I like their long brushes and their highly pigmented, easy to apply formulas.  This nail polish was no exception, almost opaque in 1 coat, perfect in 2 coats.
Read more »

Thursday, December 9, 2010

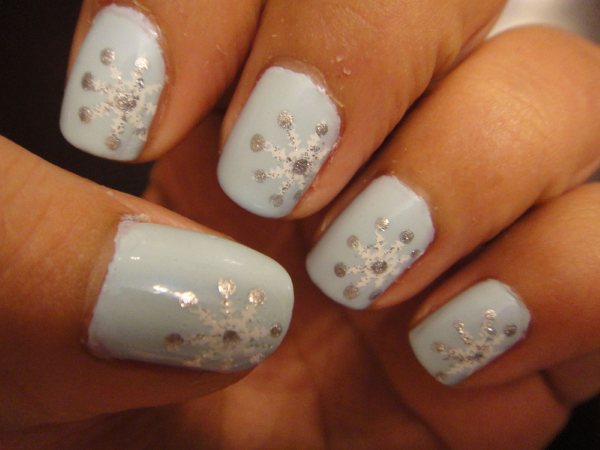
Snow in the Sky


So I was online the other day, looking for a Chanel Riva dupe, and I came across several blog posts that name Hard Candy "Sky" as the ultimate winner.  It is indeed a winner, but a dupe? I don't think so.  Hard Candy was big in the nineties, specially if you were a Clueless wannabe.  And they first hit it big because of a little jewel named Sky.  Alicia Silverstone made it famous, and Hard Candy was an instant hit.  More than a decade later, Hard Candy is now available at your local Wal-Mart, and they just re-released the one that started it all.  So for it to be considered a dupe, seems unfair to me.  Yes, they are very similar (from what I see in pictures, I don't own Riva), but Sky came FIRST!

The color is beautiful and you won't be disappointed with the final result, your nails will turn heads.  But the application is a whole other thing…. Very streaky, very sheer, needs 3 coats, kind of a bitch to apply.  I wore it alone for a day, I just wanted to admire this shade on my nails.


Today I stamped a snowflake over them with Konad White Special Polish, and added a few details with silver dots and glitter (Finger Paints Easel come, easel go and Kiss Nail Art in Silver Glitter).  I used plate bm14. 

Something else that happened and made my manicure more difficult is that my top coat is half way through so it got thicker and since the bottle is half empty, it's kind of hard to get the brush completely dipped in the polish and that was very annoying.

In the end, I liked the final result. It is cute, subtle, yet Christmasy, and I need to thank my sister because it was totally her idea and I stole it due to lack of inspiration and plane ol' laziness.

Wednesday, December 1, 2010

LiLo's "F- you" Court Manicure!!


Boy, was I excited to recreate this one! Lindsay Lohan may be lots of things, but somehow I always like what she's wearing, or how she looks. For her court date back in July, she opted for a super girly and cute, airbrushed pastel manicure with a very naughty hidden message: "fuck u" written right in the middle fingernail. How passive-agressive! Here's how I did it:

Start with clean, short nails, buff them and use a base coat (I always use OPI).

Then, apply the nail polish with a sponge. I used an old eyeshadow applicator, because i'm on a budget here! But you can get a fancy one from Konad (I want it!), or one of those foamy makeup applicators.

What I used
After sponging. We'll clean up later!


Drip 2 or 3 drops of nail polish on a flat surface (I did it on an old plastic tray somebody gave me and I never ever use), Dip your sponge in it and apply to your nail in a taping motion, just little dabs here and there. You have to leave room for at least 3 colors. Repeat this step with every polish for a multicolored effect. It's ok if you don't completely cover your nail. I think Lindsay's show a bit of natural nail down the middle.

Next, we are going to stamp our nails with the leopard print on Konad's image plate m57. I didn't want the print to be that blunt, so I used a regular nail polish instead of the Special one for a soft, almost ethereal look. You can also use a nail art pen or an art brush and do this step freehand.

Finally, you can write an offensive message of your own, or copy Lohan's infamous words.  Use a nail art pen, or a Sharpie for this step.  I skipped it, I thought it wasn't office appropiate, LOL.  Seal your design with 1 or 2 coats of your favorite top coat.

Lindsay Lohan


My version. Please excuse my crooked fingers!
I think my design looks a lot like Lindsay's, and I really like it on her, but I just don't know how to feel about it.  I'm not sure the color combination looks good with my skin tone, but still got some compliments :)

I used Sally Hansen Xtreme Wear in Blue Me Away, Bubblegum Pink and Sun Kissed (toned done with a few drops of white).  For the white leopard print I used NYC French White Tip.

Saturday, November 27, 2010

A sea of purple


This look was a little bit more complicated than what I usualy do but I will explain it step by step.
I used Sally Hansen's Deep Purple from their Xtreme Wear collection as a base.  Like most of their polishes, it was very easy to apply, smooth, and opaque in 2 coats.
We are going to apply a tape diagonally to each finger and then use our base color to paint the nail.


Then, we are going to stamp our nail with a swirly design from image plate bm19 and a Silver Foil Nail Polish (Finger Paints Easel come, easel go).  Remove the tape carefully and slowly to protect your design.
Apply silver glitter to the line that divides your design and your naked nail with a fine brush.  I used Kiss Nail Art Paint in Silver Glitter.  If you are shaky like me, you need to do this slowly so you can get a straight line.  Finish it with a nice and glossy top coat, like Seche Vite.

After removing the tape
Apply a thin line of silver glitter and voila! 


Nail Polishes that I used from start to finish!

Wednesday, November 24, 2010

The White Stripes


This was the easiest manicure ever.  I really wanted to take off that fall manicure attempt that I had in my nails but didn't have much time, so I went for the easiest way out.  I stamped the striped design on bm20 on my naked nails with White Konad Special Polish and topped it with 2 coats of good ol' Seche Vite. I was done in no time, and got a lot of compliments!  The only thing that gave me a hard time, was  trying to get the thumbs right, because Bundle Monster plates are TINY so if you have long nails, or fat thumbs like me, you'll have to get a little creative.  I stamped twice, tried to make it as unnoticeable as possible and I think it looks alright. My husband said it reminded him of candy canes and that I should try it over red for Christmas… Well, maybe I will.  Meanwhile I hope you like my lazy, fast and uncreative manicure as much as me. 

Fall


Sorry for the delay between posts, there's been TOO MUCH stuff going on in my life, but I am pretty sure you're not reading this blog to hear that, but to see some manicures… On with the nails!
I wanted to do a Fall or Thanksgiving inspired manicure but wasn't feeling so creative.  Also, I had just received some faux Konad image plates (Bundle Monster, 21 plates for 17 bucks) and I wanted to try them out.  
As a base, I used Sally Hansen Laquer Shine in Glossy. A-ma-zing shade!  I've had this for a long time but I forgot about it, and trust me, Im glad I found it! It has the most perfect goldish burgundy shimmer to it. Once the light hits this baby, it just comes alive. 
On top of it, I randomly stamped some leaves with Orly Luxe and White Konad Special Polish.
This is the final result.  I didn't really like it that much, I think it came out a bit matronly. 
I hope you guys have a great Thanksgiving!

The final result
Sally Hansen Glossy.  Can you see the shimmer?


Saturday, November 13, 2010

Metallic Zebra


I really liked how this one turned out because it was exactly what I had in mind.  You can use any color combo you wish. I've done it in the past with neons (hot pink, orange and yellow) but this time I wanted to use metallic, foil-finish nail polishes (silver, gold and bronze).  It may seem like it's a lot of work or like it's hard to do, but not at all! 
You are going to grab your silver nail polish (I used Finger Paints in Easel come, easel go) and paint about 1/3 of your nail. Then, the gold (Orly Foil FX in Luxe) and paint the next third of your nail, and finally the bronze (Cover Girl Boundless Color in Bronze Beauty) and paint the last third of your nail.  It doesn't matter if the line between the colors is not straight.  I actually like the way it looks when its a little bit uneven, or overlaps at some points.


Wait for your nails to dry, then use the zebra print in Konad's image plate m57, with Konad Special Nail Polish in Black, and stamp your nails.  You can also do the zebra stripes by hand if you don't have a Konad, You can use a nail art black polish, a nail art pen, or any black polish with a fine brush.  
I hope you like it! Thanks for looking.


Sunday, November 7, 2010

Leopard Manicure


I used my Konad m57 plate for this manicure.  The thing with Konad is that you don't need to get to creative to have a cool looking manicure so, usually I just use a base color, stamp, and that's it.  For this mani I switched it up a little bit.
First, I used 2 coats of Sally Hansen Lavender Cloud as a base.  It looks really bright here, but the picture is really not doing it justice.  Lavender Cloud is the lightest lavender possible, so it does not look completely white, it has a purplish or pinkish tone, which is very beautiful.


Then, I stamped my nail with the Leopard Print from Konad's m57 plate. I grabbed my dotter tool, and filled out the leopard's spots with China Glaze's For Audry, one of my favorite nail polishes EVER, It's the closest possible color to a "Tiffany blue".
And finally, I used Sally Hansen's Disco Ball  as a top coat. This is a clear polish with rainbow iridescent glitter, that I usually think it looks childish, but I'm really digging it today.  Now, I'm going to remind you guys again: when using Konads, it is SUPER important that you apply your top coat in as little brush strokes as possible, 2 or 3 tops, because you may drag your design and ruin your manicure.  I got carried away with my beautiful glittery top coat, and I dragged my nail polish a little bit here and there, but since it's a Sunday and I'm feeling way too relaxed I didn't make a big fuzz about it.  I'll probably have a fresh mani in a couple of days anyway!  
I really like how this one came out, I love the color combination and the iridescent glitter gives it a nice little kick.  

Blurry shot, so you can see the colors of the glitter top coat (Disco Ball)


Monday, October 25, 2010

Electric Zebra!

This look was inspired by my friend Rosy McMichael's latest youtube video, who had to create an "Electric Zoo" makeup look for a contest.  She has other great tutorials in her channel, you need to check it out.  You can see her videos HERE.
Now, I used my toes because my hands are still busy with the Incoco experiment thing, but PLEASE focus on the nails and not my actual feet (I don't really like the way my bones stick out from the sides and I'm not even going to address my scars...let's just say I'm a bit clumsy)
Anyways, I used Sinful Color's Neon Melon as a base.  The best way to describe this color is "highlighter yellow". It even applies like a highlighter! You are going to need 3 or 4 coats because it's very thin, but it dries fast, so it's not such a hassle.  Also, the color is very vibrant, so it is wort it.  Like most neons, it has a semi-matte finish, but if you don't like it you can use a topcoat over it and that should solve your problem. This is how the nail polish looks after 4 coats, very streaky!


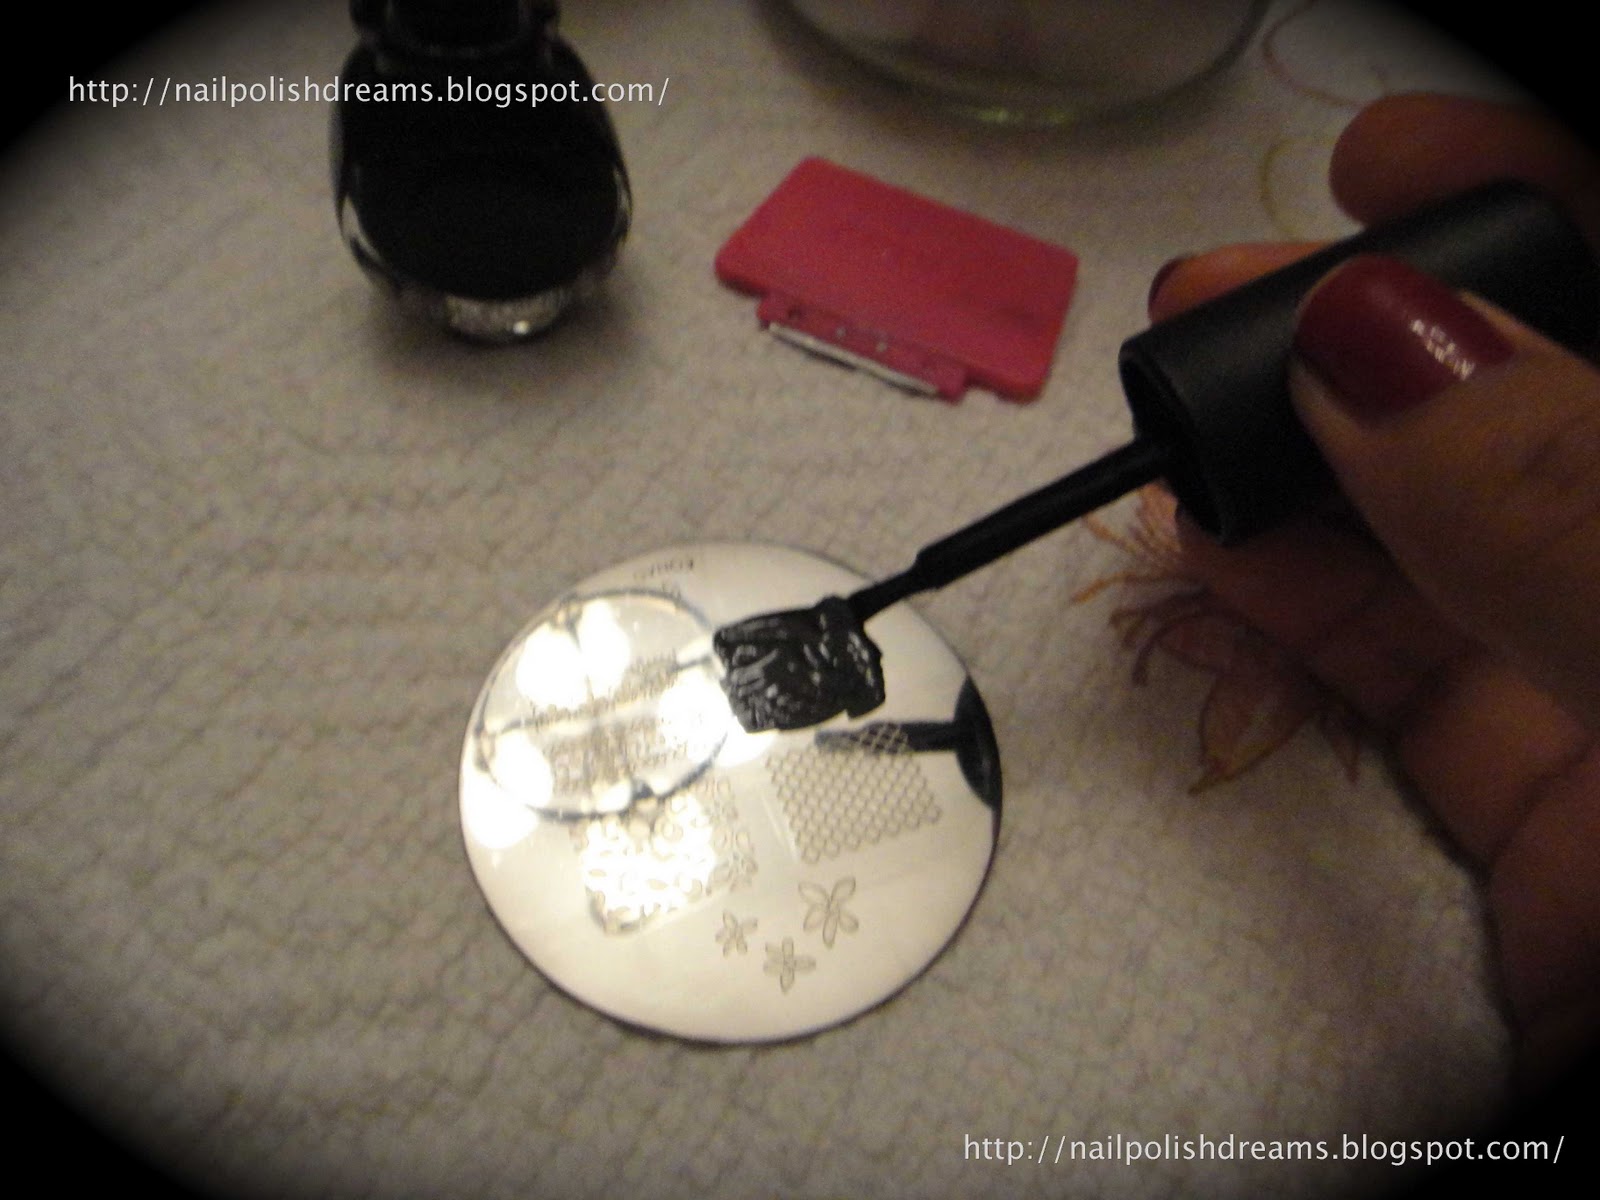
Now, the good part: adding the zebra design!  This time, i'm going to use my Konad.  For those of you who don't know, Konad is a nail stamping system that is very popular and inexpensive. You can get it on ebay.  Konad also sells "special nail polish" to use with the stamping thingy and I must confess that I didn't believe this polish was really special at first, but then, when I actually started using it I realized that it makes it so much easier! If you're gonna go and buy the Konad, I highly recommend that you buy the special nail polish as well.  You can also use your own nail polish but not all of them work with it.  You need to experiment with them.


So this is how Konad works: You get an metal disc (image plate) of your choice, that contains about 5 different nail designs; once you choose your design, you brush a little nail polish in it, then you scrape the excess off.  Then, with a special stamp, you pick up the design and stamp it in your nail.  Sounds easy? That's because it is.  You just need a little bit of practice to learn how to do this fast, because you need to act before the nail polish dries.


After stamping in your nail, this is how it looks, VERY messy! Don't worry, we'll clean that later, when all the nails are done and everything is dry.  See how messy mine look?


Now, this is the final result.  Very simple, but I think the base color is already making a statement, and truth be told, I'm a bit lazy today :)


I used an OPI base coat , Sinful Colors Neon Melon as a base, Konad Special Nail Polish in Black for the zebra design, and Seche Vite as a top coat.  When using Konad you absolutely canNOT skip this part.  You need a good top coat that doesn't drag the nail polish, and you need to apply it with as few brush strokes as possible to protect the design.  Seche Vite always does the trick for me, I adore it!

That is all for today, I'll try to post very often, and if there's anything that you guys wanna see let me know! I can always use a little inspiration...