Showing posts with label Cremes. Show all posts

Tuesday, June 21, 2011

Polka Dot Mani Fail with Essie Foot Loose

Edited to add: Get 10% off your Born Pretty Store purchase with coupon code MH10K31 - expires Oct 31, so you can purchase happily til then! (Note: I don't profit in anyway from the code. I'm just sharing it with interested readers.)

After seeing all those awesome cool manicures featuring dotting tools, I decided that despite my lack of hand-eye coordination and general clumsiness, I just HAD to try one out. That, and I wanted to bring on a summer colour on my nails. That's how I ended up with this monster of a manicure. I have to admit, while there wasn't anything wrong with the tools I used, my dotting skillz are teh suckz. Seriously.


I got my dotting tools from Born Pretty Store, which has been popular lately among bloggers and nail polish lovers for its ready availability of cheap and cheery nail art suppliers, including crackle polish, stickers, rhinestones, etc. The dotting tools I got were just under US$5 for a set, and are available here.

These dotting tools are of good quality, and quite handy to use. You get a set of 5 dual-ended dotting tools. All five have two ends.

dotting tool bornprettystore 1


One end is all the same size, a standard size that would be handy for most designs:

dotting tool bornprettystore 2


The other end of the tools is more interesting for girls who really want to dot in all sizes. The ends of the tools range from really big to positively tiny, and would definitely satisfiy any dotter's needs.

dotting tool bornprettystore 3


For the dot manicure below, I used Essie Foot Loose because it was such a lovely summer colour - girly, bright, and still a little spunky. And since it's in the colour family of pinks (in this case bright purply-pink), it's wearable to the office! And unlike other Essies which tend to be sheer and streaky, this is a one-to-two coater, depending on thickness of application.

essie foot loose wnw white 2


For the dots, I used the dotting tools and Wet n Wild White. One of the best white konading polishes ever, now used for dotting. FOr the variously sized dots on my nails, I used the large end of the green dotting tool, and the large end of the pink dotting tool. I also, for smaller dots, used the white dotting tool.

I know the dots don't looks as nice as they could be, but that's realy due more to my lousy application than anything else. After all, all dotting tools are the same right? But looking at these photos makes me feel like from far, they aren't THAT bad, right, right? *Crickets chirp*

essie foot loose wnw white 3


Anyway, I love the colour of my mani, even if my dotting skills suck. It kind of reminds me of summer - bright, and polka dotted, and just generally cheery!

(Dotting tools were sent for review. Review is my complete and honest opinion. I am not affiliated with/compensated by the company.)

Monday, May 23, 2011

Nails Inc Paddington + Nail Art Pearl Rhinestone = Classy But Fun NOTD

I don't always get to do nail art, so whenever I bling up my nails, I get all excited! So please humour me while I start off this post with a photo of my awesome blinged up nails.

Nails Inc Paddington Nail Art Pearls

The nail polish in question is Nails Inc Paddington, a gorgeous glossy deep red I bought in my craze to own as many Nails Inc colours as I possibly could before leaving the UK. It's distinct from Nails Inc's other famous colour, Victoria, in that Victoria is a jelly (sort of), while Paddington is a creme, and Victoria has a tinge more purple to it, whereas Paddington is more maroon.

Anyway, I first applied Paddington, which applies like a dream, as with most of my Nails Inc polishes. I loved how absolutely classic it looked. So I decided that if I wanted to bling it up, I would have to use something equally classy - and lo and behold, I took out this little baby.

nail art pearl 1


This humble-looking set of nail art pearls is available from Born Pretty Store, which has been quite popular among nail bloggers lately for their vast array of nail art products. The store simply has everything, from shatter polish to nail art tools, and of course, nail art decorations like this set of pearls. This set of pearls is the 3 sizes nail baby pearl rhinestone decoration wheel, available for a very reasonable price.

The pearls come in three sizes, so you can pick and choose to form various designs, or to suit very large or small fingers. I've taken the liberty of photographing a pearl of each size against a ruler, so you can guesstimate how large these are. The smallest pearl is really quite tiny, while the largest pearl is pretty big.

nail art pearl 2


For this look, I used just the medium-sized pearl. For round items like nail art pearls or rhinestones, I find it best to pick and place them on the nail by using a damp toothpick, a tip I learned from some other nail bloggers. Basically, you dampen the end of a toothpick, and touch the surface of a pearl or rhinestone. The pearl or rhinestone will then "stick" to the toothpick due to the surface tension of the water, thus allowing you to move the pearl and hover it over the nail until you are fully satisfied with its position. Then, you can lower the pearl or rhinestone on to the surface of the nail, and the wet nail polish will have a stronger surface tension than the water on the toothpick, so the rhinestone will stick to the nail even after you lift your toothpick. Nifty, right? Sometimes I also use a pair of tweezers, when I can't find a toothpick lying around.

nails inc paddington nail art pearl 2


Another tip I've found handy when working with nail art is that topcoat is needed over the pearls and rhinestones, otherwise they will fall off within a couple of days. I typically use two coat of topcoat over the nail art. I first use a slow-drying topcoat, and then apply a second coat of fast-drying topcoat, like Seche Vite, over it. That way, the pearls and rhinestones stay firmly in place for as long as possible, without me having to wait for hours for my manicure to dry. With this method of slow topcoat and fast-dry topcoat, my manicure is typically ready to go after half an hour. Meanwhile, in the interim half-hour, I can use my hands, but carefully.

nails inc paddington nail art pearl 3


Lasting power of the manicure was very good. If you've been a longtime reader of my blog, you'll know I'm an absolute hoor for all Nails Inc polishes, since they work very well on me. Nails Inc's Paddington applied smoothly, and stayed on for 3-4 days before chipping, which is about usual for me. I only wish that Nails Inc was cheaper, and available outside the UK! In my humble opinion, the Nails Inc formula is the best there is in nail polish - outstripping even - dare I say it - RBL. I personally find the consistency smoother in Nails Inc polishes, and the application less streaky. Okay, now I'd better run before the RBL fans stone me.

nails inc paddington nail art 4


I don't know about you, but I am absolutely loving my nail art, although it was a little more time-consuming than your average manicure. I love the combination of deep red together with white pearls, and I love how it looks classy with the deep red colour, but still a little fun with the pearls! I'm not going to lie - I simply couldn't stop looking at my nails when I had this manicure on.

(Nail art product was sent for review. Review is my complete and honest opinion. I am not affiliated with/compensated by the company.)

Tuesday, February 8, 2011

Girly Punk Valentine's Day Nails: Neon Pink and Black Roses

Nothing says girly punk like hot pink and black. And nothing says romance like roses. So when I decided to do Valentine's Day manicure, I decided to combine these two aspects, although I'm not very girly, punky, or romantic. I keep seeing all these sterotypical reds, pale pinks, and sheers coming out near Valentine's Day, and I keep thinking - why shouldn't I do something different?

So here you are: neon pink, black, and roses. The horror!

Girly punk Valentine's Day nails

To be honest, I didn't quite like my nails when I first wore them. I thought they were ugly (and I'm sure some of my readers will think they ARE ugly), but for some reason they grew on me, and I can't quite figure out why either. Maybe I got used to the ugliness. Or maybe the hot pink colour matched my funky Valentine's Day eye look. LOL. But it did grow on me, and yes, I was walking around with blinding hot pink nails with OTT rose designs. Yeeha!

funky valentine day nails 2


For the neon pink base, I used Eyeko Punk Polish for Neon Nails, which is a one-coater if you're careful. Like other Eyeko polishes I've used before, the consistency is a little on the thick side, so if you prefer a thinner polish consistency, one or two drops of thinner would be more than sufficient. Oh, and this polish is NEON. Like eyeball searing, highlighter pink kind of neon. I know it doesn't look like it in the photos, but that's because I just couldn't capture the blinding neon-ness of it on camera.

For the black roses, I used my favourite konading black of all time, Wet n Wild Black. It's dirt cheap (if you don't count the cost of shipping it outside of the USA), easily available, and opaque in one coat. Perfect for konading!

The konad plate used was M65. I figured I could get away with such an OTT rose design only around Valentine's Day!

funky valentine day nails 3


So this isn't your traditional Valentine's Day sweetheart manicure. But I have those too! If this is making you puke, feel free to try some other sweetheart, Valentine-appropriate posts: there's one with girly chic, a feminine pastel purple that's holo to boot, a nude with a touch of flowers, and the near classic jewel pinky-purple holo. Probably more traditionally Valentine Day-ish than this sad excuse to wear hot pink, LOL!

I'm not much of a romantic, and I really couldn't care less for Valentine's Day. But I figured, since it was the occasion for it, why not go all out in dressing up my nails? It's the perfect reason to get away with whatever I want!

(Eyeko product sent for review. Review is my complete and honest opinion. I am not affiliated with/compensated by the company.)

Wednesday, February 2, 2011

Chinese New Year Nails: Year of the Rabbit KOTD!

I know I just posted a Chinese New Year NOTD just awhile back, but hey, since Chinese New Year comes only once a year, why not do another one? This time, I have cute little rabbits on my mani, you know, because it's the year of the rabbit!

Year of the Rabbit

The absolutely adorable kawaii rabbit imprint is, of course, thanks to the wonders of Konad! I'm using plate S10, and it's full of kawaii animals. There's a rabbit, a cow, a cat, a bear, a dog, and so on. Very cute, if you ever want to do a zoo-inspired mani.

face shop rd302 chg  hi tek


The polishes were different this time, because after the glitter of the last CNY (Chinese New Year) NOTD, I decided I wanted this one to be a creme. So the base was a colour from the Face Shop's Nail Talk range, RD302. The first coat produces a pinky-red colour not unlike Benefit's Benetint, but in nail polish form. The second coat produces the primary straight-up red you see in the photos. It also comes in a very kawaii bottle, although the bottle is quite tiny.

The konad colour was China Glaze Hi-Tek, a gorgeous orangey-gold chrome that is absolutely beautiful for konading. I love the China Glaze Khromes, and if you're a konader, you need the entire Khrome collection, since they all konad very nicely.

year of the rabbit nails 2


As you can see from the photo, my konading skills are obviously quite lousy - there's a konad fail on some of the fingers. Oops. But still, my mistakes don't detract from how cute the rabbits are!

And just so you can really see all those rabbits on my nails up close, including my mistakes:

year of the rabbit nails 3


Since the year of the rabbit comes once every 12 years, I may as well get a kawaii rabbit on my nails while I still can, right? Happy Chinese Year, everyone! :D

Saturday, December 4, 2010

Christmas Green and Gold Glitter Gradient Nails with Etude House Lucidarling

Christmas is coming, and it's showing on the nails! Today's nails are Christmas-inspired in the seasonal holiday colours of green and gold, and to add to the festive spirit, there's glitter involved. I attempted to do a gradient manicure with the gold glitter, but it was a big fail.

The green nail polish is Nails Inc Fitzhardinge Street, a deep, dark forest green that's so dark as to be almost black. And the glitter was Etude House's Lucidarling Fantastic Nails in 04 Sequin Crystal Gold.

Here's a shot of my gradient fail Christmas mani:

Christmas Nails

I love Nails Inc Fitzhardinge Street - it's almost black, and looks black in most lights, especially with 2 coats. What you see on my nails is one coat, so it still looks green. But any thicker and it will look black on the nails.

I also really like the Etude House colour, 04 Sequin Crystal Gold. For those unfamiliar with Asian brands (and how is that possible, I wonder :P ), Etude House is a Korean drugstore brand that can be found in Asia, and they have cute and girly packaging. The colour, 04 Sequin Crystal Gold, is part of their Lucidarling range, and it contains two sizes of glitter - a small gold glitter, as well as larger circular holographic glitter. And they do have really cute packaging! Take a look at the awfully girly bottle:

etude house lucidarling sequins crystal gold


So now that I've shown you the kawaii-ness of the bottle, let's get back to my nails. I attempted to do the gradient by painting my tips, and then extending the glitter area a little outside the tips. I don't think I did well, but I guess it was my first time:

nails inc fitzharding xmas nails


I know it's not as awesomely blingy or nail art-y as it could have been, but this was the easiest way to sneak in some Christmas spirit without my boss at work noticing!

Sunday, October 17, 2010

NOTD: Nubar Twilight Kiss and Revlon Grapefruit Glimmer

Nubar Twilight Kiss is one of those "in-between-the-season" colours - it's not too dark or dusky for summer, and it's not too light for cooler weather. And when overlayed with a sheer shimmer, I think it looks pretty good. So that's today's NOTD is! The layering polish is a really old (and probably discontinued) Revlon goodie, the Grapefruit Glimmer from their ancient Glimmer Gloss range.


Nubar Twilight Kiss is a dusky light purple, and I think it's actually a pretty colour, and quite wearable to work. I kind of think it's one of those colours you can sneak into the office. Revlon Glimmer Gloss in Grapefruit Glimmer is definitely an office colour - it's a sheer pink with very fine, faint shimmer. Honestly, it's so sheer it probably won't look like much by itself. But I think Grapefruit Glimmer has a lot of potential over darker colours.

Here, I'm trying it out over a light colour, and I think it looks quite good. Just imagine the possibilities this one has with dark colours! In fact, I think that if you layer it over a dark grey-purple, you'd get a shimmer similar to Chanel Paradoxal. I mean, it does have that similar faint sort-of-pink shimmer, no? Not identical, but close enough, perhaps?

nubar twilight kiss revlon grapefruit glimmer


Application was pretty good for both - but then again I'm partial to Nubars and Revlons, they are some of my favourite brands. The brush size, shape, texture of the polish just works for me. Lasting power is average, these lasted for about 3-4 days before chipping, which is normal for me.

nubar twilight kiss revlon grapefruit glimmer


I like Twilight Kiss well enough, but I personally think Nubar has more exciting colours (like their awesome duochrome shades). Twilight Kiss by comparison is one of their more subdued shades, although it's still pretty. And Glimmer Gloss is a great work shade for someone looking for a slightly more interesting pink sheer. Not a bad combination altogether.

Sunday, September 19, 2010

Nail Art Fun: Essie Chinchilly and Viva la Nails!

I love nail stickers and nail gems, because they can really dress up a manicure, and they accommodate people of all sorts of inclinations. If you don't have much time, simply slapping on a sticker will do. On the other hand, if you want to do intricate little designs with nail gems, that's also perfectly possible!

For this NOTD, I wanted to make a girly, yet not all pink-and-swirly NOTD, so I dressed what was otherwise a boring grey NOTD. I used these nail stickers and nail gems from Viva la Nails. Aren't they absolutely adorable? I used a pack of nail stickers that had teeny tiny little rhinestones on some of the stickers, and a pack of black gemstones.

viva la nails

For the base I used Essie Chinchilly, which by the way is the most gorgeous grey creme I've seen. It's grey, but it doesn't have much blue in it, and in fact it does seem to have a tinge of green compared to other greys, so it's perhaps the most ideal grey I've seen for warm-toned people. I love this one because it's not too cool-toned. And application and pigmentation was excellent, to boot.

Then, using a pair of tweezers, I picked up the black gemstones one by one and stuck them along my smile line on the nail, parallel to the free edge. Or at least attempted to, since not all my lines were perfect. And then I stuck on some flower nail art stickers for interest.

This is the final result:

Essie Chinchilly and Viva La Nails

I don't know about you, but I'm absolutely in love with it! I loved how the Viva la Nails art stuff totally glammed up my grey mani. And I love how it's fun and feminine without being OTT, you know? It's a very happy medium as far as nail art is concerned.

I wore these for a good while before I finally decided to remove them, and I didn't have any problem with them falling off or peeling off my nails. I applied two coats of topcoat (one slow-dry and Seche Vite on top of it), so I think that really secured them.

essie chinchilly and viva la nails

I'm totally enjoying the Viva la Nails nail art stuff, I have a bunch of their stuff, and it's really good quality - no tacky stuff that falls apart here! I love that they have individual gemstones, stickers, and even some less conventional items like feathers! (I'm still trying to figure out what to do with a feather on my nails, but if I ever do, you can bet you'll be hearing about it!) They're UK-based, and shipping is cheap (2.95GBP and up) and fast when I placed my order, so if you want to get anything from them, I highly recommend it!

Tuesday, August 31, 2010

Eyeko Chi Chi Polish and Punk Polish Swatches!

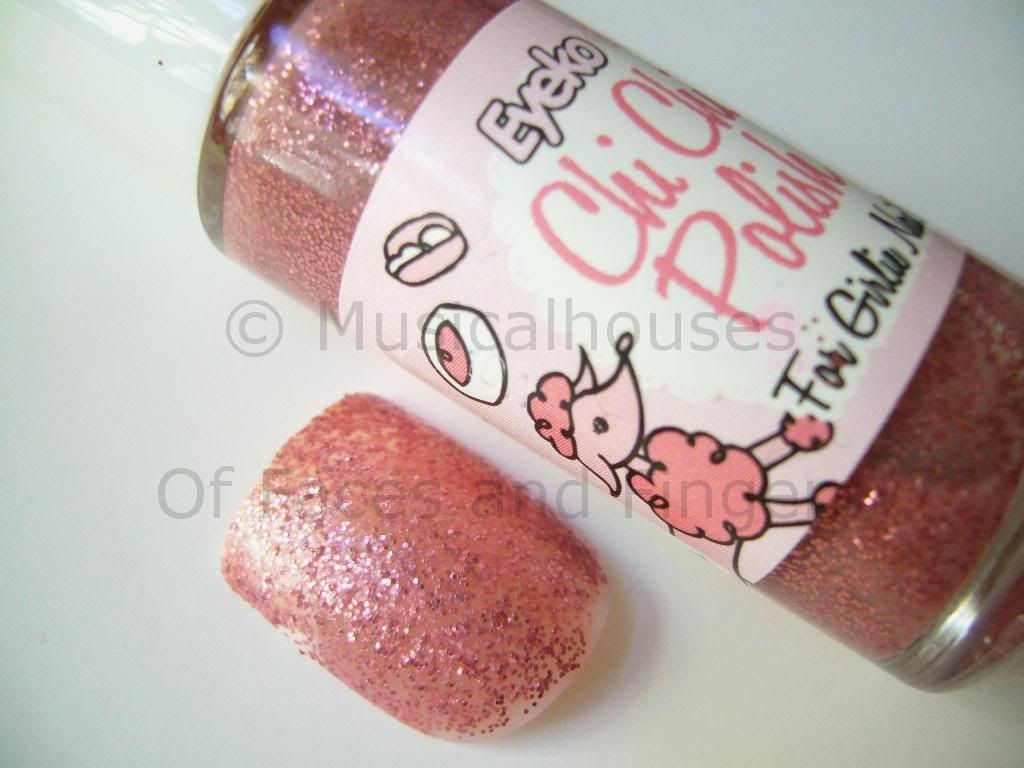
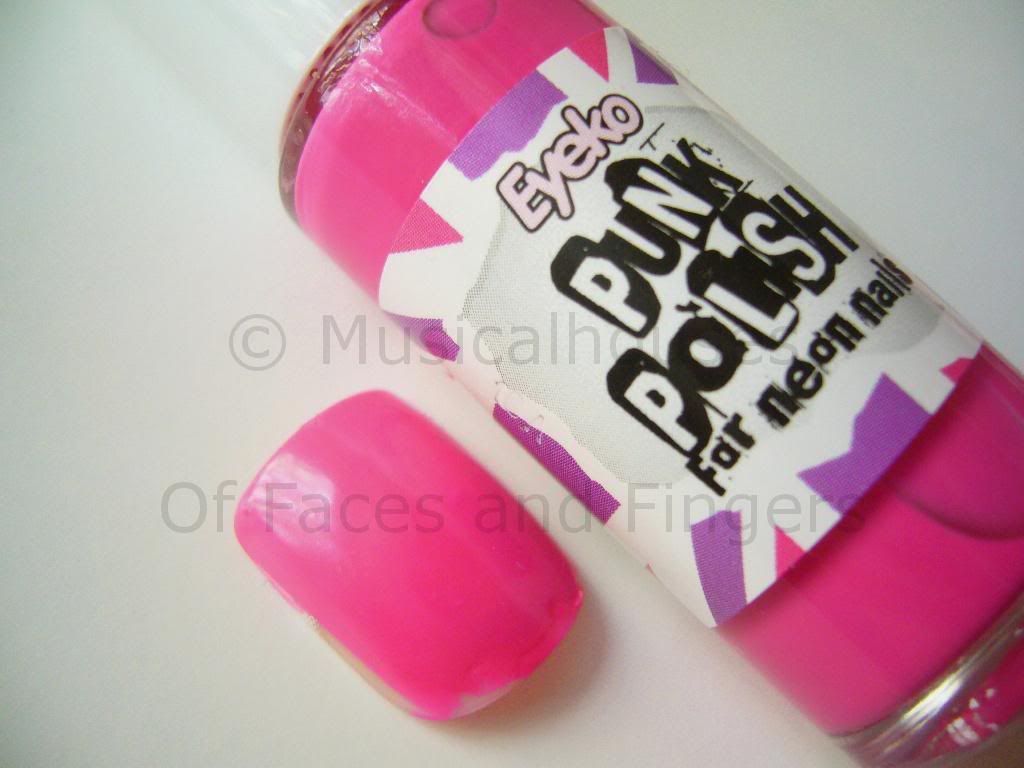
Eyeko has launched two new shades, Chi Chi Polish and Punk Polish. One's a glitter and one's a neon, but they're both pink! Punk Polish is a hot neon pink creme, while Chi Chi is a rose pink glitter in a clear base.

Eyeko Chi Chi Punk Polish

You know I'm a huge fan of swatching, but unfortunately, it so happens that I happen to already have done my nails, complete with nail stickers and bling, and it would have been difficult to remove all that to swatch two polishes. (What, you mean you haven't seen my nail bling yet? See my nail bling here. And follow me on Twitter so you don't miss my future exploits!:P ) So I swatched them on some false nails I had lying around instead. I hope you guys don't mind, I promise that real nail swatches will be up soon!

Here is Chi Chi Polish for Girly Nails:

Eyeko Chi Chi Polish

This is a not-too-dense glitter in clear base, and this was 3 coats. You'll probably need 3-4 coats for full opacity. This would probably work well for layering, because the glitter won't obscure the colour below it. As a standalone colour it's pretty, but you'll need to put more coats on. I personally love this colour, it's sweet and girly but it still packs a punch due to the glitter. It's not too boring.

Here's Punk Polish, for Neon Nails:

Eyeko Punk Polish

This is a hot pink neon shade. It's not retina-searing neon, but it's still a pretty bright hot pink nevertheless. This is a creme and it is nicely opaque in two coats. Otherwise, there's not much I can say - the pictures do all the talking, really :)

Application-wise, both of these were the usual Eyeko quality - that is to say, the texture is a bit thicker than some of the other polishes out there, but they apply quite well. And they're pretty good value for the price, too, so these are worth checking out if you like any of the colours.

(This product was sent to me for review. I am not affiliated with or compensated by the company. This review is my honest and complete opinion.)

Friday, August 27, 2010

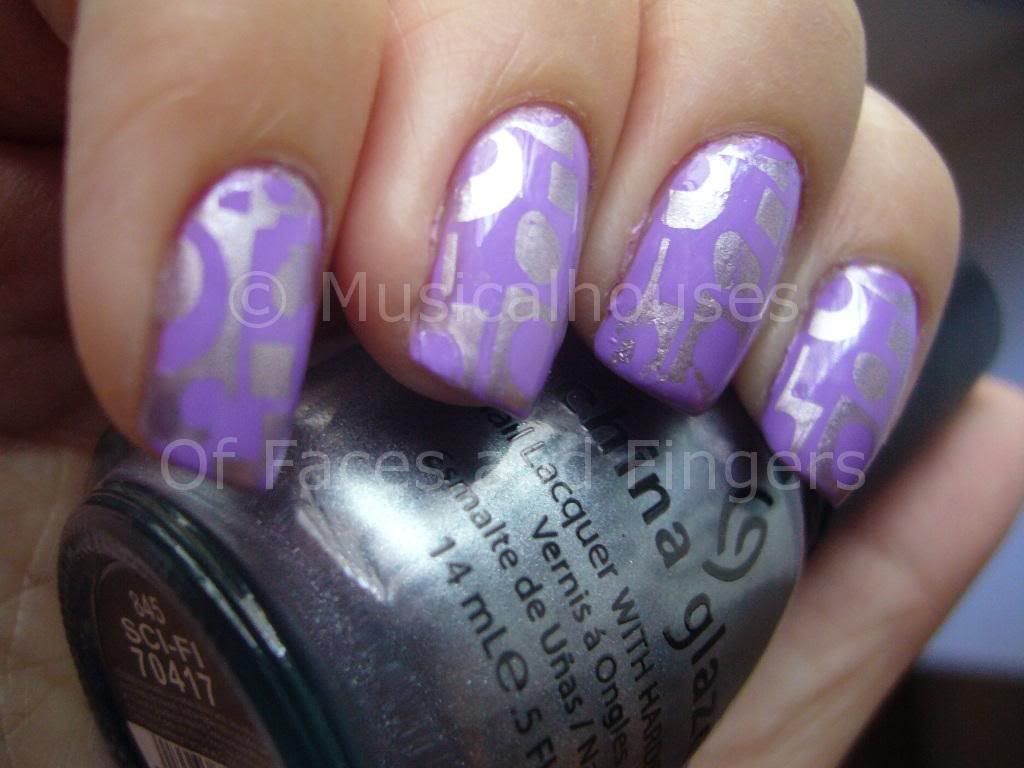
Illamasqua Jo'mina and China Glaze Sci Fi KOTD: Purple and Silver

Illamasqua released Jo'mina (is it Jomina or Jo'mina?) some months ago, with the Body Electrics collection, and out of all the three nail polishes in the collection, Jo'mina was the hot favourite. I snagged it for 50% off because it wasn't "in season" anymore (sigh, I guess you know autumn is coming when the Spring/Summer collections start going on sale). But you know me, and you know I don't give a hoot about what's trendy or not - I wear what I like, regardless of season. And a 50% discount is timeless :P

Here it is in sunlight. I think this was the most colour-accurate I could it to be, but it's still not quite there. The base for the konad was Jo'mina, while China Glaze Sci Fi was used as the design. The konad plate was M65. Man, my fingers look fat.


Jo'mina is a gorgeous beautiful bright lilac purple. I'm not sure quite how to describe it, and unfortunately, my photographs aren't that colour-accurate because it's also really hard to photograph! It keeps turning out a lot more blue than in photos. I took a gazillion photos, and they all turned out blue-purple. And I tried colour-editing it, but with my limited photo-editing skills, there was only so much I could do. I'm sorry I couldn't get a more accurate portrayal of this, so just try to imagine this as being a lot more red-based purple instead of a blue-based violet, okay?

Illamasqua Jomina China Glaze Sci Fi

I've read a lot about how Jo'mina was a total PITA to apply, so I was totally prepared to struggle with this one when applying it. To be fair, it isn't the best, but it wasn't as bad as I thought it would be either. I used two coats for all my photos. To be fair they were thick-ish coats, so if you used thinner coats you might need more. Still, I didn't get as much pulling, tugging, or unevenness as I expected. Weird right?

China Glaze Sci Fi is awesome to apply and opaque in just one coat, which makes it perfect for konading. Of course, that's evident from these pictures!

Jomina ChG Sci Fi

I really love this KOTD. I mean, I love purple, and I love chromes, so combining them makes me a very happy girl!

Saturday, August 21, 2010

NOTD: Maybelline Banana Puddin': Pretty, but a PITA

I have a complicated relationship with yellow nail polish. I like how it looks like on others, but I've been too scared to actually try it out on myself. So everytime I consider picking yellow as a mani colour, my brain goes through this thought process: Wear yellow - Don't wear yellow - Wear yellow - Don't wear yellow - etc ad infinitum. Yeah as you can tell, I'm a deep thinker. :P

I decided to finally suck up the courage to actually try out a yellow, because I figured if I hated it on me, I need never look back, and I can finally stop vacillating over whether I should wear yellow or not. So I picked out a pastel yellow that didn't have too many warm tones in it - I figure it would ease me into the yellow shock I might have. And after scouring around, I found Maybelline Banana Puddin'.

Here is Banana Puddin' on me, taken outdoors in natural light. I actually think it's as pretty as pastel yellow can get, although it's definitely not everyone's cup of tea (I'm still trying to decide if it's mine or not):

Maybelline Banana Puddin

Banana Puddin' is a colour that has long been discontinued (thanks, Maybelline), and apparently it's a HTF (hard to find) colour, and a pretty coveted one at that. Apparently it's desirability stems from the fact that it's a wearable yellow for cooler skintones. Warmer yellows can often make cooler skintones appear very ruddy and red, giving a "lobster hands" effect, but unfortunately most yellows are warm, so a cool yellow is hard to find.

I do think Banana Puddin' is wearable enough for cooler skintones. Of course it's still not going to be a colour everyone will like, but if you are going to wear yellow, this is probably one of the more wearable ones around. It's also a soft pastel yellow, as opposed to neon highlighter yellow, so it doesn't draw too much attention to itself. It's a good start if you're going to be trying yellow for the first time.

Maybelline Banana Puddin

Here it is in indoor lights. You can see it's more yellow indoors.

While it's a pretty yellow, it was a total PITA to apply. Yellows in general do tend to be hard to apply though, so it was no surprise to me. Still, it's a pain when you're doing your mani, because it was sheer and streaky. These pictures show 4 coats. Yes, FOUR FREAKING COATS. If you are skilled and apply thicker coats that are even, you might get away with three, but I suspect most people are going to use four. I dinged my mani so many times while waiting for it to dry, because four not-that-thin coats is obviously going to dry slowly.

Unfortunately, my attempt to finally decide whether I liked yellow or not wasn't very successful, as even after trying Banana Puddin', I still feel ambivalent about yellow. I don't know how I feel about it, and the lousy application isn't helping. What do you think? Would you wear yellow?

Sunday, August 15, 2010

NOTD: The My-Toilet-Overflowed-And-Ruined-My-Mani Edition

One fateful day, my housemate and I decided we would paint our nails together. She wanted to borrow my Orly Luxe (which for some reason, out of all the colours in my stash, is her favourite), and I wanted to borrow her YSL and Anna Sui. It seemed like a good idea.

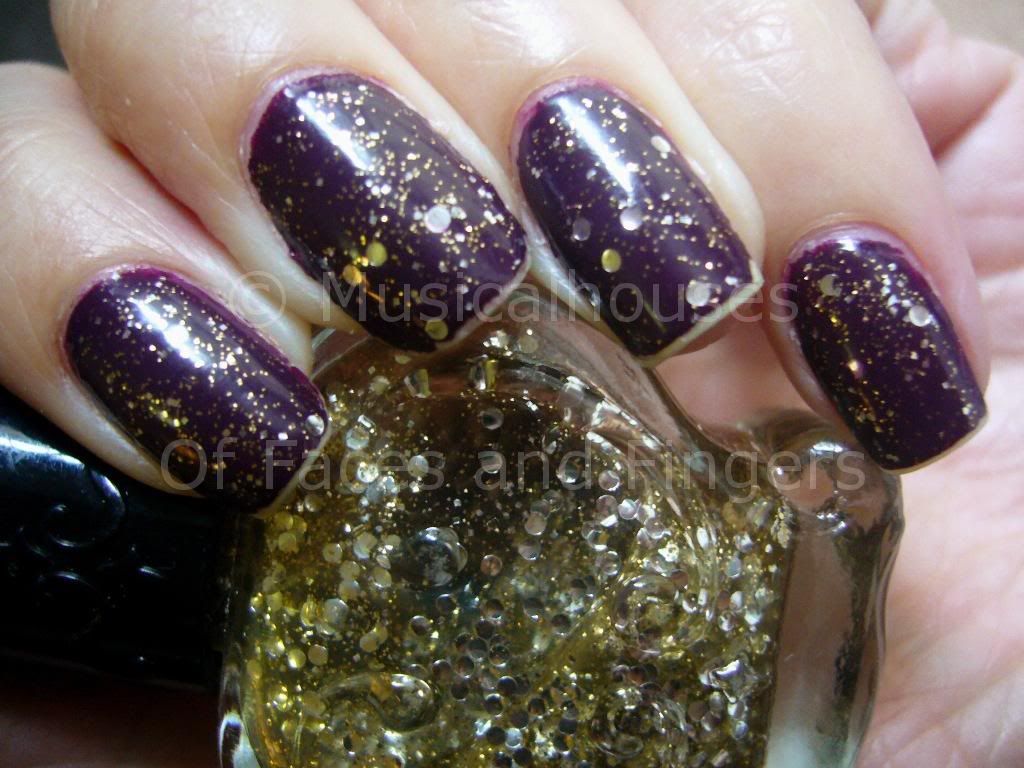
My mani was the most awesome combo ever - or at least, it sure did feel like it then. I used YSL Black Tulipe #34 as the base (or at least I THINK that was what I used - she didn't know what colour it was, and she didn't keep the box so unfortunately I had no way of verifying the colour name, since YSL puts the name of their polishes on the box, not the bottle. But it looks pretty identical to other swatches I've seen). I then layered Anna Sui Nail Color in 020. I have no idea what that is - it must be discontinued or Asia-only or something, since I can't seem to find any other swatches of it, and it isn't listed on the Anna Sui website. Lastly, I sealed in the glitter bits with two layers of topcoat, since they were rather large and I wanted a smooth finish.

Anyway, there I was, luxuriating in the sheer gorgeousness of my mani - hey it's purple, and blingy, and you know I love my purples, and I love them with a bit of bling! And because this mani was a whopping 6 coats (1 base coat, 2 YSL Black Tulipe, 1 Anna Sui 020, 2 top coats), I felt sure it would last forever, because I mean, 6 coats takes a longer while to wear down, right? So I would be able to be absolutely blingtastic for longer! Woohoo!

Sadly, it was ruined the very next day. I went to sleep, happy with my mani, and the next thing I knew, I was woken up at 8am by my housemates, and found that somehow, in the morning, our toilet bowl had overflowed and dirty water had soaked the entire lower floor of our apartment, which housed all our bedrooms and bathrooms. The floor was literally flooded with crapwater. We called the landlord, and he called the plumber, but in true British fashion, they said they would arrive anytime between 9am and 6pm. At that point I just wanted to scream. This is an emergency plumbing service, not Fedex package delivery!

So while my housemates and I waited for the plumbers (who arrived very punctually at 5pm), we spent our day vacuuming out the dirty water from our apartment, and hoping that the toilet bowl wouldn't flood anymore (hah! Murphy's law seems to love situations like this, doesn't it?). We were literally carrying pails of crapwater. It was that bad. It was beyond bad. It was gross, smelly, and just...UGH. If you were following me on Twitter, you would have been subject to my updates on this - I think I must have complained a lot, because some user called "Carpet Cleaning Tips" started following me, LOL!

And after the plumbers had left, we spent the rest of the day cleaning up after the mess. I had to shampoo my darn carpet twice to get rid of the smell, and I think I used up a good third of a bottle of carpet cleaner. At some point I was so desperate I was just pouring carpet cleaning solution into the carpet. At that point, my carpet was clean, but it was still wet. As of now, my carpet is still slowly air-drying, so it's damp and squelchy, but at least it doesn't stink. Sigh.

So what did this really gross story have anything to do with YSL, Anna Sui, or my mani? Well, this is because the two days of maniacal cleaning, carrying, and generally getting my hands wet all the time took its very sad toll on my mani. By the end of it, there was immense tipwear, and there were chips, and my cuticles were dry and red.

And you can take a look for yourself at the damage all this manual labour did to my nails. This is the "better" nail that suffered less damage. To be fair, I think I was relatively fortunate - it could have been much worse:

YSL Black Tulipe

Can you see the major tipwear? Yes, that's how much work my poor hands were subject to. I think my housemates must have thought I was crazy, because while everyone was complaining about the smell and the work, I was moaning, "This is so going to ruin my mani!" But you know how it is...it's always the manis you like best that get ruined in the most horrid fashion. I wouldn't have felt so bad about it if it was a crappy colour I didn't like.

Anyway, YSL Black Tulipe (hopefully my sleuthing was on the mark and I got the name right) is a decently pigmented 2-coater. The first coat was a little bit streaky, but it came out just fine with a second coat. I also love the colour - it's a gorgeous medium-dark purple plum creme that is deep in colour, but not deep enough to be classed as a vampy shade. It isn't that unique, however, and does remind me a lot of another colour I've worn before, Nails Inc Dover Street Market, in this post.

Anna Sui 020 is absolutely gorgeous. Normally I'm not that much of a fan of glitter-in-clear-base variants, but I'm making an exception for this one because it just stands out with it's two types of glitter, making it a lot more interesting than most glitters. There is the more obvious glitter, composed of sparse round discs of silver glitter, and then there are also smaller glitter squares that are gold in colour. I actually really like the fact that they combined gold and silver in this polish, so it can be layered over virtually any colour without looking "off". Neat, huh? It applied pretty nicely, but as it usually happens with glitter polishes I had to work a little bit to get the glitter to spread out more evenly, otherwise it tends to clump together in one spot.

YSL Black Tulipe Anna Sui 020

Here's a shot of my nails with the Anna Sui bottle, in case anyone here happens to be an expert and can help me track down exactly what range/series this came from. I'd really love more info on this colour - and need I say I'd love my own bottle too? :P I really love this combination of purple and glitter - it looks vaguely cosmic, like a purple alien sky filled with stars.

One of the things I noticed about the Anna Sui polish in particular is that it's scented with a fruity scent. It smells like lychee to me (and my housemate agrees). Even after applying 2 coats of topcoat on top of it, after the nail polish smell has worn off, I can still smell lychee on my fingertips. It kind of makes me want to sniff my fingers more. For people who are unfamiliar with lychee (since it's not really easily found in the West), I've come across the smell being described as a rose scent. I personally think lychee is a better description, but I can how it smells like rose if you've never eaten/smelled lychee before. In any case, it's a sweet fruity smell.

Rats, typing that just made me feel like eating lychee all of a sudden. Anyway, that was my NOTD of awesomeness that got ruined by the toilet. The toilet needs to DIE. But I'm glad that all it did to my NOTD was wear it down quickly. It really could have been worse - at least I didn't break a nail!

Sunday, August 8, 2010

NOTD: Happy National Day Singapore - Sorry I Ruined Your Present

Part of the reason why I don't do Youtube videos is because I don't think many people would understand my English accent easily. I'm not American, and thus widely understandable (thank you MTV and Hollywood), and I'm not British, and thus slightly less comprehensible but still forgivable on account of having a cute and adorable accent. (Yes, I've come across many a non-Brit who think the Brit accent is cute. Believe it! :P ) Instead, I'm from a tiny country in Asia, called Singapore. And though English is the default language I use (I study, think, work, curse, and converse with just about everyone I know in English), I seriously doubt anyone outside of Southeast Asia would be able to understand my accent with ease, despite my fluency in the language. And although three years of living in Chicago have given me the ability to quite passably imitate an American accent, well...I don't wanna, even if it's just on Youtube. I'd feel like I was selling out, somehow. I mean, after all, how you talk is a part of who you are, right?

Anyway, I'm telling you this because my NOTD (Nail of the Day) has something to do with my native Singapore! This is because it's a Singapore-themed mani! You see, 9th of August is Singapore's National Day - the Singaporean equivalent of America's 4th of July, so it's a meaningful date in Singapore's history. And, it's a public holiday, which makes it awesome! :P

So, to display my love for my country (and for public holidays, LOL), I thought I'd base my NOTD on the Singapore flag, step out of my comfort zone, and try some freehand nail painting for the first time.

This is what the Singapore flag looks like:


You'd think it would be easy, right? I mean, the Singaporean flag doesn't have 50 stars and 13 stripes, and it doesn't have a red-on-white-on-blue Union Jack. It consists of two colours, and a handful of geometric shapes. So, I thought, it should be easy! This would be the perfect way to try out freehand nail art for the first time!

Well, turns out I suck at freehand nail art. That, and also, one should not begin a mani at 12.30am in the morning. This is the proof:

Singapore National Day Mani

Yeah, well, I know it sucks. Sorry Singapore, but I tried my best. I mean, the moon looks like a 5-year-old drew it on for me, and those squidges of nail polish are supposed to be stars, and I blurred whatever design was there because I didn't wait long enough before putting on a topcoat (hey, I did say I started my mani at 12.30am!). Still, happy birthday, I guess. It's the thought that counts, right? Right? *Crickets chirp*

For the base I used Eyeko Saucy Polish. That polish is really pigmented and thick. It's opaque in 1 coat, and I think I should konad with it next time. For the really horribly drawn on crescent moon and pseudo-stars, I used LA Colors Art Deco white art polish, which I'm ambivalent about. While I have no problems itself with the polish formula, which is thick, viscous, and dries quickly, thus making it ideal for nail art, I don't really like the brush. The bristles are a bit too long and thus hard to control. And I'm saying that because I actually mean it, and not because I'm trying to make up excuses for my sorry NOTD. :P

Singapore National Day Mani

Well, what can I say, except maybe please don't laugh at me? I know it's bad. Oh well, at least I got the colours right.

Monday, July 26, 2010

KOTD: Orly Foil Luxe and Wet n Wild Black

A few weeks back, my programme had a boat party for the postgraduates, and of course I had to go - it was free for students, and they provided dinner, and you know I'm all up for a free meal :P The dress code was formal, but in rebellion of the utter impracticality of wearing tuxedos and gowns in summer, our class chose to go informal anyway.

Anyway, the whole point of me telling you this is because it actually has something to do with today's NOTD. I started building my outfit around my nails, as I am increasingly wont to do lately, and I decided that I wanted to wear blingy gold nails with some konad. (Note to everyone: only weirdos like me start thinking about their nails before thinking about their clothes.)

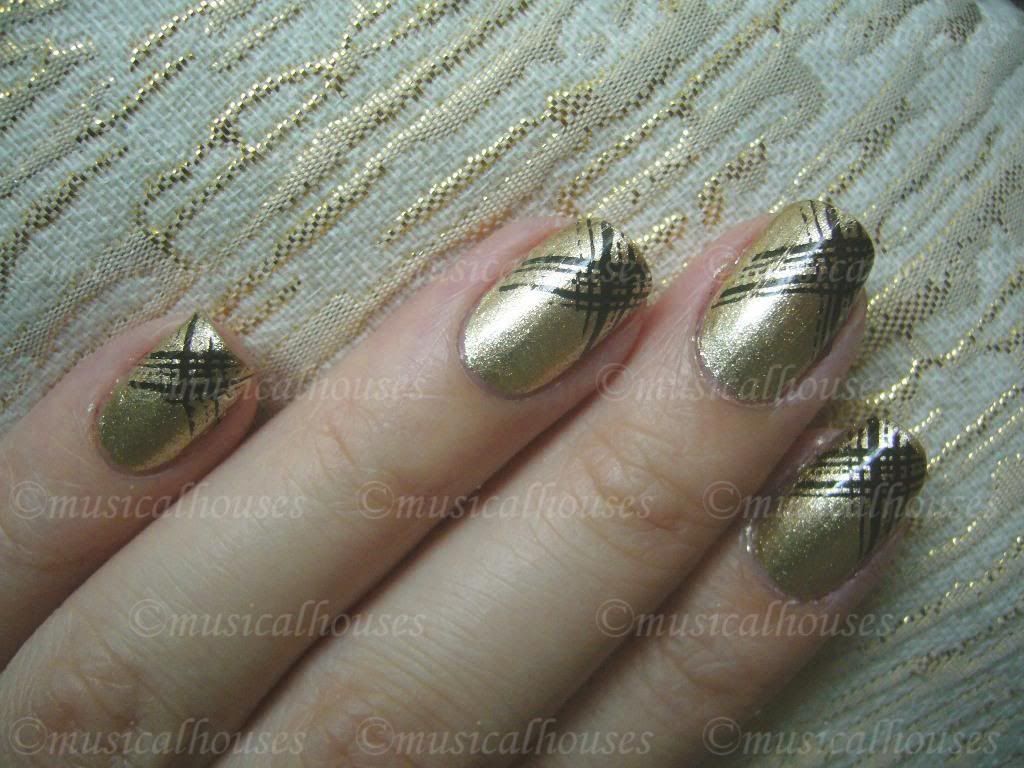
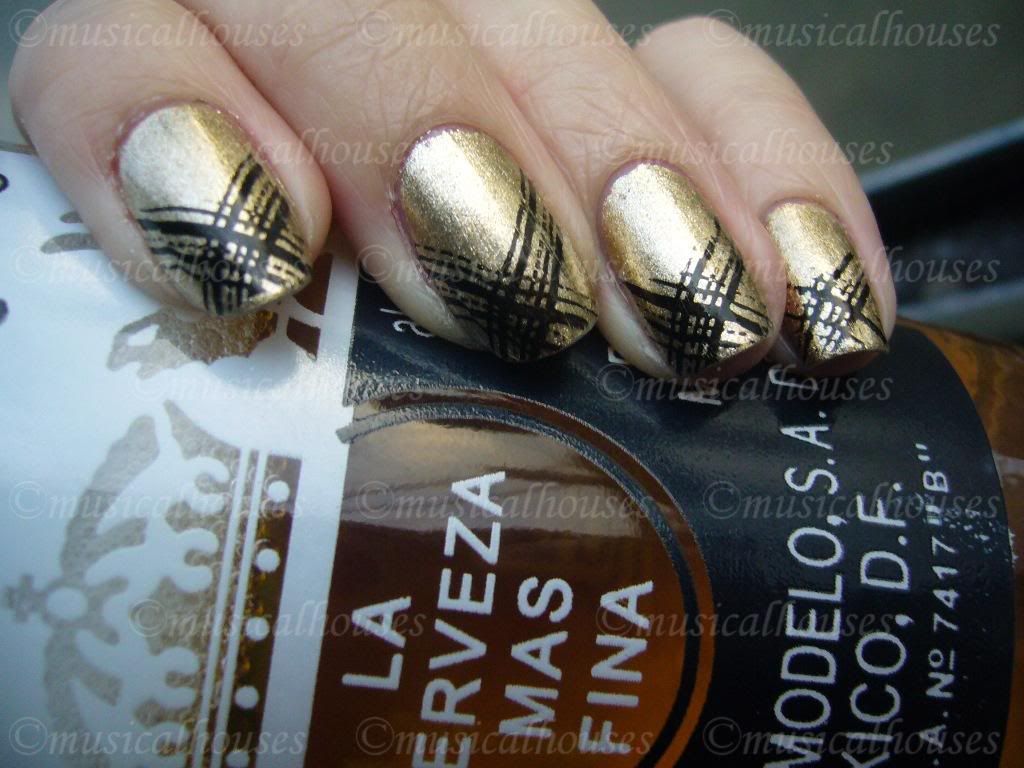
Naturally, I picked out Orly Luxe, from the Foil FX Collection, and I stamped it over with Wet n Wild Black. I used Konad plate M81 for the design. And tada:

Orly Luxe Wet n Wild Black Konad

This is two coats of Orly Luxe, under natural light, konaded over with Wet n Wild Black, which is a really opaque black creme. I just LOVE Orly Luxe. It's probably the best gold foil ever, and definitely the standout of the entire Orly Foil FX Collection. I mean, good gold foils are hard to come by, and this one is smooth, easy to apply, and opaque in one coat (ooh, gold foil konad coming up!). And not to mention I love the colour - it's a shade of gold that isn't too brassy or too warm, and would be perfect on almost anybody.

After I had done my nails, I realized that my nails matched a skirt I had just bought a few days ago (on sale from H&M, yay for 50% off summer sales!). So I ended up wearing the skirt, just because they matched my nails! And yes I know I'm a freak for matching my clothes to my nails, and not the other way around. What can I say - I probably have more nail polishes than I have clothes.

Here's a photo of my nails against the skirt. See, see? They match!

Orly Luxe Foil FX

And of course, since it was a boat party for postgrads, I managed to find something else that matched my nails:

Orly Luxe Wet n Wild Black

That was my friend's bottle, LOL. I don't drink very much, primarily because alcohol is full of empty calories, and I've never thought it was worth putting on weight for, with the possible sole exception of pear cider, LOL. I know, I'm a weirdo, but that's a pretty convincing argument to me, LOL.

Anyway, that was my KOTD, and I promise the next post won't feature any alcohol :P

Wednesday, July 14, 2010

Eyeko Rain Polish and Saucy Polish NOTD, Swatches and Review!

Eyeko has released two new nail polish colours, Rain Polish for City Nails, and Saucy Polish for Naughty Nails. These are limited edition and come in slim, small bottles, housing 8.5ml of polish. That's a slightly smaller bottle than average, but these bottles still pack a punch in terms of pigment - in fact, both of these can be one coaters if you're careful with how you apply your coats.

Eyeko Rain Saucy Polish

Rain Polish is quite aptly billed as being "for City Nails" (the way Eyeko tells you what effect their polish is supposed to give your nails never fails to make me chuckle, it's so cute!), and indeed it does kind of remind me of cities - particularly the ever-cloudy skies of London. When I first started living in London, I was struck by how it was always overcast, and the sky was never blue (well, it was Fall back then). It was always some weird shade of blue-grey, and it was a couple of months before I saw my first glimpse of blue sky in London.

So what did that all have to do with the polish? Well, Eyeko has done an awesome job of capturing the grey-blue colour of the skies I saw in their polish. This colour is just the colour of those skies, which I think is pretty cool. And it's a beauty, too! It's a cross between a blue and a grey, and I can't decide if it's a blued grey or a greyed blue. It's a muted, dusty colour, one that's really chic and stunning without being loud or neon. Awesome stuff.

Here's a swatch. This is as colour accurate as I could make it - you know how hard it is capturing accurate photos of greys and purples. But I think I pretty much nailed it!

Eyeko Rain Polish

She's a beauty, isn't she? This polish has a slight shimmer in the bottle that doesn't really show up on the nail, it kind of just reveals itself as a reflective sheen instead. This is definitely the next big hit for Eyeko.

And next we have Saucy Polish. Now this is billed as being "for Naughty Nails", but we all know reds are a classic - they just give off that 1940s movie-star vibe. Sexy, classic, and a little retro all at once. I always feel it's a pity that red nail polish, just like red lipstick, seems to have gone the way of the dodo now that girls are so cautious about wearing red.

Eyeko Saucy Polish

This is red. Straight-up neutral red. Fire engine red. Telephone box red. Hollywood movie starlet red. Colour wheel primary red. I love it! I don't normally wear reds, but I'm of the opinion that every girl needs a red lipstick and a red nail polish, and I like this one. It's a middle-of-the-road neutral that leans neither too cool or too warm - this is pretty much as neutral as red gets. And it's not too dusty or muted, but it's not so bright it's neon either. It's just right. I love it. If you're looking for a red nail polish on the cheap, this is probably as good as any other.

Application on both was pretty good. These are a little thicker than I'd like, and are not as thin as say, Zoyas, which may or may not be a good thing, depending on your preferences. These are also awesomely pigmented, which means if you're careful with application, one coat is enough. However, my swatches all show two coats, because I couldn't get the first coat to be even enough due to the slightly thick texture.

Colour-wise, I ABSOLUTELY LOVE Rain Polish. It's always going to have some sentimental value to me, reminding me of the London skies I glimpsed at when I first stepped foot into the city. The only catch is that being blue-based, it's a shade that might potentially be unflattering on girls who are really warm-toned. Still, I think it's a pretty shade worth a shot if you're game for it.

(These products were sent to me for review. I am not in anyway affiliated with or compensated by the company for this review. This review reflects my honest and complete opinion on the products.)

Friday, June 25, 2010

Random POTD Holiday Pic: Eyeko Coral

Over the weekend, I was with some friends in Cornwall, UK, and it was fun. We were so fortunate that the weather was relatively warm, and that it didn't rain, so we got to take lots of pictures, eat awesome seafood, and play by the beach.

Of course, you guys probably know that I hate a tan and have this kooky Asian idea that the-fairer-your-skin-the-better, so of course I was suntanning Asian style (or more accurately, my style, since I don't even think my Asian friends do what I did). I was lying down on the beach, sunning myself, while covering myself with my jacket to prevent the UV rays from hitting me. LOL! I know I could have used a sunscreen, but on that day it so happened that I had only applied it on my face and not my arms and legs, hence the jacket. (Who am I kidding, even if I had applied sunscreen everywhere I would have still used the jacket. I'm weird like that.) I think everyone else on the beach thought I was a total nutcase, but I wanted to lie on the sand, feel the warmth and smell the sea - without the UV rays. I know, I'm too demanding even for Mother Nature. And somehow while sunning myself (under my jacket), I fell asleep with my head resting on my bag, and when I woke up I had bag-fabric prints on one side of my face. As you can tell, I'm the paradigm of effortless glamour, NOT.

Anyway, on to the more important question - what pedi was I wearing on my tootsies for the holiday? Unfortunately, it was the rather conventional beach colour choice of a coral, which I've already swatched on my fingers HERE. But, I just thought I'd show you guys a couple of pictures of it on my feet anyway.

Here we are, POTD (Pedi Of The Day) pictures! And now we all know I have duck feet:

Eyeko Coral Polish

Very summery and beachy, no? Anyway, application was good, and it was opaque in one coat, although I think I used two, simply to even it out. But if you're careful, one will do. Lasting power was a bit problematic though - by the end of the weekend, the polish had chipped off on one toe, which surprised me. I mean, polish on my toes normally doesn't chip until WEEKS later. Maybe I ran around bumping into too many rocks at the beach.

Anyway, apologies for this boring post. Being back from holiday means I have to catch up with my real life (yes I actually have a real life, LOL!) which in turn translates into less time to blog. I promise I'll post with something more interesting tomorrow. :)

Wednesday, June 16, 2010

Eyeko Petite, Coral and Vampira Polish Swatches!

The last time I tried Eyeko's polishes, I wasn't impressed at all. Not one bit. This was back when Eyeko was still carried at my Superdrug last year. I saw their polishes in their cute bottles that looked like little milk jugs, picked up 3 or 4, tried on Pretty Polish, and promptly gave it away. It was sheer, streaky, annoying and took 4 coats to even out. And the cute milk jug bottle? It looked really eye-catching, but didn't help polish application one bit, since the polish tended to get clogged up around the too-wide rim of the bottle, and the flat cap was hard to hold.

Enter 2010, and Eyeko seems to have reformulated their polishes. These ones that I've tried were much better, both in terms of packaging. Gone are the annoying milk jug bottles with the too-wide rim and hard-to-hold cap. These ones are thinner, and sleeker, and the rim and cap are normal to hold and use. The formula also seems to have improved - out of the three I've swatched, only one was sheer, and it was billed as a polish for French manicures, so that's to be expected. There are also some interesting and surprising dupes here.

First up, we have Petite Polish, for French Nails (don't you just love how Eyeko tells you what sort of effect their polish is supposed to give? I think it's kinda cute). This one is sheer, as billed. One coat was a barely noticeable pale milky sheer pink, two coats still left VNL (visible nail line) but was still sheer. This swatch is two coats, in natural light. Pardon the stained nails:

Eyeko Petite Polish

As you can see, this is a far cry from my past experience with their Pretty Polish. While that one was impossibly streaky, this was actually even with just two coats. Streakiness is a major downfall of many a sheer french pink, so consider me impressed, even if the colour isn't devastatingly unique.

Speaking of not being unique, there are similar colours, and a close-but-not-quite-dupe in other lines:

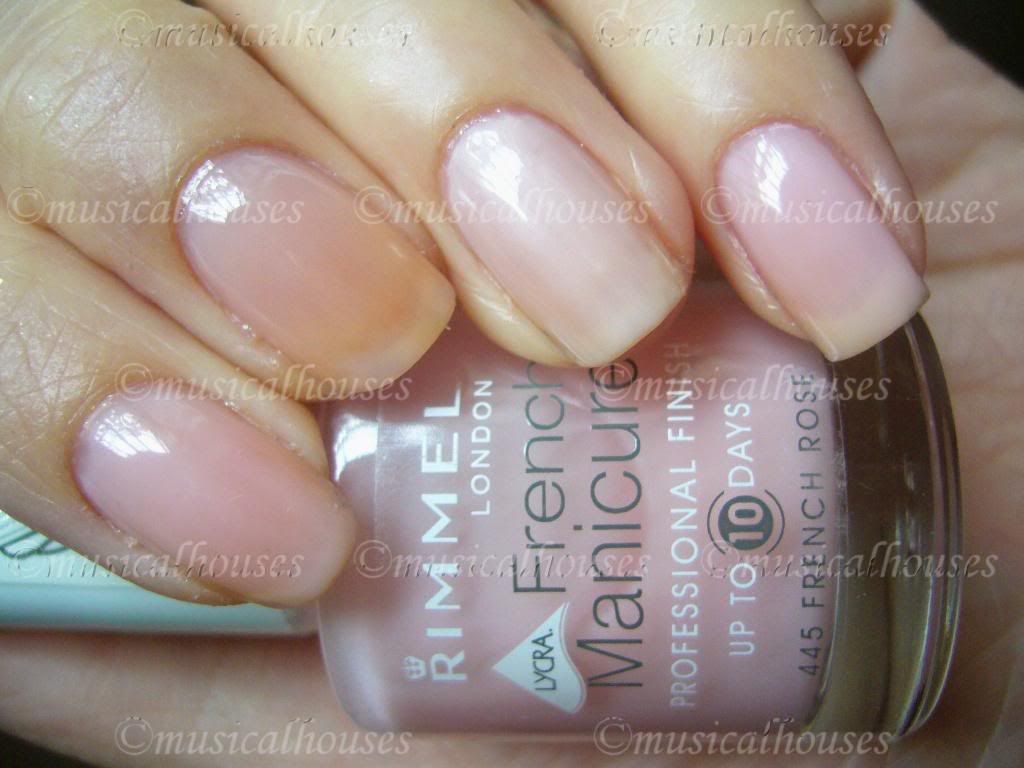
Eyeko Petite Polish, Rimmel French Rose, Nails Inc Elizabeth Street

L-R: Eyeko Petite Polish, Rimmel French Rose, Nails Inc Elizabeth Street, Eyeko Petite Polish

I used two coats of each for the swatches to ensure consistency. As you can see, Nails Inc Elizabeth Street is the most opaque of the lot, reaching near-full opacity in 2 coats. Rimmel French Rose is the sheerest of the lot, showing the most VNL, while Eyeko's Petite Polish is sort of in between, but closer to the Rimmel French Rose polish.

I think these are great for French manicures, and also very work appropriate - barely anyone is going to notice you're wearing polish with these.

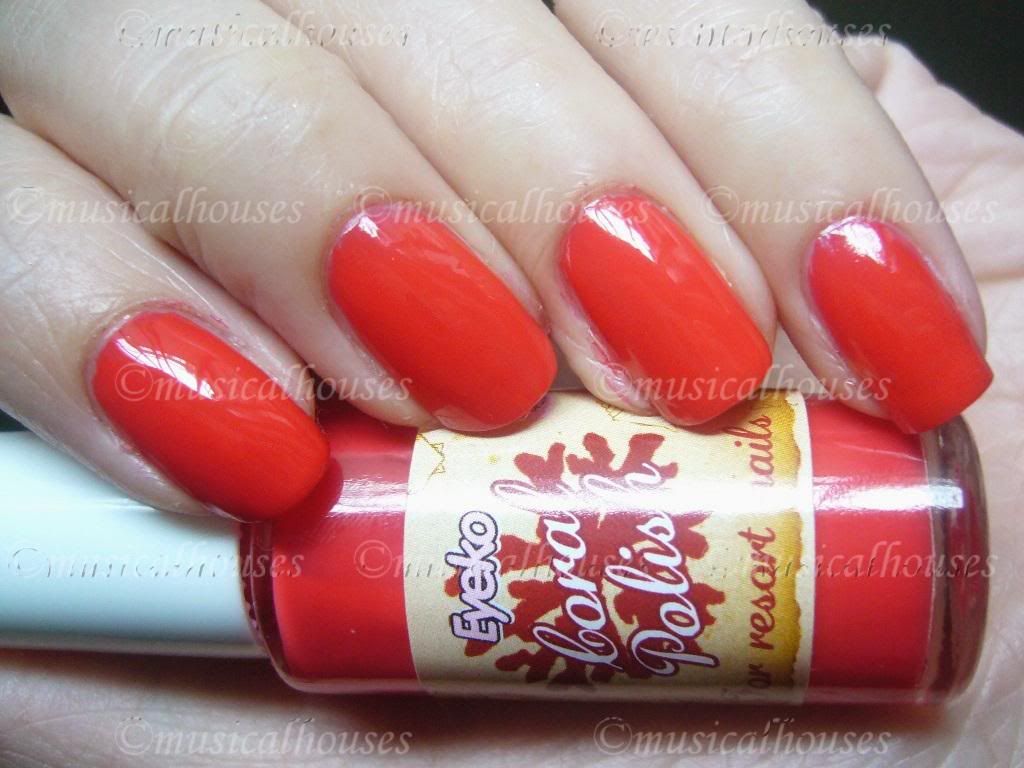
Next up, we have a stunner in Eyeko's Coral Polish, for Resort Nails. This one really gives a very summery, holiday feel, and was opaque in two coats:

Eyeko Coral Polish

This is really very pretty isn't it? I generally stay away from most coral colours, because they usually carry too much orange for my taste, but this is on the red side of coral, and thus doesn't make me look as jaundiced as it potentially could. I also liked the application on this one, it applied well and was smooth. I really love this one, it's not neon, but it's bright, summery and happy.

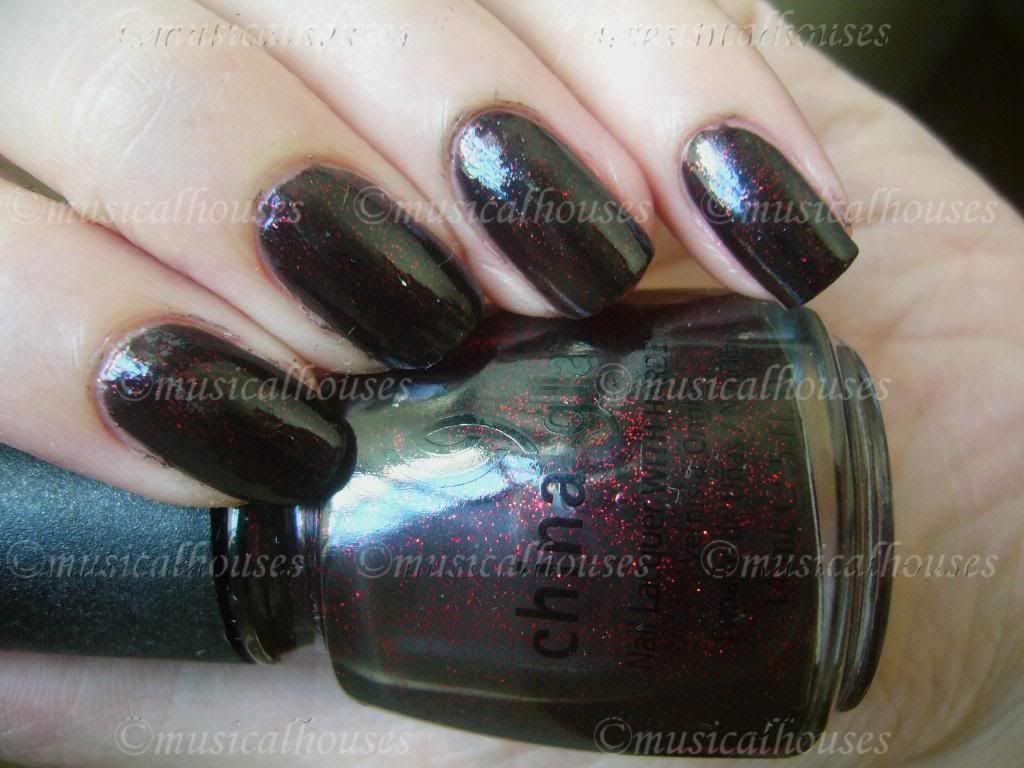
Lastly, we have Eyeko Vampira Polish, for Goth Nails. Although I'm not quite sure if black automatically equals goth, considering that China Glaze's Lubu Heels is pretty much a classic in the nail polish fanatic's world, and it's a very similar colour. Vampira Polish, as is Lubu Heels, is a sheer black with red glitter, which is pretty much opaque in two coats. If you can't see the red glitter bits, feel free to click on the picture to view the humongous full size version, complete with messy cuticles (don't say I didn't warn you):

Eyeko Vampira Polish

You know I love me my vampies, so you know I'll love this. Black with red glitter? I'll take it!

But how does Eyeko Vampira Polish compare to China Glaze's cult favourite, Lubu Heels? They look awfully similar, could they be dupes? Well, I know you'd be wondering, so I generously swatched them for you :P LOL! These swatches are two coats of each:

Eyeko Vampira China Glaze Lubu Heels Polish

L-R: China Glaze Lubu Heels, Eyeko Vampira Polish, China Glaze Lubu Heels, Eyeko Vampira Polish

As you can see, they are pretty much dupes, colour-wise, right down to the size and density of glitter. I know the China Glaze diehard fans are going to howl at the presence of a dupe of one of their cult favourites, but to be fair, the China Glaze version was easier to apply, and didn't pull or streak as much. So they might be dupes colour-wise, the China Glaze had a better application. But for anyone in the UK who can't get their hands on China Glaze, the Eyeko is definitely a good substitute.

After my previous mishap with the older Eyeko polishes, I swore I'd never buy anything Eyeko again. These polishes have redeemed Eyeko in my eyes. None of these colours are super unique, but they are good basics with good quality, and worth a look at.

These products were provided to me for review purposes. I am not affilated with the company. This review is my complete and honest opinion.