Showing posts with label Holographic. Show all posts

Thursday, September 30, 2010

China Glaze Atlantis: The Very Last Days of Summer

Okay, so summer was over a long, long time ago, but I thought that I'd better wear this while there was still some semblance of sunlight over dreary London. Also, I'm graduating from University and starting work soon, so I figured that I'd better make my last manicure before I start work a good and fun one, since once I start work I'll be subject to the tyranny of boring sheers, pinks and nudes. Not that there's anything wrong with pinks, sheers, or nudes, but I'll be darned if I have to wear ONLY those...

Anyway, China Glaze Atlantis is gorgeous. It's a teal jelly with holographic glitter chunks, so with it's eye-catching, bold, bright and defiant nature, it's totally appropriate for the last days of summer, before sunlight slips away (as well as the last days of being a freewheeling student, before I slip into the working world)...Pictures really don't do this justice, because my camera can't capture the awesome holographic fullness of this beauty. It just looks like plain old glitter, but it isn't. I need you to imagine that every one of those glitter bits below is twinkling in holo goodness.

China Glaze Atlantis

Atlantis is a chunky glitter, and while I usually hate chunky glitters, I'll make an exception for this one. When I first applied it, I hated it. I was thinking "WTF HUGE CHUNKY GLITTER?! At least it's holograhic..." but once I wore it for a bit more, I started loving it. I think it's acquired taste, especially if you're colour-shy. But it is a lovely colour, and one that's totally unique.

I like how the teal base is a jelly that's not too opaque, so even after two coats, you still see every single glitter bit. The suspended but still visible glitter really adds a dimension to the colour. I think Atlantis is absolutely appropriate as a polish name - it really looks like the diamonds of an ancient city sparkling at the bottom of a deep blue-green sea, forgotten and twinkling beneath the waves.

See what I mean? Who knew polish could tell a story? But this one does. It's almost poetic.

China Glaze Atlantis

Before you guys think I'm off my rockers, I'd better get to the more mundane aspects of polish description. Like application. As with all chunky glitters, Atlantis wasn't exactly smooth going on - the glitters do tend to all clump together at wherever your brush first lands on your nail, so you do have to maneuver carefully to ensure the glitter is as evenly distributed as possible. But otherwise, I didn't have any problems with this.

Despite being a jelly, it was easily buildable, and what you see on my nails is just two coats. I don't know how China Glaze does it, but Atlantis isn't so sheer that it's annoying, but it also isn't so opaque that you can't see the glitter bits embedded in the polish.

Here's a close up shot so you can see the awesome holographic glitter. It really is more holographic in real life, but my camera has issues:

China Glaze Atlantis 2

Of course, it's obvious how much I love this colour. When I move my fingers it sparkles and twinkles, and I absolutely love the bling effect. If you're not colour-shy, or glitter-shy, this one is for you.

Friday, July 30, 2010

How to Fix a Broken Nail With a DIY Tea Bag Wrap

There I was, opening the freezer door to get some food. I was hungry, therefore I was impatient, and therefore I wasn't really thinking too much about what I was doing. While opening the freezer door, my fingers slipped off the door handle - except my third finger, which caught onto the door handle. I felt a snag on my finger and a bit of pain, and it took me a few seconds to realize that I had just torn my nail.

I was so upset I had to Twitter about it, and my non-nail fanatic friends were laughing at me because they thought it was so funny that I could get so worked up over a nail. But you know how it is with these things. You spend months growing them out, shaping them, caring for them with hand lotion and cuticle cream, and then, just when you think "My nails don't look like rubbish after all", they tear. It's heartbreaking, really, because if you trim them all the way down after a tear, you start from scratch, all over again.

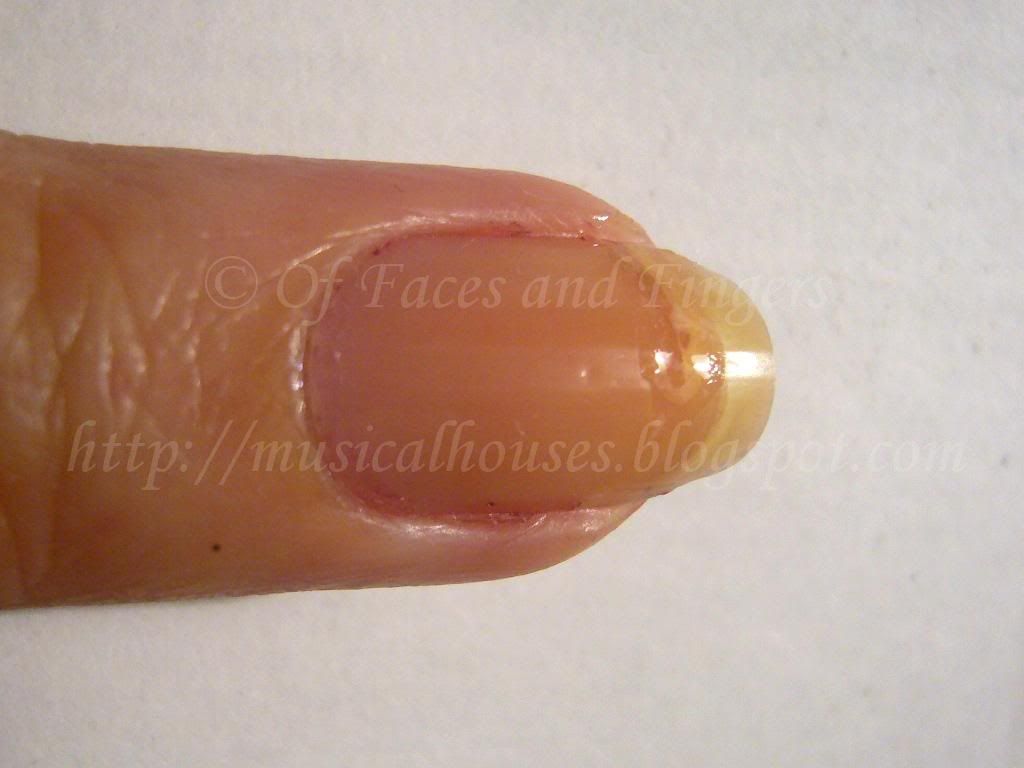
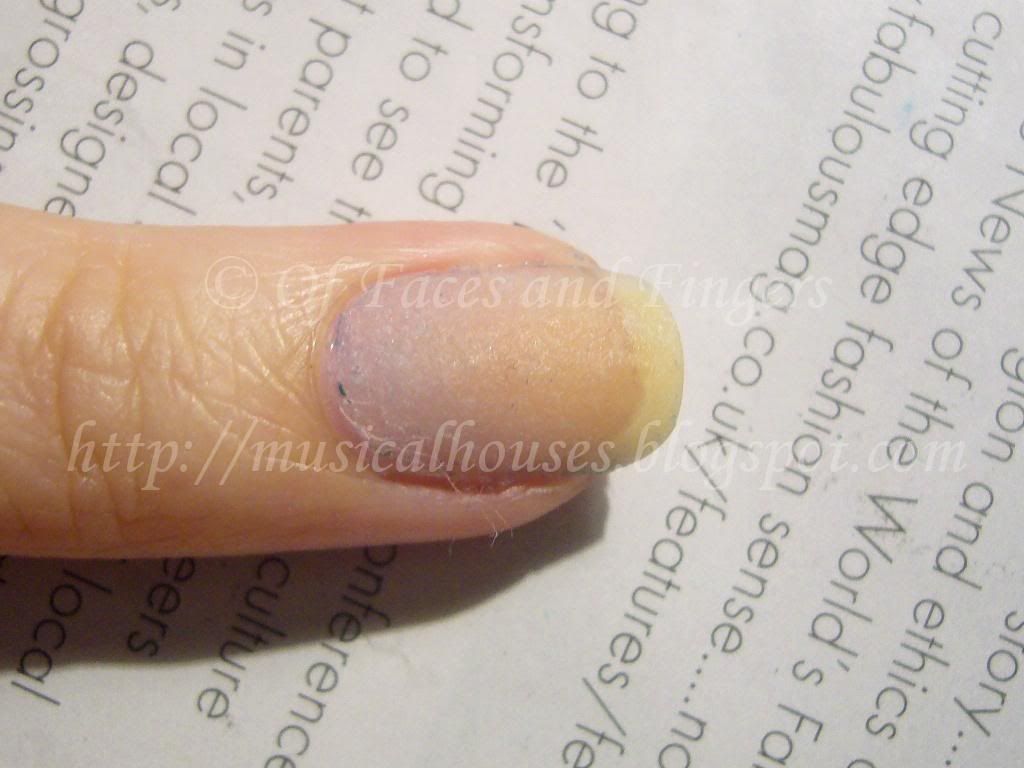
Have a look at the damage. The freezer needs to DIE. I'd have smashed it to bits, but it had three tubs of ice cream inside, and I didn't want to ruin the ice cream.


I didn't want to trim my nails all the way down and start from scratch again, so I decided to try a DIY wrap with a tea bag to hold the nail in place until it grew out. I don't do this very often, so my skills at making teabag wrap are really Noob-ish, so you'll have to put up with the lousy skills here.

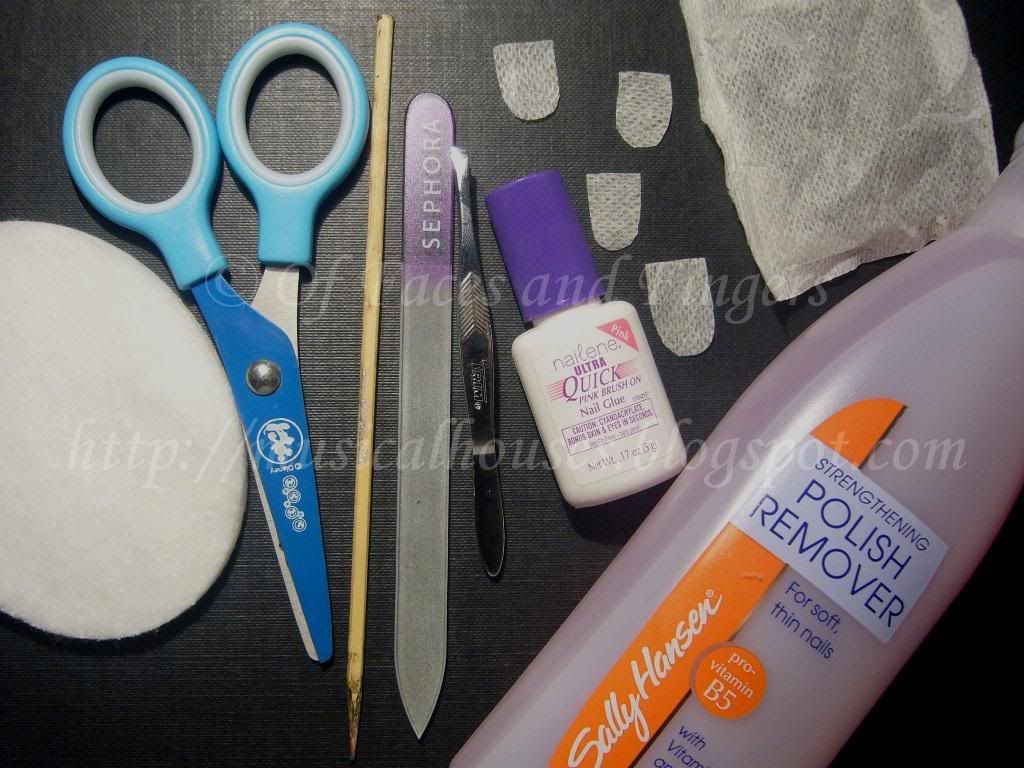
You'll Need:
1. Nail Polish Remover or Acetone (swipe over nail before applying the wrap)
2. Cotton Pad (for swiping acetone over nail before application)
3. Nail Glue (not base coat or nail treatment)
4. Tea bags (cut to just slightly smaller than nail size)
5. Scissors (for cutting tea bag wrap to size)
6. Tweezers (for placing the tea bag wrap over your nail surface)
7 Orange Sticks (for holding down the wrap while they dry)
8. File or Buffer (for smoothing out the wrap after application)


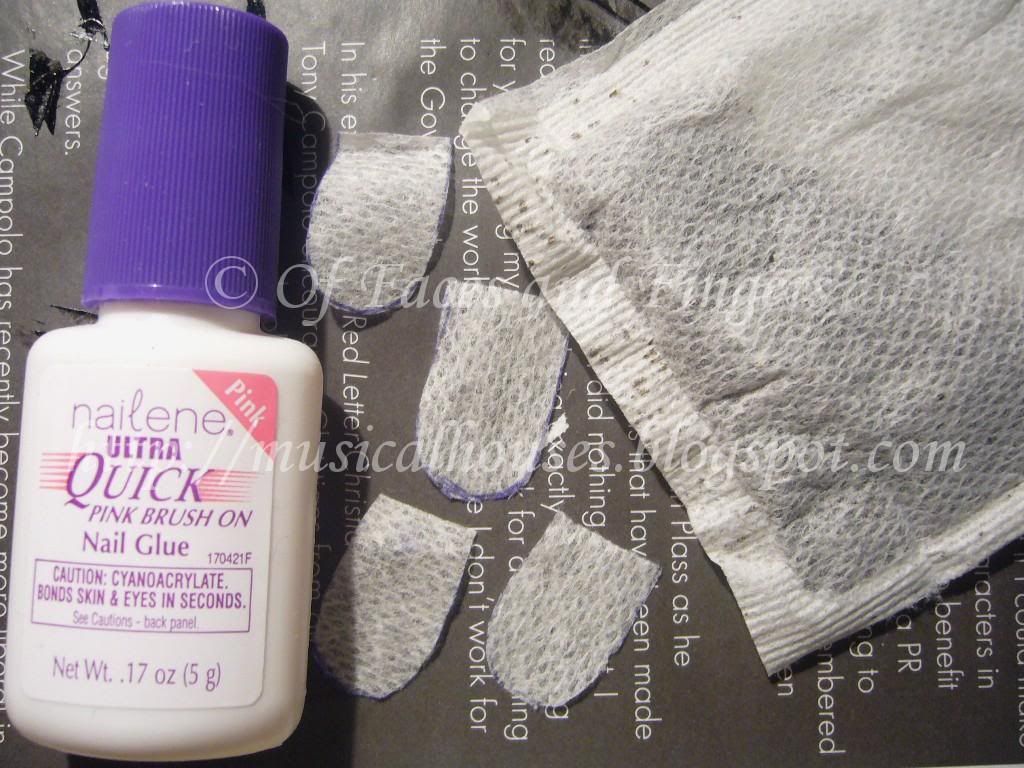
I'd like to point out that it HAS to be nail glue that you're using, as I had a question from a reader asking if she could use base coat or nail treatment instead. These weren't made to funtion as adhesives, so if you use them, the tea bag wrap won't stick to your nail. Any kind of nail glue will do, as long as it's a nail adhesive. I used the Nailene Ultra Quick Brush On Nail Glue, which dries fast, and also dries clear, which is useful if you don't want to sit around waiting for the nail glue to dry.

I also used a tea bag. Yup, your normal average tea bag. Cut it out to the size and shape of your nail. I just used a pen and a scissors for that. The cutouts here shown are the actual shape of my nail, but before you apply them you might want to make them a bit smaller than your actual nail size, so that you don't accidentally glue down the wrap onto the skin around your nail (which was what I did).


Step 1:
First, swipe your entire nail plate with acetone or nail polish remover. This helps get rid of the oils on your nails and helps the wrap adhere to your nail more securely.

Step 2:
Seal the tear with a bit of nail glue. You don't have to do this if the tear is small, but for a huge tear where the torn bit doesn't stay in place and might move around, it's a good idea. I think I put a bit too much here. You only really need a little bit to seal the tear. Too much and it will cause a bulge on your nail, which will make it harder to apply the wrap on top. You want to keep the surface flat so the wrap goes on more easily:


I don't have pictures for the next couple of steps, because you have to work quickly, so there wasn't time to stop and take photos.

Step 3:
Apply nail glue over the entire nail. Leave a little gap at the sides and at the base of the nail, near the skin and cuticles and the sides and bottom of the nail. This is important because you don't want to glue your cuticles or skin to your nail wrap!

Step 4:
Then, working quickly, use a pair of tweezers and place the nail-shaped tea bag cutout over your nail. Use tweezers, and not your fingers, or you will glue your fingers to your nail. And that's painful. (Um, not like I would know....*looks away and whistles*)

Step 5:
After the wrap is on the nail, use an orange stick to press down and hold the wrap in place while the glue dries. Remember, use an orange stick and not your fingers, or you'll get your fingers glued to your nail. This step will take a few minutes or longer, depending on how fast your nail glue dries. The important thing in this step is to make sure that there are NO air bubbles under your wrap, between the tea bag material and your nail. If there are any air bubbles, moisture could collect in them, and lead to bacterial growth, on the nail. So if you do see air bubbles, it's better to redo your wrap at this point. Better safe than sorry!

This is what my nail looks like at this point:


As you can see, I am a DIY nail wrap noob, and I glued my cuticles and skin to my nail wrap, because I accidently put too much nail glue and cut the size of the nail wrap a little too big. I ended up using a bit of nail polish remover to un-stick my skin.

Step 6:
Next, put another layer of nail glue on top, and let it dry. The nail glue will saturate the wrap and make it turn clear (or at least, clear-ish). This way, the wrap will be secure, and it won't look as obvious.

Step 7:
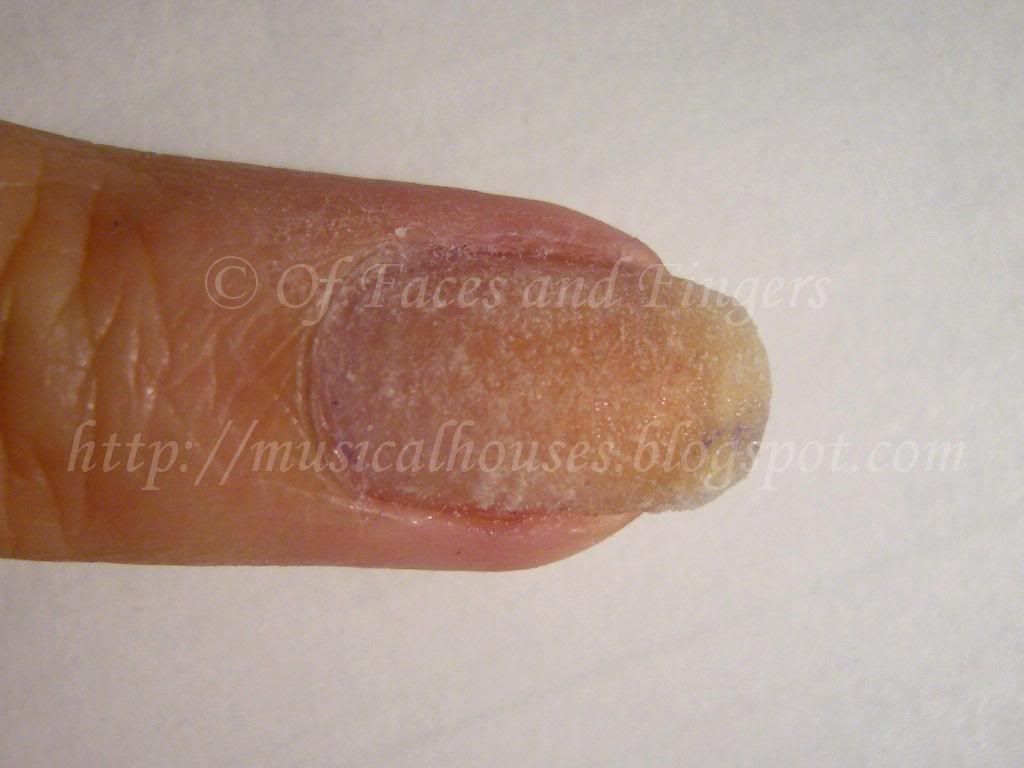
You're all done. All that's left is to lightly file or buff down the surface of your wrap to smoothen it out. Don't overdo it, or you'll end up buffing through the wrap. Once you're done filing or buffing, and you can proceed to paint your nails with whatever colour you want.

Here's a photo of the finished wrap (pardon the lint and the remnants of previous polish, this was a photo of the wrap taken later in between manicure changes):


This wrap, noob-ish as it was, lasted me for around 2 weeks. Eventually I redid it because my nails were growing out, and for some strange reason a corner of the wrap chipped off. (Seriously, how does that happen?!)

Here's my fixed-up and pretty-fied nail. You can tell its the middle finger that broke, because the too-big wrap is sticking out from the sides of my nail. Oops.


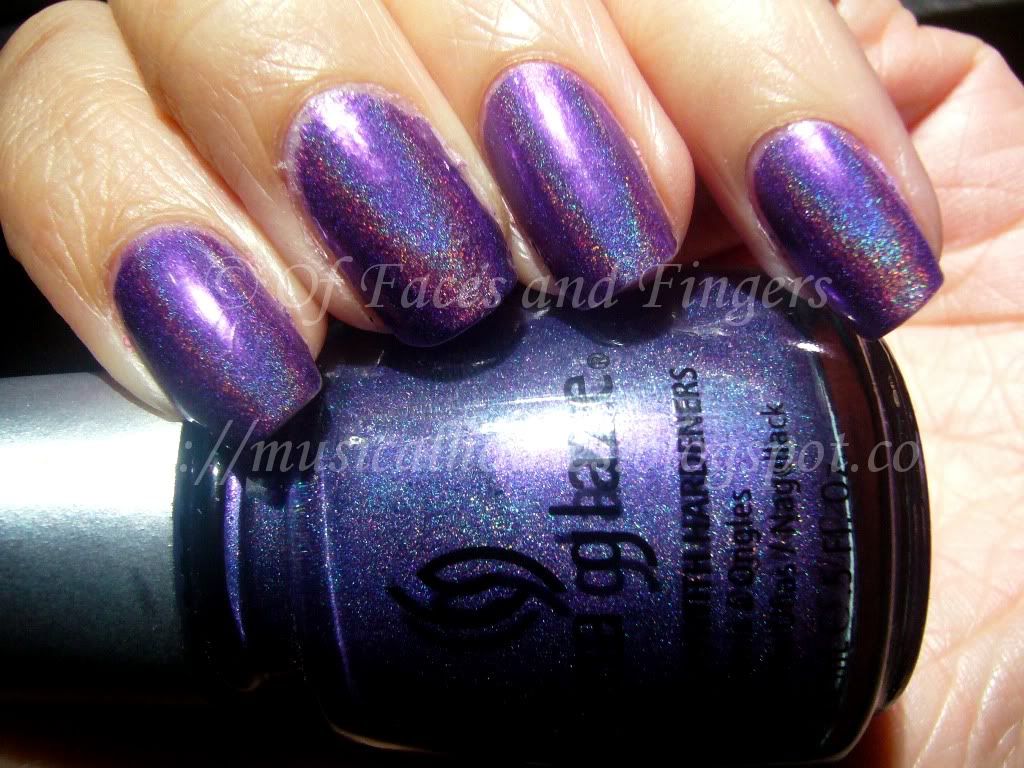
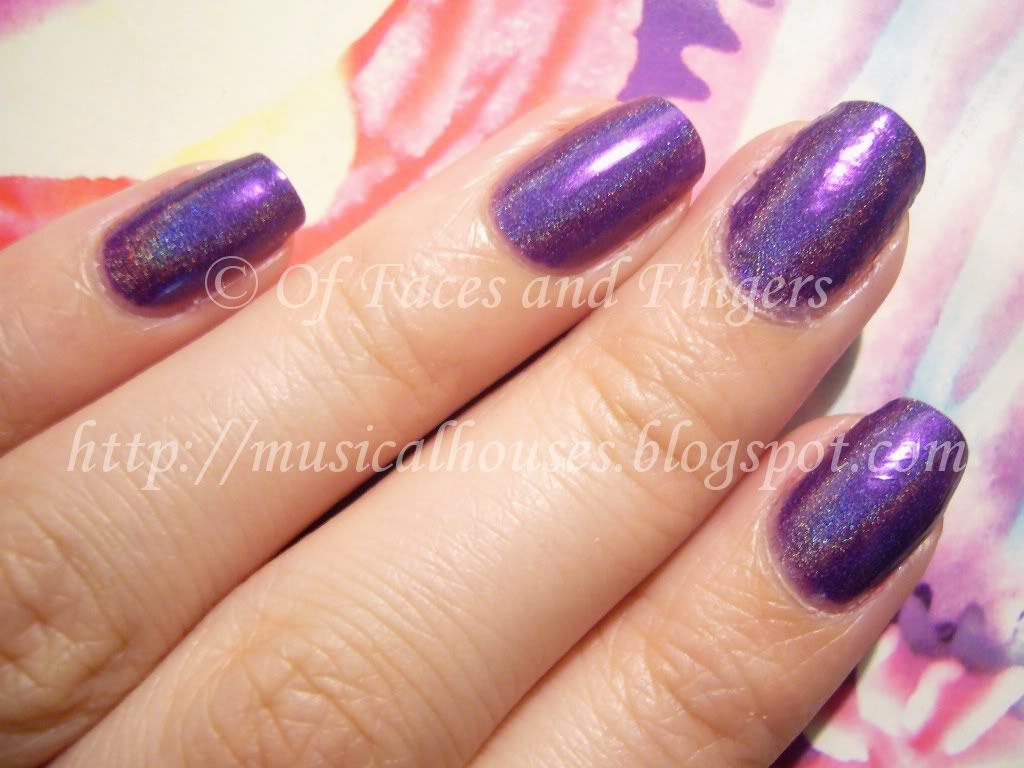
I love China Glaze LOL, it's an awesome royal purple holo. The only thing is that I feel sad about is that the holo effect was a little bumpy and rough on my broken nail, because the surface of the wrap isn't totally smooth, even after filing. And here's a slightly more flattering photo of my nails:


I guess this means I'm not going to be able to wear holos for the next couple of months until my tear grows out and I don't need the wrap :( And yes, this does mean that you'll see my nail wrap sticking out of all the next few NOTDs, unfortunately. They get less obvious as the wrap grows out, but I hope you guys can pretend it's not there! :X

Friday, June 18, 2010

OPI DS Extravagance: Awesome Holo Goodness

Ahem ahem *clears throat and looks awkward* Before I show off the awesome holo-ness on my nails, could you guys do me a teensy favour and vote for me? (I bet you knew that was coming..) It's a simple two-step (or one, even) process: Go HERE, and look for the girl called "Grace". Looks familiar? Umm well that's because that's me! So if you've enjoyed my blog and would love to see me swatch/review more stuff, be nice to me and click on the "Vote" button. :) You can do it once a day, but I don't imagine anyone's going to do that LOL, so I'd be happy if you just voted a couple of times. If you're really lazy, CLICKING HERE leads you directly to the voting form for me :D All you need to do is enter your email address, and you can uncheck the box if you don't want Stila's spam :P

Today's NOTD is one of my favourite holos of all time. There are some holos that are awesome because of the way they totally bring out the holo rainbow on your nails (like GOSH Holographic, from THIS POST) and there are some which have a more diffused holographic glitter - you get holo glitter bits, but not the entire holo rainbow. I usually don't fancy these types of holos, but OPI DS Extravagance is one I make an exception for.

Although the holo is a little more diffused in this one, I still love it nonetheless, and I can't quite say why. Maybe its because of its holographic sparkliness, maybe its the rich pinky-plum jewel tone that really feels extravagant (like the polish name, haha) and makes me feel like I've got little gems on my fingertips everytime I wear it, maybe it's the way it glints and winks in the sunlight. Whatever it is, I love this baby. And summertime is the perfect time to wear holos - the extra daylight just makes them so much more glitzy.

Here's two coats in natural sunlight:

OPI DS Extravagance

Application on this one was good, as good as OPI's usually get. Not streaky, opaque in two coats, and generally trouble-free. I'm personally a huge fan of OPI's Pro-Wide brush, so I love the huge brush size because it lets me do my man-hands in fewer strokes, but girls with slimmer proper ladylike hands might not fancy it so much.

Like all holographic polishes, this one was a little high maintanence and chippy. It chipped after a couple of days, which is not unusual for a holo polish. I really love this one, and it's a pity the entire DS series was limited edition. I really wanted DS Original too, but I never got to lay my greedy paws on it before it wasn't sold anymore.

Sunday, April 18, 2010

Diamond Cosmetics Chainmail Charm and Orly Foil FX Shine KOTD

There are times when I really hate my photo-taking skills, my camera, and my crappy looking nails, because on the rare times when I really like a KOTD, my photos never ever seem to do it justice. Today's KOTD, using a holographic polish (OOOHHHH HOLOS!) and an Orly Foil FX, is one case in point.

For the base I used Diamond Cosmetics Chainmail Charm, also known in some circles as Chacha (you know, CHAinmail CHArm?). It's a beautiful black holo, and the holographic shimmer really shines through. Unfortunately, my camera didn't seem to like the holographic goodness as much as I did:

Diamond Cosmetics Chainmail Charm

Please excuse the messiness, because that was a pre-cleanup picture (because I was going to konad over it). But the point is, that is a gorgeous holo which my camera didn't capture. I really like it, it's cool, and I love holos. Something about the colour-changing shimmer just captures me.

I could look at Chainmail Charm, but in one of my rare moments of brilliance, I thought I would konad over it, with one of the newfangled Orly Foil FXs, Shine (I've been trying to get Luxe - the gold one), using a full nail design from the Konad M78 plate.

Diamond Cosmetics Chainmail Charm Orly Foil FX Luxe

Diamond Cosmetics Chainmail Charm Orly Shine Foil FX

I know it doesn't look like much in the photo, but can I pinky promise you that it looks soooo much better in real life? Orly Shine (and the other Foil FXs I'm told) make for good konading polishes, so I wasn't disappointed to konad with this. Shine is a Foil with plenty of bling to draw attention to any dull manicure! The Orly Foil FXs have not been disappointing so far - I've got Rage and Shine, and I've been trying to go after Luxe. I love the combination of black and silver, holo and foil, and bling and more bling! I just wish my camera and my skills were better at capturing this blingy goodness.

Sunday, December 27, 2009

Color Club Fashion Addict and OPI Lincoln Park After Dark: KOTD

Hey guys! I'm back from X'Mas break and crazy laptop hard drive issues!

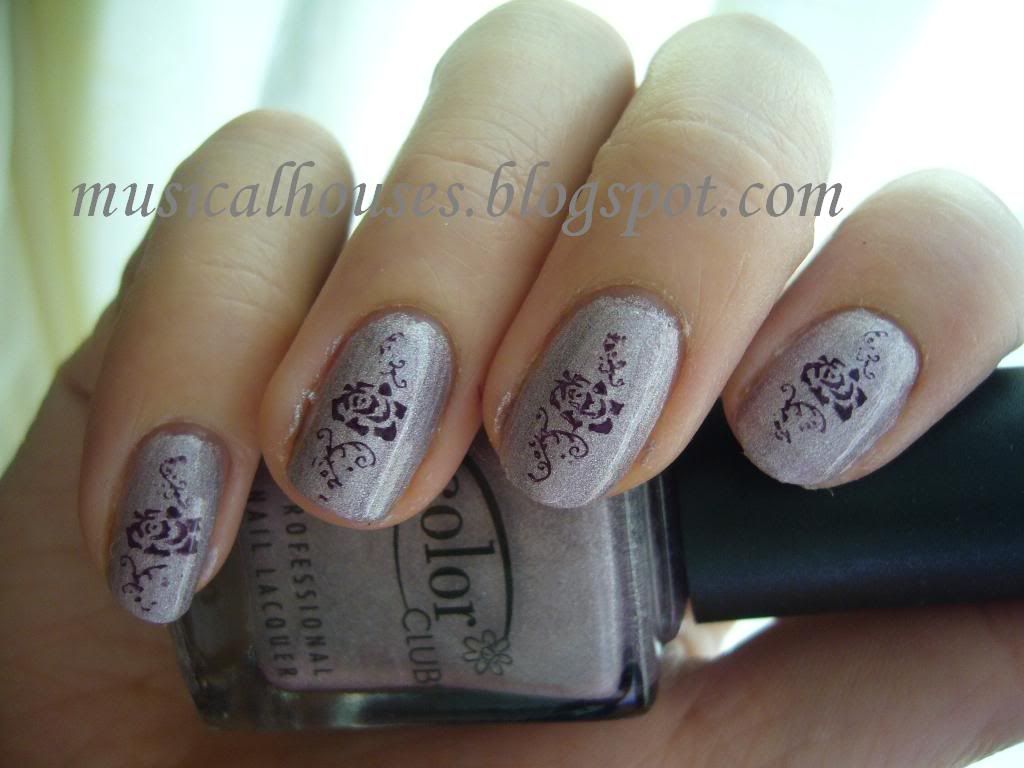
Today's KOTD is Color Club's Fashion Addict as the base with OPI's timeless LPAD for the flowers. Plate is M34 I believe.

Once again, excuse the frazzles, the pre-clean-up pics, and the general sloppiness of application - I'm so not a pro. I so suck at nails, but I promise I'm getting better. Slowly. Sort of.

Color Club Fashion Addict OPI Lincoln Park After Dark

I liked this, but it's not the most creative or the best KOTD/NOTD ever. I don't mind it though, This was 2 coats of Fashion Addict. Unfortunately the holo effect is rather weak on me - I don't know how other bloggers get their awesome holos to show on photograph, but this was under natural light in my room beside the window, and it doesn't look holo at all! I'm utterly crushed. Maybe I got a dud. Sigh.

I tried getting other pictures of this KOTD in other lighting, to see if I could get the holo to show up - warm light, white light, natural light, a mix of lights - and this was the best I could get:

Color Club Fashion Addict OPI Lincoln Park After Dark

Don't you just hate it when holos aren't holo enough?

Friday, December 11, 2009

GOSH Holographic Nail Polish: NOTD

I know that this blog is about faces (makeup) and fingers (nail polish), but due to my lowdown on my makeup brushes (Part 1 here and Part 2 will be up tomorrow!) I've been neglecting the fingers side of the blog a little. But now I'm evening the score with this darling of an NOTD: GOSH Holographic!

For those who don't know what GOSH is, it's a drugstore brand found in the UK. (EDITED TO ADD: Thanks to Pixie, I've learned that they're actually a Danish company! Cool! Thanks Pixie!) Superdrug carries it, I believe. And even then, it's pretty expensive - for drugstore that is. But they make some awesome items, particularly their lipsticks, eyeliners and nail polish. At some point I hope to swatch the lipsticks and eyeliners, but I don't think I could ever swatch all their polishes...

Anyway back to the story. Yes, GOSH Holographic. I've heard this touted as a dupe (possibly a better dupe, even) for Chanel Holographic, but I don't own the Chanel, so I can't verify. But this polish was holo awesomeness in a bottle, and even though the holo doesn't look like much on the bottle, on the nail, it is absolutely STUNNING. My friends always exclaim, "Look! Your nails!" whenever I wear this, so you know it's a keeper.


As you can tell, these were pre-cleanup pics, and they were 3 coats. I'm sorry for the ickiness of the pre-cleanup-ness, and for the frazzles on my cuticles. But frazzles and ickiness aside, isn't this a beauty? It's HOLO, BABY, HOLO! I even took two pictures just to show you how holo it can be, since the first picture sucked in showing the holo.

Application on this one isn't bad once you get the hang of it. I read a lot of blogs saying that they had to use 3 or 4 coats, and this was a nightmare to apply as the holographic glitter tended to clump together and become uneven when you apply subsequent coats....Well, that is true, if you don't wait for the polish to completely, and I DO mean completely, as in let's-wait-an-extra-3-mins-to-be-sure kind of completely, dry. Yes, it's a little of a hassle in that sense, because with most polishes you can get away with not waiting for the layers to dry, but with this one, you simply can't - if you put more polish on top of a wet layer, you will get the result of having your holographic glitter clump together, and you'll get too much holo in one spot, and no holo in other spots. And THEN you'll have to use 3 or 4 coats to cover up the uneveness. So, as long as you wait for each sheet to dry, you could probably just 2-3. Of course, I didn't know this, so I painted on top of wet polish, and had to use 3 coats.

Same goes for the basecoat. I've also read a lot of blogs going on about how you simply can't use a basecoat with it, and in this NOTD I've successfully used it with a basecoat - once again, the trick is to wait for the basecoat to completely, completey dry.

The polish in this bottle has a consistency that's more on the watery side, but not enough to irk me. All the GOSH polishes I've had were all of that slightly watery consistency, with the exception of GOSH Rainbow (which I should totally do an NOTD with sometime!) because of the suspended flakies in the polish. The good thing about GOSH polishes that I really like though, is that they dry SUPER fast. Sometimes I even wonder why I bother to use a topcoat with these things, because when I'm done doing my last nail, my first nail is already dry to the touch, albeit a very light and ginger touch. Of course these don't dry as fast as the OPI Suedes, but for non-suede polish, they're pretty much the fastest drying ones I've found so far.

Edited to add: The day after, IT CHIPPED! And I don't mean like tiny, at-the-corners-of-your-nails chipped. This is odd, because the other GOSH polishes I've tried weren't like that. But Pixie tells me it might be because it's a holo polish, and holo polishes in general tend to be chippy. I think she's right :) Thanks again, Pixie!