Showing posts with label Black. Show all posts

Sunday, July 10, 2011

BeautyUK Shatter Polish: Swatches, Review, NOTD

The BeautyUK Shatter Polishes have landed! And once BeautyUK puts them out, they do not one, but three amazing colours! The Shatter Polish comes in three colours, Goth, which is a matte black, Glam Rock, which is a silver with a foil finish, and Punk, which is a matte hot pink. A matte hot pink - can you imagine that? I'm excited!

BeautyUK Shatter Polish

Anyway, I'm sure you don't want me to blabber on unnecessarily, so without further ado, here are swatches!

First of all, let's take a look at Goth. This is a pure black, simple as that. Here it is over another drugstore brand, Collection 2000 Aztec Gold. I rather like this combination!

beautyuk shatter polish goth


One of the things I found when applying Goth was that it really shatters into tiny bits, thus displaying very prominently the colour underneath. So if you would like the under-colour to be more visible, this is a great one to choose. However, I found it a little clumpy even in the bottle, and hard to work with. It was a little difficult to get an even coat on the nail. Still, the effect it gave was gorgeous.

beautyuk shatter polish goth 2


The next colour is Glam Rock, which is silver foil. I was so excited for this, as the large majority of matte polishes up to now have been mattes, so it was great to see them come in other finishes! Here it is over Boots No. 7 Totally Teal. I love how the deep teal base makes the silver just pop!

beautyuk shatter polish glam rock


Like the Goth shatter polish, I found this a little tricky to work with. However, it wasn't as lumpy as Goth for some reason, and I applied it with reasonable ease. Another thing I noticed was that this didn't "split" as much as Goth did. When I wore Goth, you could see big patches of the base colour showing through where the polish had split. Here, the gaps were much smaller, and if you apply too thick a coat, the polish won't shatter very nicely. You can see this on my index finger, where the shattering effect was pathetic as the coat was too thick. A little goes a long way with this one.

beautyuk shatter polish glam rock (2)


Lastly, we have Punk! I was so excited for Punk - after all, how many hot pink shatter polishes are there out there? So I just had to try this. Here it is over Wet n Wild Quartz of Course. On hindsight, maybe I could have picked a more contrasting colour to pair Punk with, but hey, it still looks gorgeous right? And I'm not sure how clear it is from the photos, but Punk is HOT NEON PINK! Woohoo! Retina-searing, breath-bating, ice-melting hot pink! Such a beauty.

beautyuk shatter polish punk


I personally felt that Punk was the easieset out of all the three polishes to apply - it wasn't lumpy in the bottle, and application was good. I had no issues with this. As you can see in the photos, it also shattered very nicely, and I didn't have big bald patches or tiny shatter lines. As with most shatter polishes, though, the thicker the coat, the larger the shatter pieces.

beautyuk shatter polish punk 2


Since I'm a huge fan of shatter polishes, I'm absolutely in love with BeautyUK's latest offerings. Goth, as your standard black shatter, has been done before by other brands, but I especially love Punk and Glam Rock, both of which are of good quality and are unique in the colours. I don't see many coloured shatters by readily avaialble drugstore brands, so these are definitely worth checking out.

(Product was sent for review. Review is my complete and honest opinion. I am not affiliated with/compensated by the company.)

Tuesday, June 28, 2011

China Glaze Lubu Heels + Nails Inc Trafalgar Square = Awesome Bling!

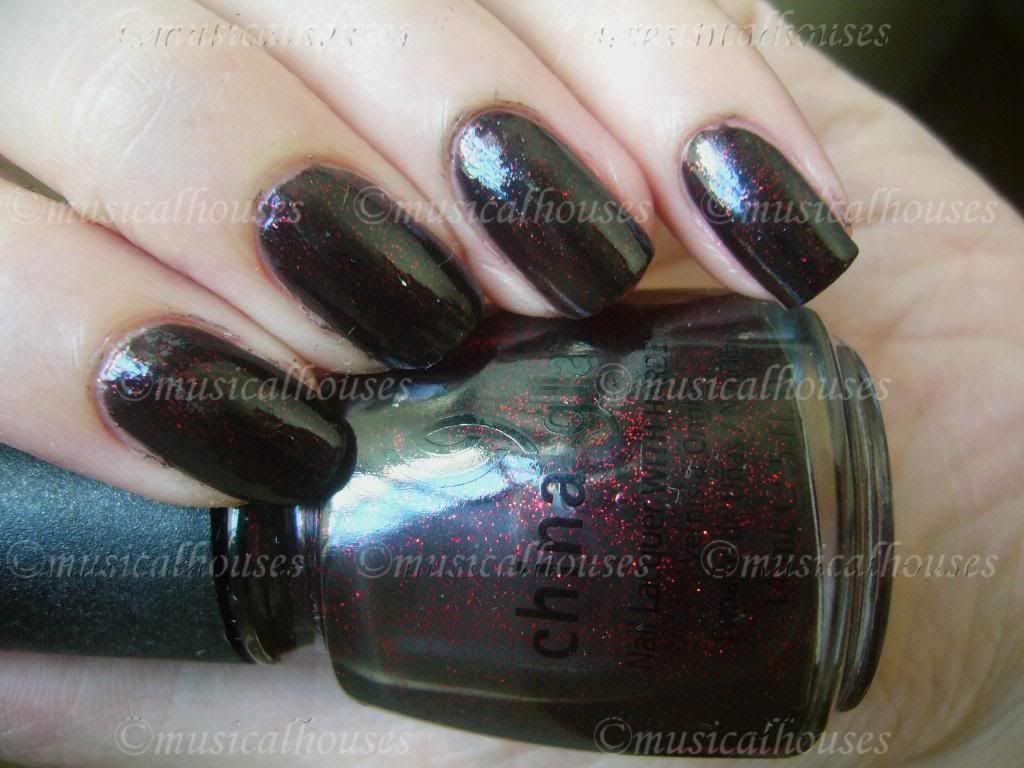
Don't you just love how cool my nails look right now? I love how this looks - just like red stars in a deep, black sky, or burning embers in a bed of lava. This look was actually two polishes layered together. For the base, I used China Glaze Lubu Heels, a black jelly with small red glitter, one of the classics in their permanent collection. However, it wasn't quite blingy enough for me, so I layered Nails Inc Trafalgar Square over it. Nails Inc Trafalgar Square consists of large chunks or red glitter in a clear base - perfect for layering over Lubu Heels!


I'm always been a fan of both China Glaze and Nails Inc, and both of these were polishes I bought awhile back but never used as often as I liked (although I've previously used Trafalgar Square in another NOTD, one that's really old.)

China Glaze Lubu Heels Nails Inc Trafalgar Square 3


Both these brands generally work very well on me, and the application for China Glaze and Nails Inc was quite trouble-free for glitter polishes. As always, since the glitter does tend to clump up in some places, you do need to work a little with the brush to try to ensure as even a distribution of glitter as possible. Otherwise, I had no issues with application.

Both China Glaze and Nails Inc wear well on me, so this lasted for around 3-4 days before chipping. That's pretty decent for me, so I have no complaints about lasting power.

China Glaze Lubu Heels Nails Inc Trafalgar Square 2

I love my nails, and I love the glitter and bling. Although I don't always use glitter polishes, I can't wait to do another manicure like that again!

Tuesday, March 8, 2011

Barry M Instant Nail Effects: Black and Silver Crackle!

If you haven't been living on Mars, you'll know what Barry M Instant Nail Effects is - it's this (not-so) newfangled thing called crackle or shatter polish. The reason why these polishes are called crackle or shatters is because, once applied on the nail, they dry up and contract very quickly, producing the coolest shatter/crackle effects ever.

Crackle polishes actually first made an appearance in in the late 90's (the brand was Covergirl back then, and the polishes were called Crackle Laquers), but went out of vogue until the trend was revived. Isn't it interesting how fashion - even nail fashion - seems to go in cycles? I mean, there were the Covergirl Crackle Laquers, and then the Sally Hansen Nail Prisms (holographic before holo became a trend), and the Maybelline Street Wears (all kinds of funky finishes and colours back in the day)! So you never know - that old dinky bottle of crap from 10 years ago might just be next trend!

Anyway, I'm sure you didn't want to hear a history lesson about nail polish (and yes, I am so much of a geek I know the origins of nail polish trends). I'm sure you wanted to see the awesome crackle/shatter effects.

Barry M Instant Effects

There are many crackle polishes out there, of course, and Barry M and OPI were the first brands to have them out this time round. (Unfortunately Covergirl missed out.) But between the two, I personally prefer the Barry M Instant Nail Effects to OPI's Black Shatter - it's cheaper, and it shatters better. Yes, I said that Barry M's crackle polish beat out OPI Black Shatter! Now I'd better hide before the OPI fans come after me.

One of the things to note about applying crackle polishes is that they dry very fast. Very, very fast, as in almost immediately. So they're really like an instant way to glam up your nails!

barry m instant nail effects 2


One of the things about applying crackle/shatter polish is that the way the polish shatters/crackles on your nails is highly dependent on how thick or thin the coat of polish is. I've found that in general, thin coats tend to produce finer, smaller shatters, while thick coats tend to shatter in bigger pieces. Whether you prefer your shatters smaller or larger is personal preference, of course, but for me, I strive for a happy medium.

Here's Barry M Instant Nail Effects applied thinly. As you can see, it shatters in to tiny pieces, especially nearer the tip of the nail, where the coat of polish was the thinnest. Some people may like that, but for me, it's a bit too thin.

barry m instant nail effects thin


And here's the same shatter polish, applied thickly. This one I didn't like at all. It seemed a bit gloopy and clumpy instead of nicely crackling.

barry m instant nail effects thick


One of the last questions I faced when applying my shatter polish was - to top coat or not to top coat? Either way is possible, the topcoat just gives a glossier finish to the nails. Personally I prefer applying top coat, because the shattered bits can chip off quite easily without it.

barry m instant nail effects 3


I'm really loving my shatter manicure, and I'm so excited to try this out on top of other colours! *Waves nails around in the air*

Tuesday, February 8, 2011

Girly Punk Valentine's Day Nails: Neon Pink and Black Roses

Nothing says girly punk like hot pink and black. And nothing says romance like roses. So when I decided to do Valentine's Day manicure, I decided to combine these two aspects, although I'm not very girly, punky, or romantic. I keep seeing all these sterotypical reds, pale pinks, and sheers coming out near Valentine's Day, and I keep thinking - why shouldn't I do something different?

So here you are: neon pink, black, and roses. The horror!

Girly punk Valentine's Day nails

To be honest, I didn't quite like my nails when I first wore them. I thought they were ugly (and I'm sure some of my readers will think they ARE ugly), but for some reason they grew on me, and I can't quite figure out why either. Maybe I got used to the ugliness. Or maybe the hot pink colour matched my funky Valentine's Day eye look. LOL. But it did grow on me, and yes, I was walking around with blinding hot pink nails with OTT rose designs. Yeeha!

funky valentine day nails 2


For the neon pink base, I used Eyeko Punk Polish for Neon Nails, which is a one-coater if you're careful. Like other Eyeko polishes I've used before, the consistency is a little on the thick side, so if you prefer a thinner polish consistency, one or two drops of thinner would be more than sufficient. Oh, and this polish is NEON. Like eyeball searing, highlighter pink kind of neon. I know it doesn't look like it in the photos, but that's because I just couldn't capture the blinding neon-ness of it on camera.

For the black roses, I used my favourite konading black of all time, Wet n Wild Black. It's dirt cheap (if you don't count the cost of shipping it outside of the USA), easily available, and opaque in one coat. Perfect for konading!

The konad plate used was M65. I figured I could get away with such an OTT rose design only around Valentine's Day!

funky valentine day nails 3


So this isn't your traditional Valentine's Day sweetheart manicure. But I have those too! If this is making you puke, feel free to try some other sweetheart, Valentine-appropriate posts: there's one with girly chic, a feminine pastel purple that's holo to boot, a nude with a touch of flowers, and the near classic jewel pinky-purple holo. Probably more traditionally Valentine Day-ish than this sad excuse to wear hot pink, LOL!

I'm not much of a romantic, and I really couldn't care less for Valentine's Day. But I figured, since it was the occasion for it, why not go all out in dressing up my nails? It's the perfect reason to get away with whatever I want!

(Eyeko product sent for review. Review is my complete and honest opinion. I am not affiliated with/compensated by the company.)

Friday, November 26, 2010

ManGlaze Fuggen Ugly vs Orly Iron Butterfly: Dupes or Not?

Awhile back, I was gushing over ManGlaze Fuggen Ugly, the ubercool matte tar grey polish. I mentioned in the post that there were similar colours, so I thought I'd do a comparison post today swatching Fuggen Ugly side-by-side with one of its sisters, Orly Iron Butterfly.

Here are comparison swatches:

ManGlaze Fuggen Ugly Orly Iron Butterfly

L-R: First 2 fingers ManGlaze Fuggen Ugly, last 2 fingers Orly Iron Butterfly

As you can see, there are similarities and differences. The similarities are that both are matte, and have the same black-grey base. Both also apply very well, although I feel like Fuggen Ugly applies a bit better, because it goes on in thinner coats.

The differences are that Iron Butterfly has much bigger silver glitter than Fuggen Ugly. Fuggen Ugly isn't totally matte - there are very minute silver shimmer that adds a dimension to the colour, but the shimmer isn't visible on the finger, unlike in Iron Butterfly, where you can clearly see the discrete pieces of silver shimmer.

So, which one should you spring for? A lot is going to hinge on the shimmer for most people. If you want a more matte shade, then ManGlaze is the one to go for. But if you want some bling, then Orly's version will be your preferred choice.

Monday, July 26, 2010

KOTD: Orly Foil Luxe and Wet n Wild Black

A few weeks back, my programme had a boat party for the postgraduates, and of course I had to go - it was free for students, and they provided dinner, and you know I'm all up for a free meal :P The dress code was formal, but in rebellion of the utter impracticality of wearing tuxedos and gowns in summer, our class chose to go informal anyway.

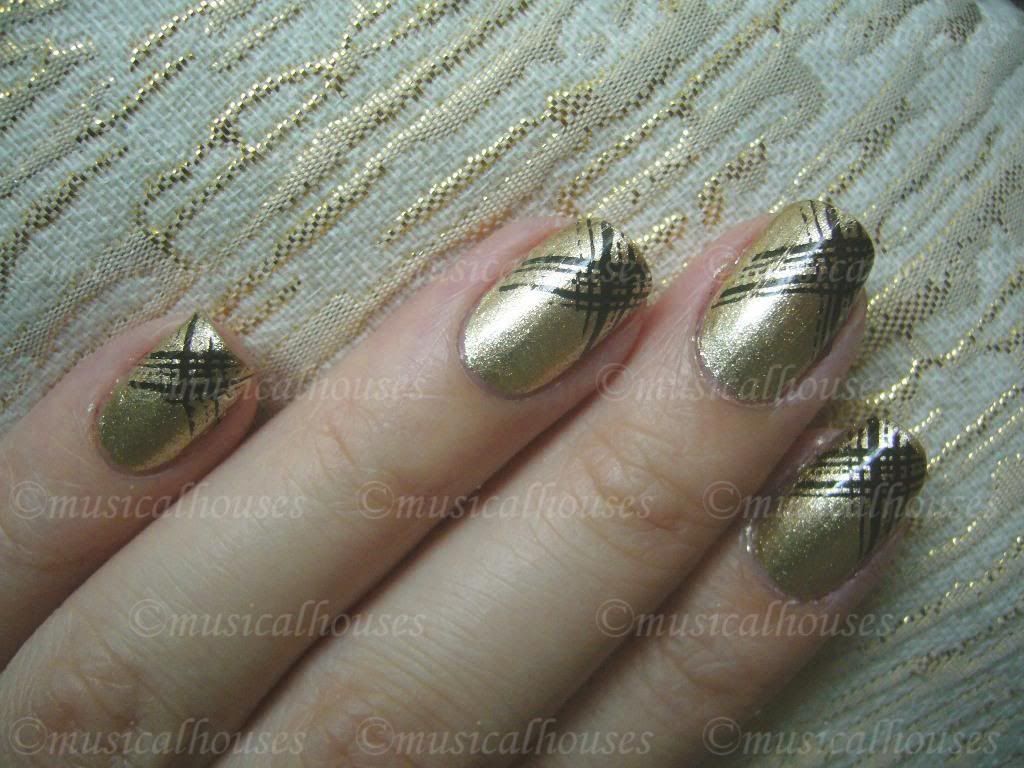
Anyway, the whole point of me telling you this is because it actually has something to do with today's NOTD. I started building my outfit around my nails, as I am increasingly wont to do lately, and I decided that I wanted to wear blingy gold nails with some konad. (Note to everyone: only weirdos like me start thinking about their nails before thinking about their clothes.)

Naturally, I picked out Orly Luxe, from the Foil FX Collection, and I stamped it over with Wet n Wild Black. I used Konad plate M81 for the design. And tada:

Orly Luxe Wet n Wild Black Konad

This is two coats of Orly Luxe, under natural light, konaded over with Wet n Wild Black, which is a really opaque black creme. I just LOVE Orly Luxe. It's probably the best gold foil ever, and definitely the standout of the entire Orly Foil FX Collection. I mean, good gold foils are hard to come by, and this one is smooth, easy to apply, and opaque in one coat (ooh, gold foil konad coming up!). And not to mention I love the colour - it's a shade of gold that isn't too brassy or too warm, and would be perfect on almost anybody.

After I had done my nails, I realized that my nails matched a skirt I had just bought a few days ago (on sale from H&M, yay for 50% off summer sales!). So I ended up wearing the skirt, just because they matched my nails! And yes I know I'm a freak for matching my clothes to my nails, and not the other way around. What can I say - I probably have more nail polishes than I have clothes.

Here's a photo of my nails against the skirt. See, see? They match!

Orly Luxe Foil FX

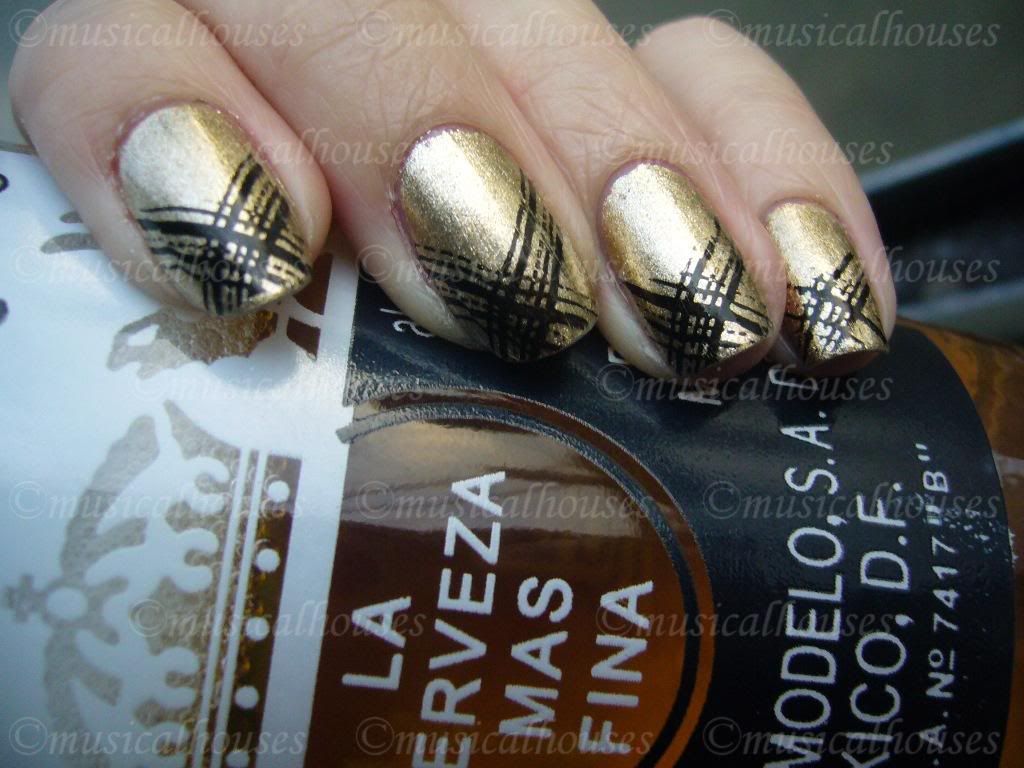
And of course, since it was a boat party for postgrads, I managed to find something else that matched my nails:

Orly Luxe Wet n Wild Black

That was my friend's bottle, LOL. I don't drink very much, primarily because alcohol is full of empty calories, and I've never thought it was worth putting on weight for, with the possible sole exception of pear cider, LOL. I know, I'm a weirdo, but that's a pretty convincing argument to me, LOL.

Anyway, that was my KOTD, and I promise the next post won't feature any alcohol :P

Wednesday, June 16, 2010

Eyeko Petite, Coral and Vampira Polish Swatches!

The last time I tried Eyeko's polishes, I wasn't impressed at all. Not one bit. This was back when Eyeko was still carried at my Superdrug last year. I saw their polishes in their cute bottles that looked like little milk jugs, picked up 3 or 4, tried on Pretty Polish, and promptly gave it away. It was sheer, streaky, annoying and took 4 coats to even out. And the cute milk jug bottle? It looked really eye-catching, but didn't help polish application one bit, since the polish tended to get clogged up around the too-wide rim of the bottle, and the flat cap was hard to hold.

Enter 2010, and Eyeko seems to have reformulated their polishes. These ones that I've tried were much better, both in terms of packaging. Gone are the annoying milk jug bottles with the too-wide rim and hard-to-hold cap. These ones are thinner, and sleeker, and the rim and cap are normal to hold and use. The formula also seems to have improved - out of the three I've swatched, only one was sheer, and it was billed as a polish for French manicures, so that's to be expected. There are also some interesting and surprising dupes here.

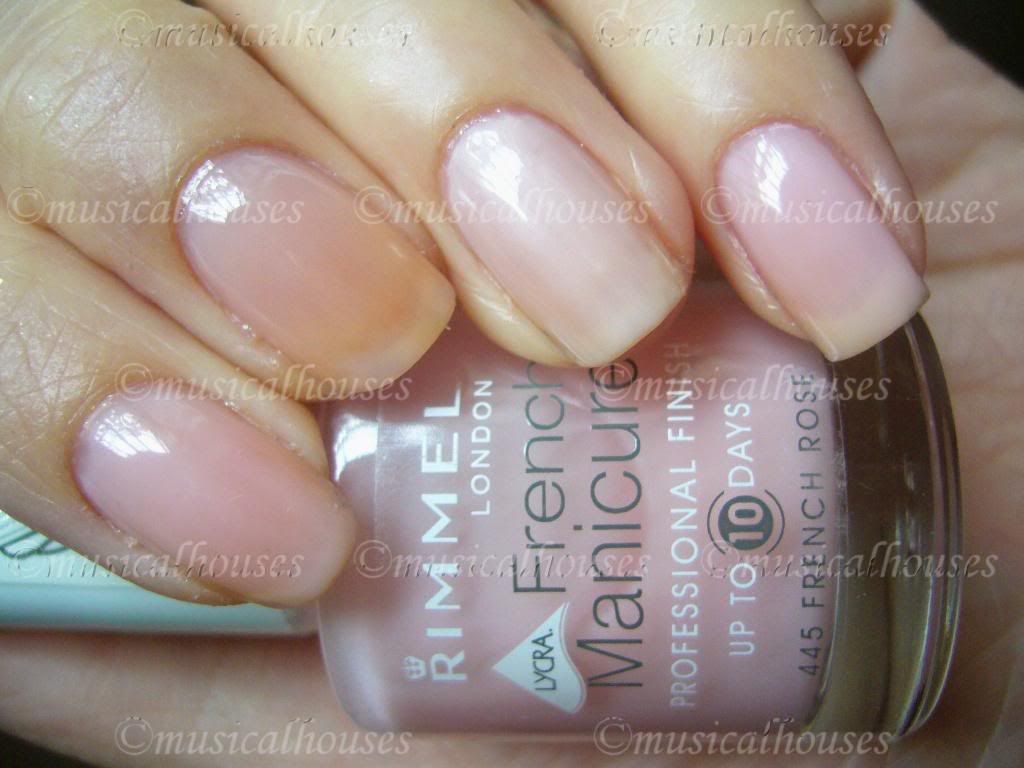
First up, we have Petite Polish, for French Nails (don't you just love how Eyeko tells you what sort of effect their polish is supposed to give? I think it's kinda cute). This one is sheer, as billed. One coat was a barely noticeable pale milky sheer pink, two coats still left VNL (visible nail line) but was still sheer. This swatch is two coats, in natural light. Pardon the stained nails:

Eyeko Petite Polish

As you can see, this is a far cry from my past experience with their Pretty Polish. While that one was impossibly streaky, this was actually even with just two coats. Streakiness is a major downfall of many a sheer french pink, so consider me impressed, even if the colour isn't devastatingly unique.

Speaking of not being unique, there are similar colours, and a close-but-not-quite-dupe in other lines:

Eyeko Petite Polish, Rimmel French Rose, Nails Inc Elizabeth Street

L-R: Eyeko Petite Polish, Rimmel French Rose, Nails Inc Elizabeth Street, Eyeko Petite Polish

I used two coats of each for the swatches to ensure consistency. As you can see, Nails Inc Elizabeth Street is the most opaque of the lot, reaching near-full opacity in 2 coats. Rimmel French Rose is the sheerest of the lot, showing the most VNL, while Eyeko's Petite Polish is sort of in between, but closer to the Rimmel French Rose polish.

I think these are great for French manicures, and also very work appropriate - barely anyone is going to notice you're wearing polish with these.

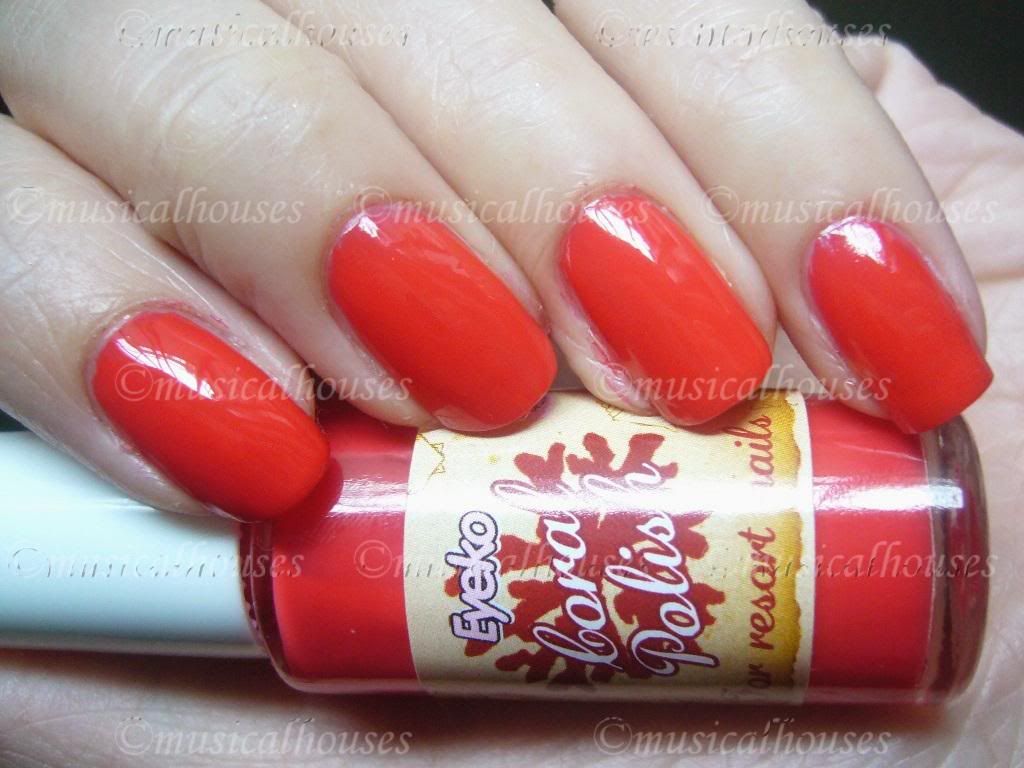
Next up, we have a stunner in Eyeko's Coral Polish, for Resort Nails. This one really gives a very summery, holiday feel, and was opaque in two coats:

Eyeko Coral Polish

This is really very pretty isn't it? I generally stay away from most coral colours, because they usually carry too much orange for my taste, but this is on the red side of coral, and thus doesn't make me look as jaundiced as it potentially could. I also liked the application on this one, it applied well and was smooth. I really love this one, it's not neon, but it's bright, summery and happy.

Lastly, we have Eyeko Vampira Polish, for Goth Nails. Although I'm not quite sure if black automatically equals goth, considering that China Glaze's Lubu Heels is pretty much a classic in the nail polish fanatic's world, and it's a very similar colour. Vampira Polish, as is Lubu Heels, is a sheer black with red glitter, which is pretty much opaque in two coats. If you can't see the red glitter bits, feel free to click on the picture to view the humongous full size version, complete with messy cuticles (don't say I didn't warn you):

Eyeko Vampira Polish

You know I love me my vampies, so you know I'll love this. Black with red glitter? I'll take it!

But how does Eyeko Vampira Polish compare to China Glaze's cult favourite, Lubu Heels? They look awfully similar, could they be dupes? Well, I know you'd be wondering, so I generously swatched them for you :P LOL! These swatches are two coats of each:

Eyeko Vampira China Glaze Lubu Heels Polish

L-R: China Glaze Lubu Heels, Eyeko Vampira Polish, China Glaze Lubu Heels, Eyeko Vampira Polish

As you can see, they are pretty much dupes, colour-wise, right down to the size and density of glitter. I know the China Glaze diehard fans are going to howl at the presence of a dupe of one of their cult favourites, but to be fair, the China Glaze version was easier to apply, and didn't pull or streak as much. So they might be dupes colour-wise, the China Glaze had a better application. But for anyone in the UK who can't get their hands on China Glaze, the Eyeko is definitely a good substitute.

After my previous mishap with the older Eyeko polishes, I swore I'd never buy anything Eyeko again. These polishes have redeemed Eyeko in my eyes. None of these colours are super unique, but they are good basics with good quality, and worth a look at.

These products were provided to me for review purposes. I am not affilated with the company. This review is my complete and honest opinion.

Sunday, April 18, 2010

Diamond Cosmetics Chainmail Charm and Orly Foil FX Shine KOTD

There are times when I really hate my photo-taking skills, my camera, and my crappy looking nails, because on the rare times when I really like a KOTD, my photos never ever seem to do it justice. Today's KOTD, using a holographic polish (OOOHHHH HOLOS!) and an Orly Foil FX, is one case in point.

For the base I used Diamond Cosmetics Chainmail Charm, also known in some circles as Chacha (you know, CHAinmail CHArm?). It's a beautiful black holo, and the holographic shimmer really shines through. Unfortunately, my camera didn't seem to like the holographic goodness as much as I did:

Diamond Cosmetics Chainmail Charm

Please excuse the messiness, because that was a pre-cleanup picture (because I was going to konad over it). But the point is, that is a gorgeous holo which my camera didn't capture. I really like it, it's cool, and I love holos. Something about the colour-changing shimmer just captures me.

I could look at Chainmail Charm, but in one of my rare moments of brilliance, I thought I would konad over it, with one of the newfangled Orly Foil FXs, Shine (I've been trying to get Luxe - the gold one), using a full nail design from the Konad M78 plate.

Diamond Cosmetics Chainmail Charm Orly Foil FX Luxe

Diamond Cosmetics Chainmail Charm Orly Shine Foil FX

I know it doesn't look like much in the photo, but can I pinky promise you that it looks soooo much better in real life? Orly Shine (and the other Foil FXs I'm told) make for good konading polishes, so I wasn't disappointed to konad with this. Shine is a Foil with plenty of bling to draw attention to any dull manicure! The Orly Foil FXs have not been disappointing so far - I've got Rage and Shine, and I've been trying to go after Luxe. I love the combination of black and silver, holo and foil, and bling and more bling! I just wish my camera and my skills were better at capturing this blingy goodness.

Friday, February 5, 2010

Ciate Sharp Tailoring and Velvet Tuxedo Lace Manicure Fail

So now that Winter's almost over, I'm finally wearing my Winter collection nail polishes. Go figure. Anyway, good polish is timeless! The perfect edgy neutral is always timeless and oh-so-chic all year round! And the two Ciate colours I happened to buy when they were on sale at ASOS are pretty neutral and chic. I bought Sharp Tailoring and Velvet Tuxedo.

First of all, bottle pics of both of them! I'm really digging these two.

Sharp Tailoring is a very edgy neutral greige (you know, a cross between a grey and a beige), and is one of those colours that I LOVE to death. This one isn't like the rest of them - it doesn't have any pink in it (unlike the other greige-y colours), and that's what makes it stand out. It also has gold shimmer that really amps up the colour.

Ciate Sharp Tailoring

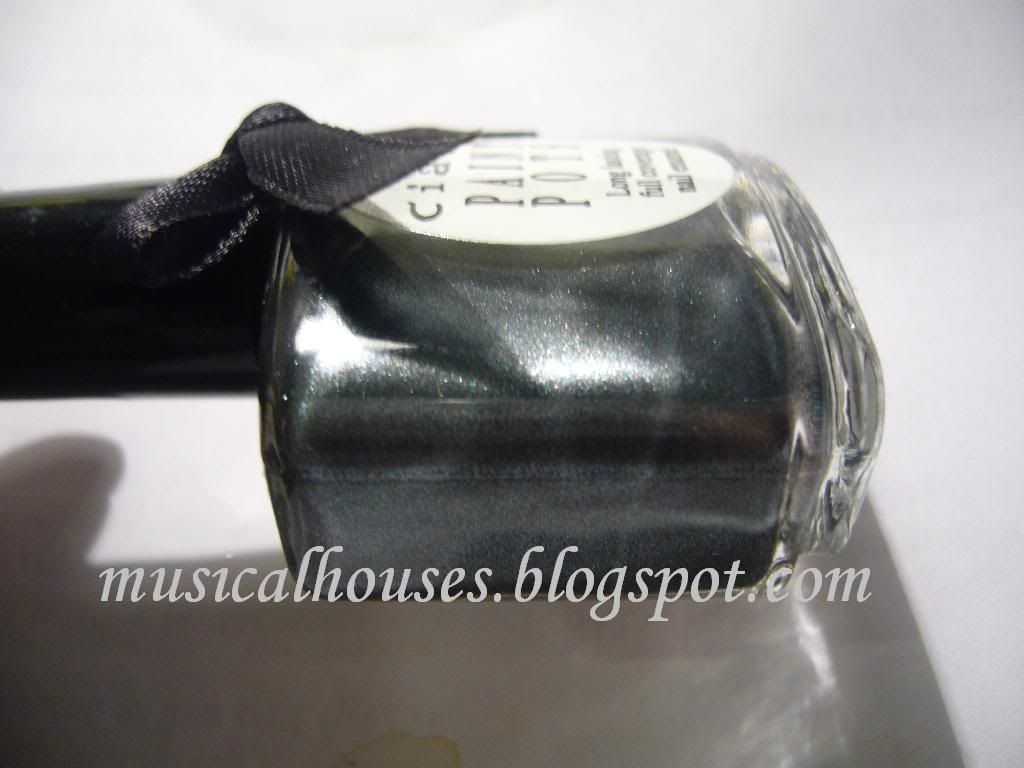
Velvet Tuxedo is a blackened-grey, or is it a black? that has beautiful multidimensional shimmer:

Ciate Velvet Tuxedo

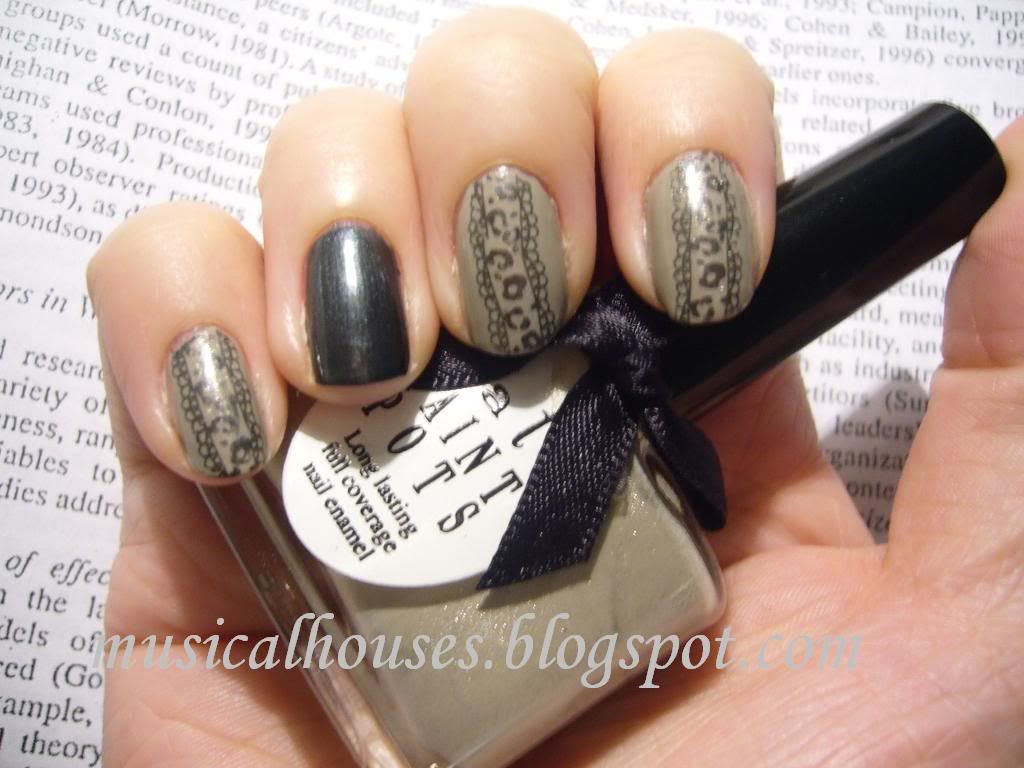
I love those two colours, and I decided to do a KOTD with them, in attempt to replicate the "Lace Manicure" look that's been so popular lately. The KOTD itself turned out to be a massive fail due to my inability to stamp and align properly, but here you go anyway. I believe the plate is M57.

As you can see, in natural sunlight, Sharp Tailoring is a lot more grey, and a lot less beige.

Ciate Sharp Tailoring Velvet Tuxedo

In indoor lighting, you can really see it's beige-y-ness, and it's gold shimmer (which my @#$@% camera can't seem to capture. I think my camera has issues with shimmer). I do think it stands out best indoors, as opposed to outdoors:

Ciate Sharp Tailoring Velvet Tuxedo

Application-wise, both of them were a little mixed. Velvet Tuxedo gave me no problem whatsoever - it was opaque in one coat, and good enough to konad with. Sharp tailoring was a little sheer and streaky, but two coats took care of everything, so it's not a big deal. However, I do wonder if it was the polish or my lack of skillz that made this a little tricky to work with. But anyway, I've yet to see a dupe of this pretty little colour, so if anyone knows of a dupe with less application issues, let me know!

Friday, January 29, 2010

Asos Paints by Ciate: Mary-Kate NOTD: Black Blah

So a long time ago in this post I said I would show you guys my NOTDs of the Asos Paints by Ciate when I eventually got around to doing them. Well I did, and here you are.

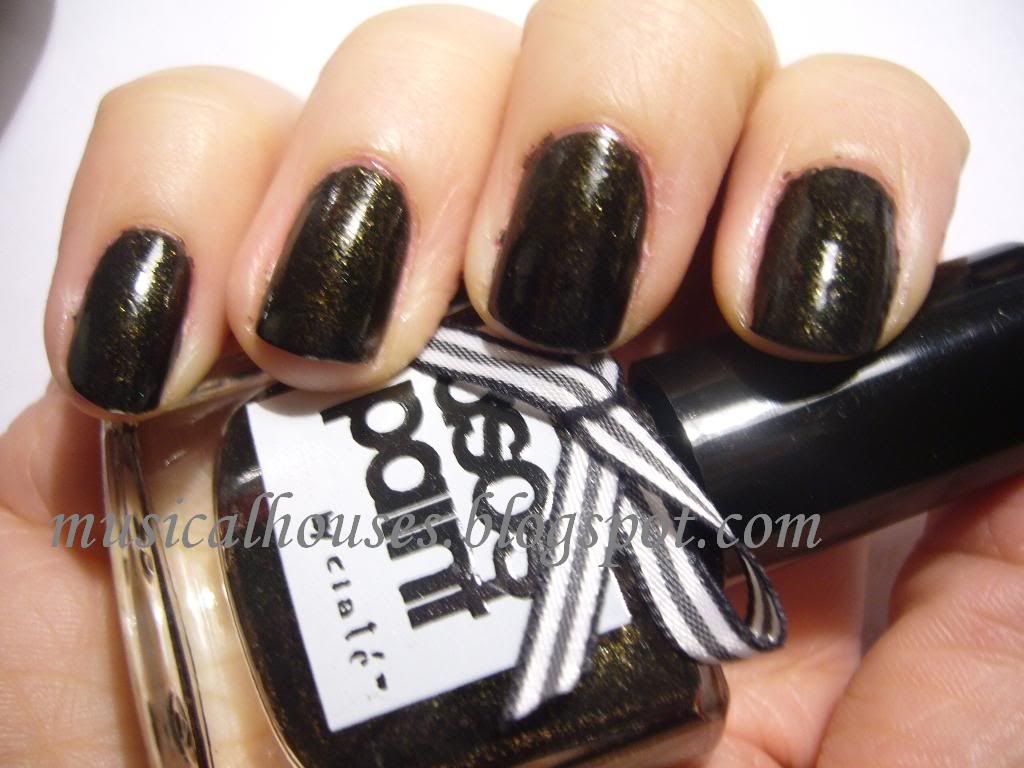
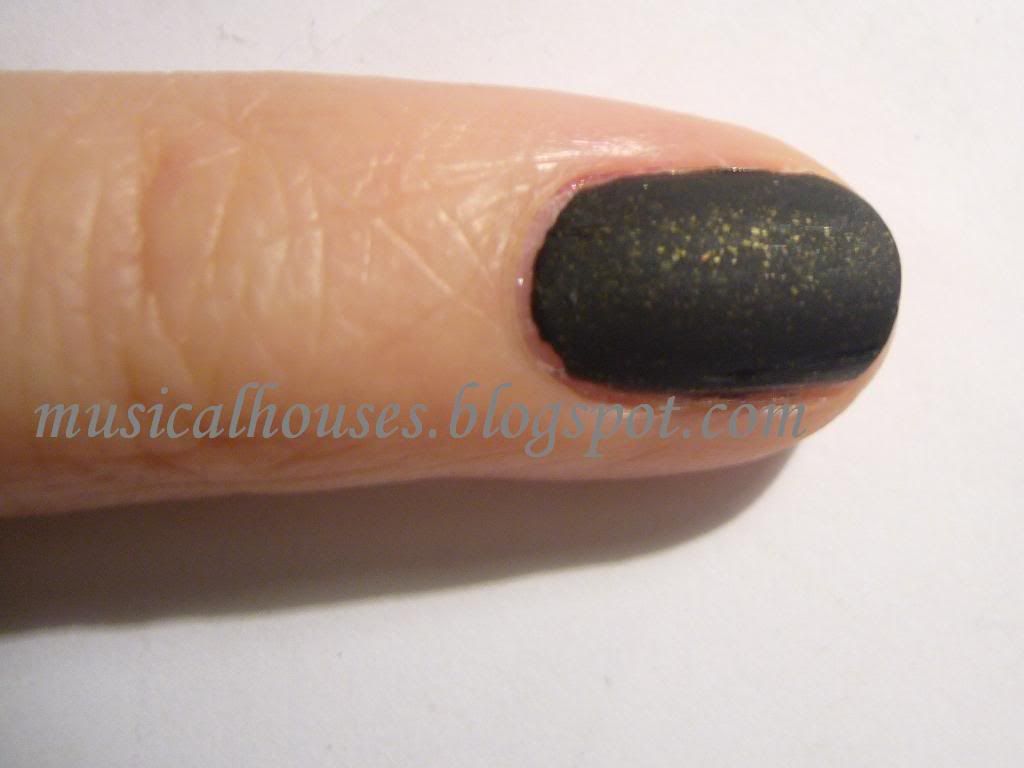
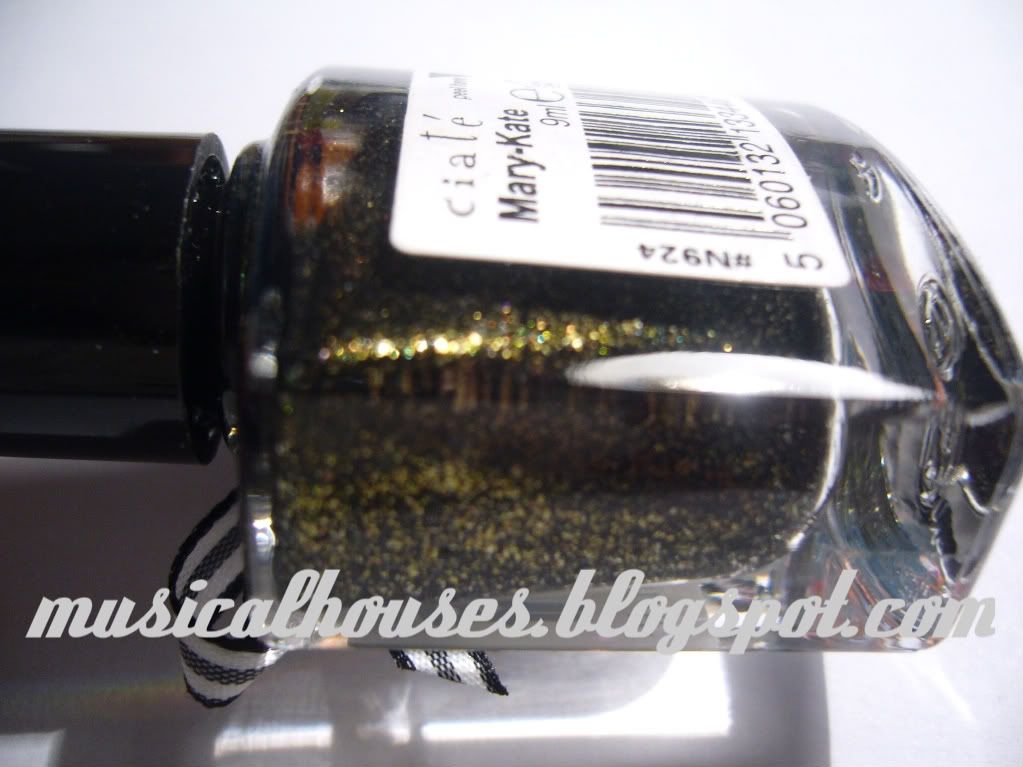
The first one (because my nails are nubbins now and that's the perfect excuse for wearing black) is of course Mary-Kate, the black I was so excited about. In the bottle it was a black with gold glitter that looks a little yellow or orange in some lights, and I was hoping that it would be a jelly, for that super cool glitter-suspended-in-black-jelly effect a la ChinaGlaze's Lubu Heels. And honestly, this one had the potential to one up Lubu Heels, because the glitter is a lot more noticeable in the bottle.

Well you notice I said "had". Turns out the black base was a creme, not a jelly, so although this polish is positively LOADED with glitter, most of it got buried under the opacity of the creme. Now opacity isn't a good thing - those of you who know me know that I LOVE polishes that are opaque in one coat, as they do double duty as nail colour and Konad colour, but when it comes to glitter in a black base, I personally feel a jelly or a sheer finish is best for showing off the glitter. Anyway, this one was still cool, but didn't live up to it's full potential.

Check out this photo. Once again, this was pre-cleanup, so please forgive the mess everywhere. I was just so excited to show you guys a pic of these that cleanup couldn't wait! I know, I'm such a slob when it comes to painting neatly. I'm learning!

Asos Paints Ciate Mary Kate

Ah, Mary-Kate. I'm so sad for you. It's not that you can't see the glitter - as you can see, when the glitter catches the light it does sparkle - but why is this in a creme and not a jelly base?! It almost makes me want to cry, because that is such a waste of good gold glitter. Seriously, when you remove this thing you'll realize how glitter packed it was - it does tend to get everywhere, as is common with glitters - but you only really see the top layer of glitter when it's actually on your nail. The rest are just buried in the opaque creme base and are invisible.

Anyway, this one was a pretty awesome polish otherwise. It was opaque in one coat, although I did two, and the formula on this was smooth. I was really impressed! In fact someone mentioned on a forum that she thought these applied better than the regular Ciate, and I wouldn't be surprised, because this was really smooth and nicely pigmented. The only thing is that the brush was a bit unwieldy for me, which resulted in a greater amount of mess than usual. I personally thought that this was an awesome formula ruined by a terrible brush, but then again brushes are very much a personal preference (you know, like how some people like the OPI Pro-Wide brushes and some don't), so my word isn't final authority, of course. It doesn't dry smooth of course, like most glitters, but that isn't an issue for me, and isn't anything a couple of layers of topcoat can't fix. Wear time was good on this one - I didn't experience any major chipping or tipwear issues.

And because you know I love to mattify everything with glitter in it, here's a lousy swatch of it with RBL Matte Topcoat over. (Sorry for the one-finger and lousy swatch, I did it after I took off the polish from most of my fingers. That also explains why the polish is seeing some wear.)

Asos Paints Ciate Mary Kate

I think it's pretty cool mattified. But I also wish it had a jelly base so it'd be even more cool mattified. Still, can't complain - it's opaque enough to Konad with, and it does have a pretty good formulation. I hope Ciate polishes in general are this nicely formulated, I'm looking forward to trying out the rest of my bottles.

Bookmark and Share

Saturday, January 16, 2010

Asos Paints by Ciate Winter Collection Bottle Pics

Ciate is a UK-based brand of nail polish founded by celebrity nail technican Charlotte Straughan, and is hard to find, even within the UK (or at least in Central London, where I'm at). I end up ordering most of mine online. They also aren't very well-known or popular (unlike fellow UK-based nail polish brand Nails Inc), but those who are in the know will have at least heard of them. They also have the cutest bottles ever. I don't have enough Ciate to form a good opinion of their quality in general, but I've heard raves from some, and I've also heard from others that it's a hit-and-miss brnad (like every other). In general they seem pretty good though.

Ciate also has a line of nail polish specially created for ASOS, called Asos Paints by Ciate, kind of like how Sephora has their Sephora by OPI collection. These have a similar packaging, but it's not exactly like the regular Ciate collection. The bottles are smaller, being 9ml instead of 13.5ml, and the bottles are also square instead of rectangular, and have a shorter handle. Each season, ASOS also releases a limited edition Asos Paints by Ciate. I just got the Winter 2009 Asos Paints by Ciate collection, because it was on sale at Asos, so that explains why I'm reviewing these after the fact. I'm sorry, but I'm not gettin' any swag down here, so everything I review either comes from my own pocket, or me squatting at counters and swatching their testers. What can I say, it's tough being a small-time blogger, LOL.

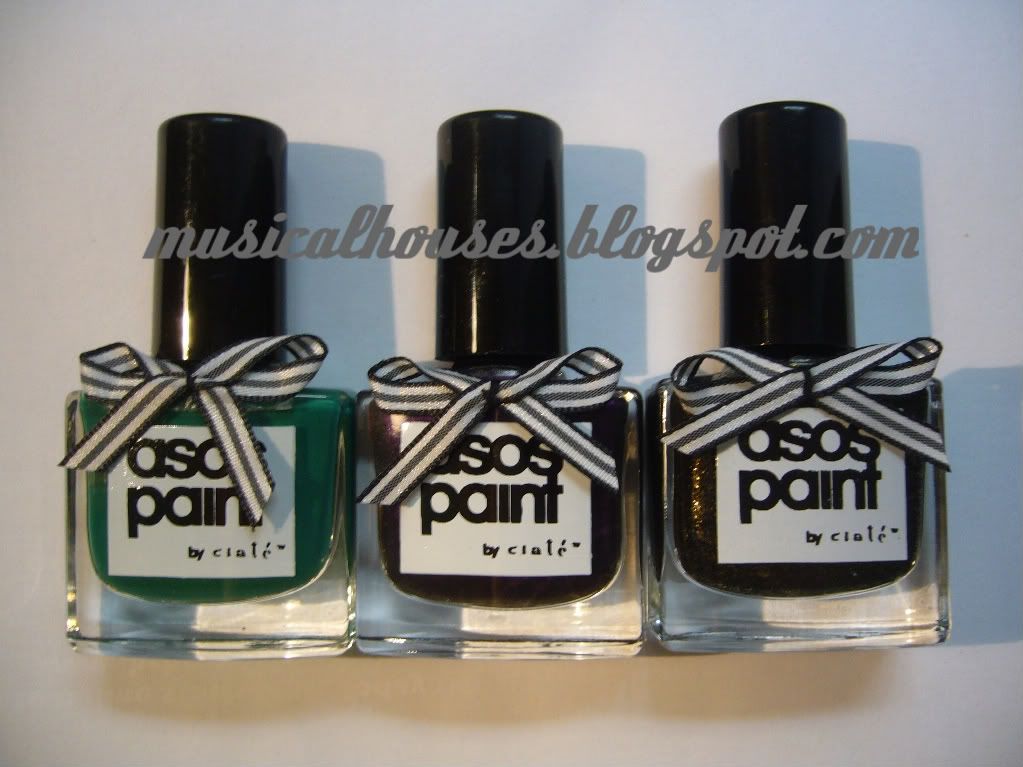
Anyway, the Asos Paints by Ciate Winter 2009 collection consists of 3 pretty exciting colours that are awesome all-year round. I haven't gotten around to trying them out yet, but here are bottle pictures! I know bottle pictures aren't preferred, and most people would rather see on-nail swatches, but I couldn't wait (and not just because I'm overdue). This collection's pretty cool - it's a good digression from the usual pale pinks and sheers. Without further ado, here are pictures!

Asos Paints by Ciate Winter Collection

Here's the entire collection altogether. This photo isn't very great, the individual bottle pictures are more accurate.

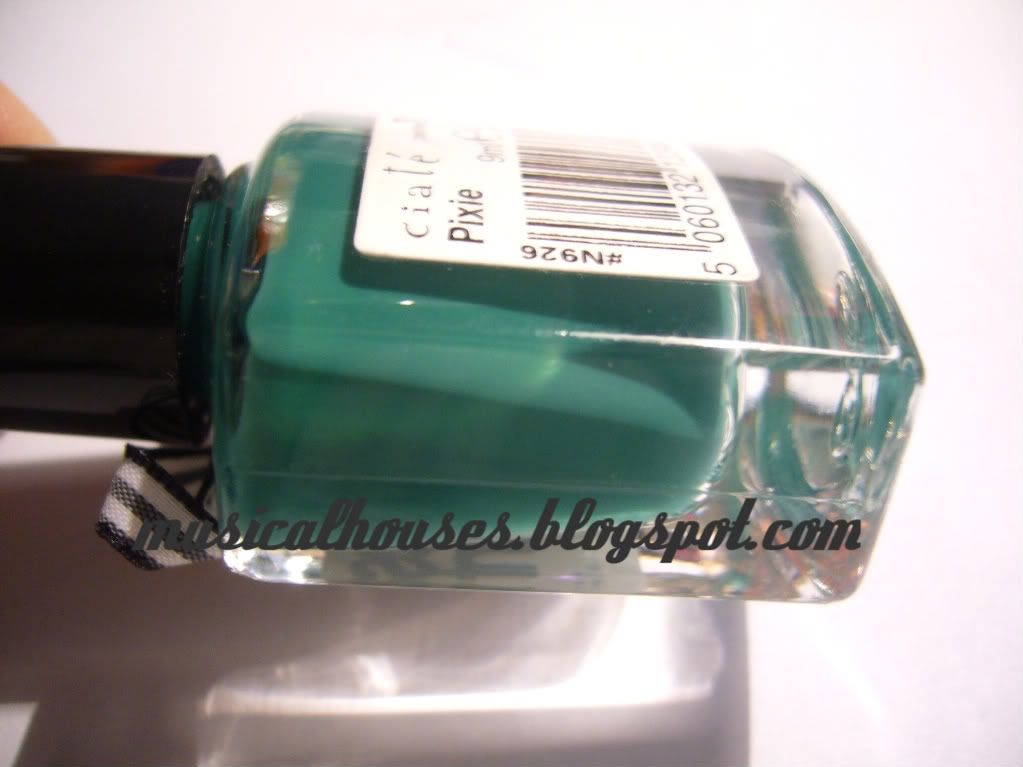
Pixie Asos Paints by Ciate Winter Collection

First up is Pixie, a emerald-jade green, that's NOT a Chanel Jade dupe. It's a darker, deeper and more jewel-toned green, more emerald and less pastel. I LOVE this colour, and I don't even normally like greens! This is a creme finish, very smooth looking.

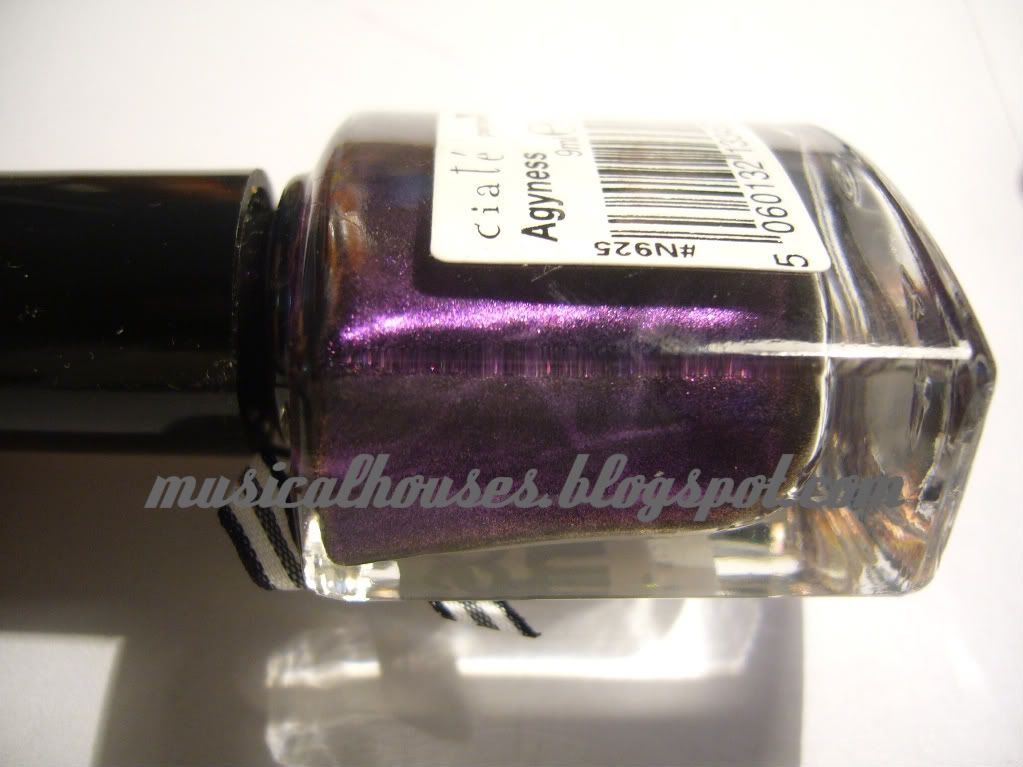
Agyness Asos Paints by Ciate Winter Collection

Next up is Agyness, a medium-to-dark royal purple with multicoloured shimmer. I love purples, so this is right up my alley.

Mary-Kate Asos Paints by Ciate Winter Collection

Lastly, we have Mary-Kate, which is a really awesome black with fine glitter. I can't really discern all the glitter in this colour, but from the bottle it looks to be gold, but it also has hints of orange and green. Super cool. It's hard to tell if the black is opaque or jelly-ish, but I'm hoping it's a jelly! I totally want to try this one out. This is probably my favourite of the bunch! It kind of reminds me of $OPI 212, except that 212 has bigger chunks of glitter. The glitter in this one isn't too big.

So that's it for today, and when I do get around to trying this out (my untrieds list of nail polish is so long right now), I'll be sure to do an NOTD post!

Bookmark and Share