Showing posts with label Glitter. Show all posts

Tuesday, June 28, 2011

China Glaze Lubu Heels + Nails Inc Trafalgar Square = Awesome Bling!

Don't you just love how cool my nails look right now? I love how this looks - just like red stars in a deep, black sky, or burning embers in a bed of lava. This look was actually two polishes layered together. For the base, I used China Glaze Lubu Heels, a black jelly with small red glitter, one of the classics in their permanent collection. However, it wasn't quite blingy enough for me, so I layered Nails Inc Trafalgar Square over it. Nails Inc Trafalgar Square consists of large chunks or red glitter in a clear base - perfect for layering over Lubu Heels!


I'm always been a fan of both China Glaze and Nails Inc, and both of these were polishes I bought awhile back but never used as often as I liked (although I've previously used Trafalgar Square in another NOTD, one that's really old.)

China Glaze Lubu Heels Nails Inc Trafalgar Square 3


Both these brands generally work very well on me, and the application for China Glaze and Nails Inc was quite trouble-free for glitter polishes. As always, since the glitter does tend to clump up in some places, you do need to work a little with the brush to try to ensure as even a distribution of glitter as possible. Otherwise, I had no issues with application.

Both China Glaze and Nails Inc wear well on me, so this lasted for around 3-4 days before chipping. That's pretty decent for me, so I have no complaints about lasting power.

China Glaze Lubu Heels Nails Inc Trafalgar Square 2

I love my nails, and I love the glitter and bling. Although I don't always use glitter polishes, I can't wait to do another manicure like that again!

Saturday, January 29, 2011

Chinese Lunar New Year Nails Using Color Club X'mas!

Chinese New Year is upon us soon, and in the spirit of celebrating the lunar new year, I thought I'd dress up my nails for the occasion! I went with the predominant colours of Chinese New Year - red and gold. And in the spirit of festivities, the brighter and gaudier the colours are, the better they are! LOL! So, I hunted around in my stash for the brightest, blingiest red and gold nail polishes I could find.

And lo and behold: I found these shades of red and gold glitter, perfect for the New Year!

color club enchanted holiday wish list red


But wait! Aren't those from Color Club's last Christmas collection? If that was your reaction, you're sharp - those are indeed the latest Christmas polishes from Color Club's Enchanted Holiday seasonal collection. Specifically, that gorgeous red is Wish List Red, and the gold is Enchanted Holiday. But whatdayaknow, those Christmassy shades of red and gold just also happen to be just right for Chinese New Year! Who says you can't do bling on both occasions?

So, since I had done the Christmas bling on my nails, I decided to do some Chinese New Year bling too. But since I had to wear this to work, the bling had to be a lot more toned down than I would have liked - I couldn't risk blinding my clients!

Here's the watered-down bling for the year of the rabbit. In the end I settled on a gradient manicure, using Wish List Red as a base, and layering Enchanted Holiday on the top:

Chinese lunar New Year nails

Isn't that awesome? It makes me feel all in the mood for firecrackers, red packets and dumplings! And the best part is - you can actually replicate a look like that for Christmas, because you're using the same colours! Talk about killing two birds with one stone!

Color Club Wish List Red is a gorgeous jelly-like red base with dense amounts of red glitter. I really like this one, it kind of reminds me a little bit of China Glaze's Ruby Slippers. Very pretty, and very eye-catching. Enchanted Holiday consists of gold glitter, but more sparsely distributed in a clear base. I also liked this one, and I think it'll be perfect for layering over other polishes.

Both polishes were a litte bit on the thick side, which is not my usual experience with Color Club. It could just be that the base formulation was made thicker to ensure even dispersal of glitter in the polish. Still, they applied well, and dried fast. As with most glitters, you may wish to use two coats of topcoat instead of one if you want a finish that's smooth to the touch. I made do with just one, though.

chinese new year nails


I'm so psyched about my nails, and I think they're a great way to celebrate the lunar new year! If you've been looking for nail colours for Chinese New Year, but can't seem to find any, Color Club's Wish List Red and Enchanted Holiday would be perfect. If, on the other hand, you don't celebrate Chinese New Year, but still wish it was Christmas, now you have the perfect excuse to continue wearing Christmas colours!

(Product provided for review. Review is my honest and complete opinion. I am not affiliated with/compensated by company.)

Saturday, December 25, 2010

Incoco Nail Polish Strips Review/Tutorial: 24 Karats: Gold Bling

Merry Christmas everyone! In the spirit of Christmas, I'm going to talk about one of the most gorgeous gold nail polishes I've ever seen - but it doesn't even come in a bottle! Incoco Nail Polish Strips in 24 Karats is a gold glitter that blings and shines under both low light as well as strong light, and it's absolutely gorgeous to look at. It's also perfect for the festive Christmas season just upon us!

Incoco nail strips 24 karat

Incoco calls their products dry nail appliques, but they're strips of nail polish that you peel off from a backing and stick onto your nail. Pretty cool, right? I've tried a couple of them, and while they do have a slight learning curve, once you get them right, they're very easy to use, and produce a very professional effect.

incoco nail strips 24 karat


However, it can get a bit used to applying nail polish strips instead of liquid nail polish, so here's a step by step guide of how to apply them:

1. Find the size of nail strip that most closely matches the size of your nail, and tear off the relevant nail strip. In this case below, I'm using the last strip for my little finger.

incoco nail strips 24 karat


2. Peel off the plastic covering on top of the strip. Then peel off the nail polish strip from the paper backing. Be careful not to tear the strip when doing this!

incoco nail strips 24 karat


3. Gently smooth the strip over the nail. I personally find the easiest way to do this is to start with center of the nail, and smooth out towards the sides to avoid any wrinkles in the strip.

incoco nail strips 24 karat


4. File off any excess nail polish strip. I think the best way is to file downwards, isntead of from side to side. This way, the strip isn't disturbed by any filing motion.

incoco nail strips 24 karat


5. And viola! All done.

incoco nail strips 24 karat


I guess the fit of the appliques for the nails would vary from person to person, but for me, I found that I was able to find a match for all my nails. I thought the strips were nicely sized, and they also matched the natural curvature of my nails and cuticles. I also liked that these strips were very thin, unlike some other nail appliques I've tried, and thus easier to place on the nail. As far as nail strips go, I think these are one of the best.

Here's 24 Karat, in it's full glory. I don't think I ever got such a neat gap by painting manually, LOL.

incoco nail strips 24 karat


I've also discovered that if your nails are short, you can further save money by cutting each nail strip into half - so that instead of wasting the free end (shown in the image in Step 3), you could use it for another nail - perhaps the same nail on your opposite hand. I've managed to do this successfully, but your nails have to be pretty short in order for this tip to work.

These strips lasted about 3 days on me - a bit shorter than if I had painted my nails myself, but given that they were very little trouble to put them on, I thought it was still worth it.

One thing makes me wonder though - these strips so happen to fit the curvature of my cuticles perfectly, but I'm wondering how they would work for other women with more square-shaped cuticles. Also, I'mm wondering how the strips would work for girls whose nails are differently-sized compared to mine. My sister is tiny, and I think most of the strips would probably be too large for her teensy nails. But on me, they fit perfectly, so I'm not complaining, and I imagine they'd be fine for most women. But I could imagine on very petite girls (I'm talking about having to get your clothes from the kids' department petite, not size 2 petite here), the strips might be too small.

These strips would probably appeal to women who want to wear nail polish for special events, but who don't wish to paint their own nails or hop into a salon. I don't foresee these replacing the traditional method of painting nails due to the higher cost, but I do think that Incoco products are a beautifully executed concept, and might be worth it for that special occasion.

(Product was sent to me for review. This is my honest and complete opinion of the product. I am not compensated by/affiliated with the company.)

Saturday, December 4, 2010

Christmas Green and Gold Glitter Gradient Nails with Etude House Lucidarling

Christmas is coming, and it's showing on the nails! Today's nails are Christmas-inspired in the seasonal holiday colours of green and gold, and to add to the festive spirit, there's glitter involved. I attempted to do a gradient manicure with the gold glitter, but it was a big fail.

The green nail polish is Nails Inc Fitzhardinge Street, a deep, dark forest green that's so dark as to be almost black. And the glitter was Etude House's Lucidarling Fantastic Nails in 04 Sequin Crystal Gold.

Here's a shot of my gradient fail Christmas mani:

Christmas Nails

I love Nails Inc Fitzhardinge Street - it's almost black, and looks black in most lights, especially with 2 coats. What you see on my nails is one coat, so it still looks green. But any thicker and it will look black on the nails.

I also really like the Etude House colour, 04 Sequin Crystal Gold. For those unfamiliar with Asian brands (and how is that possible, I wonder :P ), Etude House is a Korean drugstore brand that can be found in Asia, and they have cute and girly packaging. The colour, 04 Sequin Crystal Gold, is part of their Lucidarling range, and it contains two sizes of glitter - a small gold glitter, as well as larger circular holographic glitter. And they do have really cute packaging! Take a look at the awfully girly bottle:

etude house lucidarling sequins crystal gold


So now that I've shown you the kawaii-ness of the bottle, let's get back to my nails. I attempted to do the gradient by painting my tips, and then extending the glitter area a little outside the tips. I don't think I did well, but I guess it was my first time:

nails inc fitzharding xmas nails


I know it's not as awesomely blingy or nail art-y as it could have been, but this was the easiest way to sneak in some Christmas spirit without my boss at work noticing!

Thursday, September 30, 2010

China Glaze Atlantis: The Very Last Days of Summer

Okay, so summer was over a long, long time ago, but I thought that I'd better wear this while there was still some semblance of sunlight over dreary London. Also, I'm graduating from University and starting work soon, so I figured that I'd better make my last manicure before I start work a good and fun one, since once I start work I'll be subject to the tyranny of boring sheers, pinks and nudes. Not that there's anything wrong with pinks, sheers, or nudes, but I'll be darned if I have to wear ONLY those...

Anyway, China Glaze Atlantis is gorgeous. It's a teal jelly with holographic glitter chunks, so with it's eye-catching, bold, bright and defiant nature, it's totally appropriate for the last days of summer, before sunlight slips away (as well as the last days of being a freewheeling student, before I slip into the working world)...Pictures really don't do this justice, because my camera can't capture the awesome holographic fullness of this beauty. It just looks like plain old glitter, but it isn't. I need you to imagine that every one of those glitter bits below is twinkling in holo goodness.

China Glaze Atlantis

Atlantis is a chunky glitter, and while I usually hate chunky glitters, I'll make an exception for this one. When I first applied it, I hated it. I was thinking "WTF HUGE CHUNKY GLITTER?! At least it's holograhic..." but once I wore it for a bit more, I started loving it. I think it's acquired taste, especially if you're colour-shy. But it is a lovely colour, and one that's totally unique.

I like how the teal base is a jelly that's not too opaque, so even after two coats, you still see every single glitter bit. The suspended but still visible glitter really adds a dimension to the colour. I think Atlantis is absolutely appropriate as a polish name - it really looks like the diamonds of an ancient city sparkling at the bottom of a deep blue-green sea, forgotten and twinkling beneath the waves.

See what I mean? Who knew polish could tell a story? But this one does. It's almost poetic.

China Glaze Atlantis

Before you guys think I'm off my rockers, I'd better get to the more mundane aspects of polish description. Like application. As with all chunky glitters, Atlantis wasn't exactly smooth going on - the glitters do tend to all clump together at wherever your brush first lands on your nail, so you do have to maneuver carefully to ensure the glitter is as evenly distributed as possible. But otherwise, I didn't have any problems with this.

Despite being a jelly, it was easily buildable, and what you see on my nails is just two coats. I don't know how China Glaze does it, but Atlantis isn't so sheer that it's annoying, but it also isn't so opaque that you can't see the glitter bits embedded in the polish.

Here's a close up shot so you can see the awesome holographic glitter. It really is more holographic in real life, but my camera has issues:

China Glaze Atlantis 2

Of course, it's obvious how much I love this colour. When I move my fingers it sparkles and twinkles, and I absolutely love the bling effect. If you're not colour-shy, or glitter-shy, this one is for you.

Tuesday, August 31, 2010

Eyeko Chi Chi Polish and Punk Polish Swatches!

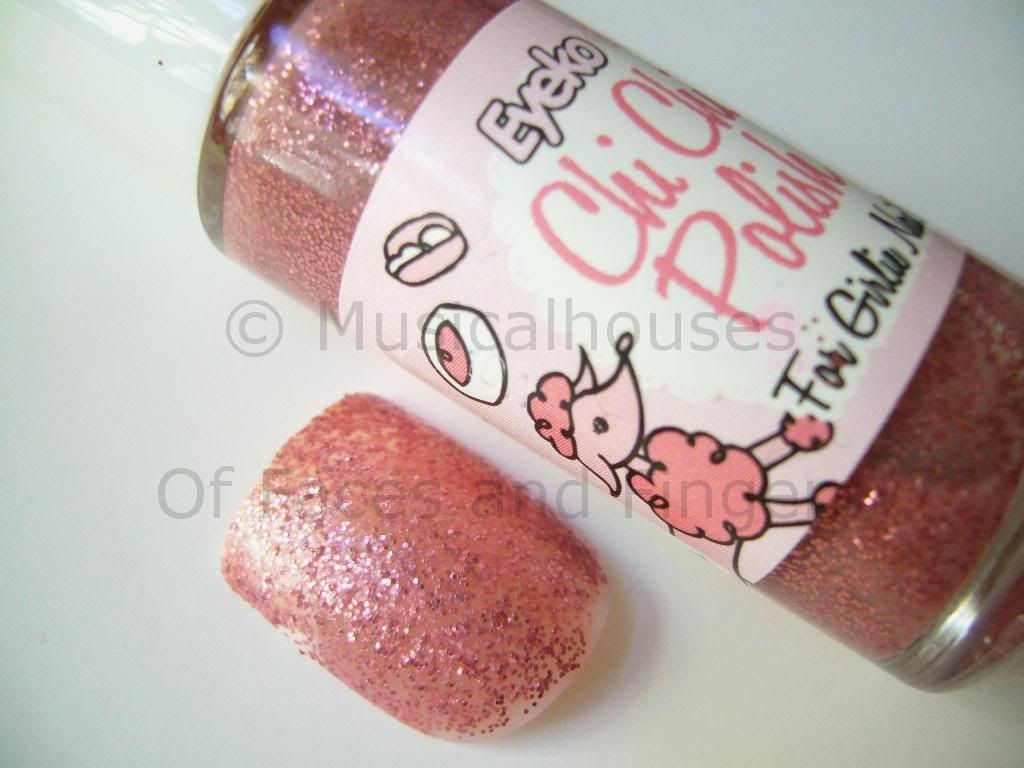
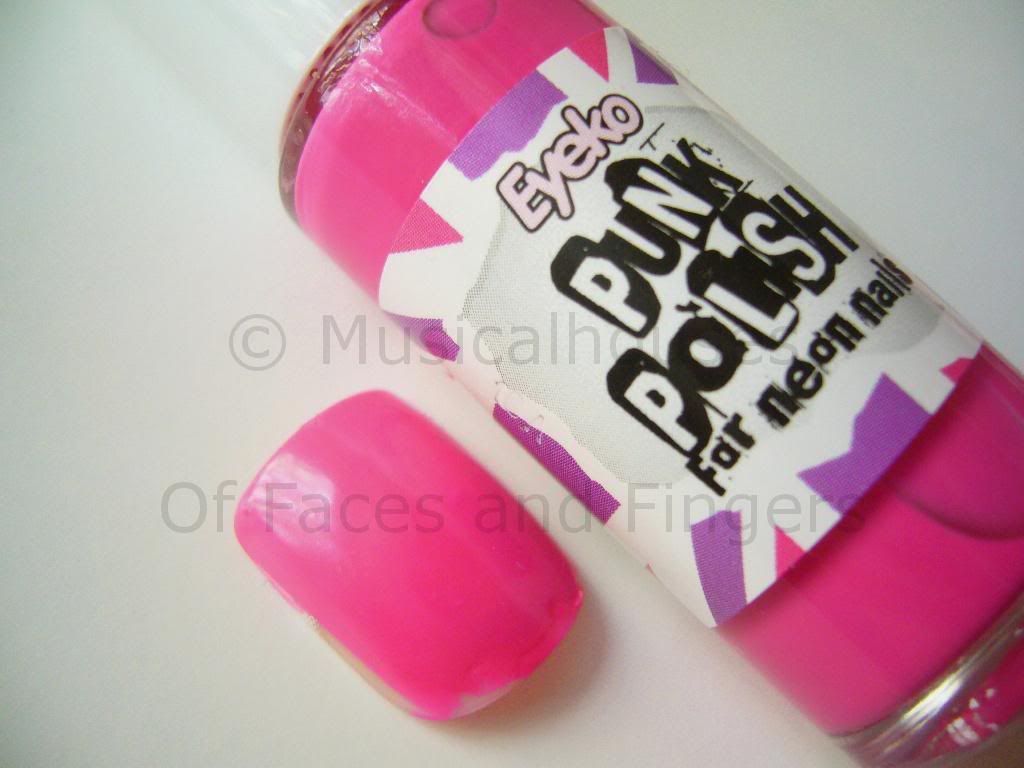
Eyeko has launched two new shades, Chi Chi Polish and Punk Polish. One's a glitter and one's a neon, but they're both pink! Punk Polish is a hot neon pink creme, while Chi Chi is a rose pink glitter in a clear base.

Eyeko Chi Chi Punk Polish

You know I'm a huge fan of swatching, but unfortunately, it so happens that I happen to already have done my nails, complete with nail stickers and bling, and it would have been difficult to remove all that to swatch two polishes. (What, you mean you haven't seen my nail bling yet? See my nail bling here. And follow me on Twitter so you don't miss my future exploits!:P ) So I swatched them on some false nails I had lying around instead. I hope you guys don't mind, I promise that real nail swatches will be up soon!

Here is Chi Chi Polish for Girly Nails:

Eyeko Chi Chi Polish

This is a not-too-dense glitter in clear base, and this was 3 coats. You'll probably need 3-4 coats for full opacity. This would probably work well for layering, because the glitter won't obscure the colour below it. As a standalone colour it's pretty, but you'll need to put more coats on. I personally love this colour, it's sweet and girly but it still packs a punch due to the glitter. It's not too boring.

Here's Punk Polish, for Neon Nails:

Eyeko Punk Polish

This is a hot pink neon shade. It's not retina-searing neon, but it's still a pretty bright hot pink nevertheless. This is a creme and it is nicely opaque in two coats. Otherwise, there's not much I can say - the pictures do all the talking, really :)

Application-wise, both of these were the usual Eyeko quality - that is to say, the texture is a bit thicker than some of the other polishes out there, but they apply quite well. And they're pretty good value for the price, too, so these are worth checking out if you like any of the colours.

(This product was sent to me for review. I am not affiliated with or compensated by the company. This review is my honest and complete opinion.)

Sunday, August 15, 2010

NOTD: The My-Toilet-Overflowed-And-Ruined-My-Mani Edition

One fateful day, my housemate and I decided we would paint our nails together. She wanted to borrow my Orly Luxe (which for some reason, out of all the colours in my stash, is her favourite), and I wanted to borrow her YSL and Anna Sui. It seemed like a good idea.

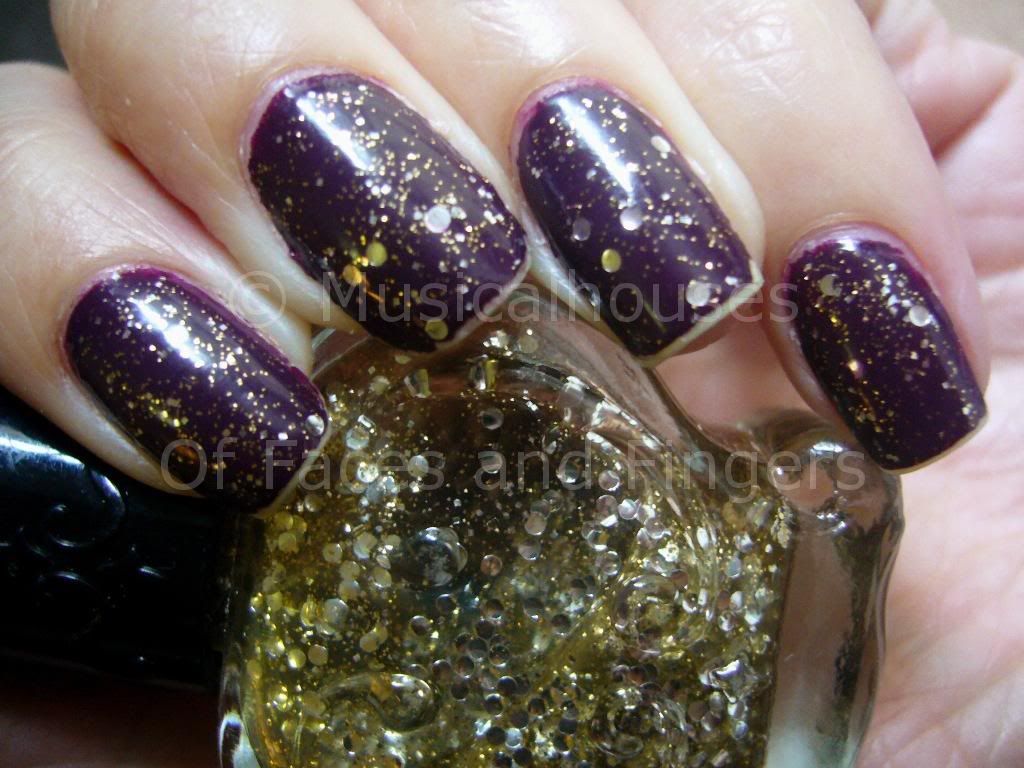
My mani was the most awesome combo ever - or at least, it sure did feel like it then. I used YSL Black Tulipe #34 as the base (or at least I THINK that was what I used - she didn't know what colour it was, and she didn't keep the box so unfortunately I had no way of verifying the colour name, since YSL puts the name of their polishes on the box, not the bottle. But it looks pretty identical to other swatches I've seen). I then layered Anna Sui Nail Color in 020. I have no idea what that is - it must be discontinued or Asia-only or something, since I can't seem to find any other swatches of it, and it isn't listed on the Anna Sui website. Lastly, I sealed in the glitter bits with two layers of topcoat, since they were rather large and I wanted a smooth finish.

Anyway, there I was, luxuriating in the sheer gorgeousness of my mani - hey it's purple, and blingy, and you know I love my purples, and I love them with a bit of bling! And because this mani was a whopping 6 coats (1 base coat, 2 YSL Black Tulipe, 1 Anna Sui 020, 2 top coats), I felt sure it would last forever, because I mean, 6 coats takes a longer while to wear down, right? So I would be able to be absolutely blingtastic for longer! Woohoo!

Sadly, it was ruined the very next day. I went to sleep, happy with my mani, and the next thing I knew, I was woken up at 8am by my housemates, and found that somehow, in the morning, our toilet bowl had overflowed and dirty water had soaked the entire lower floor of our apartment, which housed all our bedrooms and bathrooms. The floor was literally flooded with crapwater. We called the landlord, and he called the plumber, but in true British fashion, they said they would arrive anytime between 9am and 6pm. At that point I just wanted to scream. This is an emergency plumbing service, not Fedex package delivery!

So while my housemates and I waited for the plumbers (who arrived very punctually at 5pm), we spent our day vacuuming out the dirty water from our apartment, and hoping that the toilet bowl wouldn't flood anymore (hah! Murphy's law seems to love situations like this, doesn't it?). We were literally carrying pails of crapwater. It was that bad. It was beyond bad. It was gross, smelly, and just...UGH. If you were following me on Twitter, you would have been subject to my updates on this - I think I must have complained a lot, because some user called "Carpet Cleaning Tips" started following me, LOL!

And after the plumbers had left, we spent the rest of the day cleaning up after the mess. I had to shampoo my darn carpet twice to get rid of the smell, and I think I used up a good third of a bottle of carpet cleaner. At some point I was so desperate I was just pouring carpet cleaning solution into the carpet. At that point, my carpet was clean, but it was still wet. As of now, my carpet is still slowly air-drying, so it's damp and squelchy, but at least it doesn't stink. Sigh.

So what did this really gross story have anything to do with YSL, Anna Sui, or my mani? Well, this is because the two days of maniacal cleaning, carrying, and generally getting my hands wet all the time took its very sad toll on my mani. By the end of it, there was immense tipwear, and there were chips, and my cuticles were dry and red.

And you can take a look for yourself at the damage all this manual labour did to my nails. This is the "better" nail that suffered less damage. To be fair, I think I was relatively fortunate - it could have been much worse:

YSL Black Tulipe

Can you see the major tipwear? Yes, that's how much work my poor hands were subject to. I think my housemates must have thought I was crazy, because while everyone was complaining about the smell and the work, I was moaning, "This is so going to ruin my mani!" But you know how it is...it's always the manis you like best that get ruined in the most horrid fashion. I wouldn't have felt so bad about it if it was a crappy colour I didn't like.

Anyway, YSL Black Tulipe (hopefully my sleuthing was on the mark and I got the name right) is a decently pigmented 2-coater. The first coat was a little bit streaky, but it came out just fine with a second coat. I also love the colour - it's a gorgeous medium-dark purple plum creme that is deep in colour, but not deep enough to be classed as a vampy shade. It isn't that unique, however, and does remind me a lot of another colour I've worn before, Nails Inc Dover Street Market, in this post.

Anna Sui 020 is absolutely gorgeous. Normally I'm not that much of a fan of glitter-in-clear-base variants, but I'm making an exception for this one because it just stands out with it's two types of glitter, making it a lot more interesting than most glitters. There is the more obvious glitter, composed of sparse round discs of silver glitter, and then there are also smaller glitter squares that are gold in colour. I actually really like the fact that they combined gold and silver in this polish, so it can be layered over virtually any colour without looking "off". Neat, huh? It applied pretty nicely, but as it usually happens with glitter polishes I had to work a little bit to get the glitter to spread out more evenly, otherwise it tends to clump together in one spot.

YSL Black Tulipe Anna Sui 020

Here's a shot of my nails with the Anna Sui bottle, in case anyone here happens to be an expert and can help me track down exactly what range/series this came from. I'd really love more info on this colour - and need I say I'd love my own bottle too? :P I really love this combination of purple and glitter - it looks vaguely cosmic, like a purple alien sky filled with stars.

One of the things I noticed about the Anna Sui polish in particular is that it's scented with a fruity scent. It smells like lychee to me (and my housemate agrees). Even after applying 2 coats of topcoat on top of it, after the nail polish smell has worn off, I can still smell lychee on my fingertips. It kind of makes me want to sniff my fingers more. For people who are unfamiliar with lychee (since it's not really easily found in the West), I've come across the smell being described as a rose scent. I personally think lychee is a better description, but I can how it smells like rose if you've never eaten/smelled lychee before. In any case, it's a sweet fruity smell.

Rats, typing that just made me feel like eating lychee all of a sudden. Anyway, that was my NOTD of awesomeness that got ruined by the toilet. The toilet needs to DIE. But I'm glad that all it did to my NOTD was wear it down quickly. It really could have been worse - at least I didn't break a nail!

Monday, August 2, 2010

NOTD: Nubar Petunia Sparkle: It's Freaking FUSCHIA?!

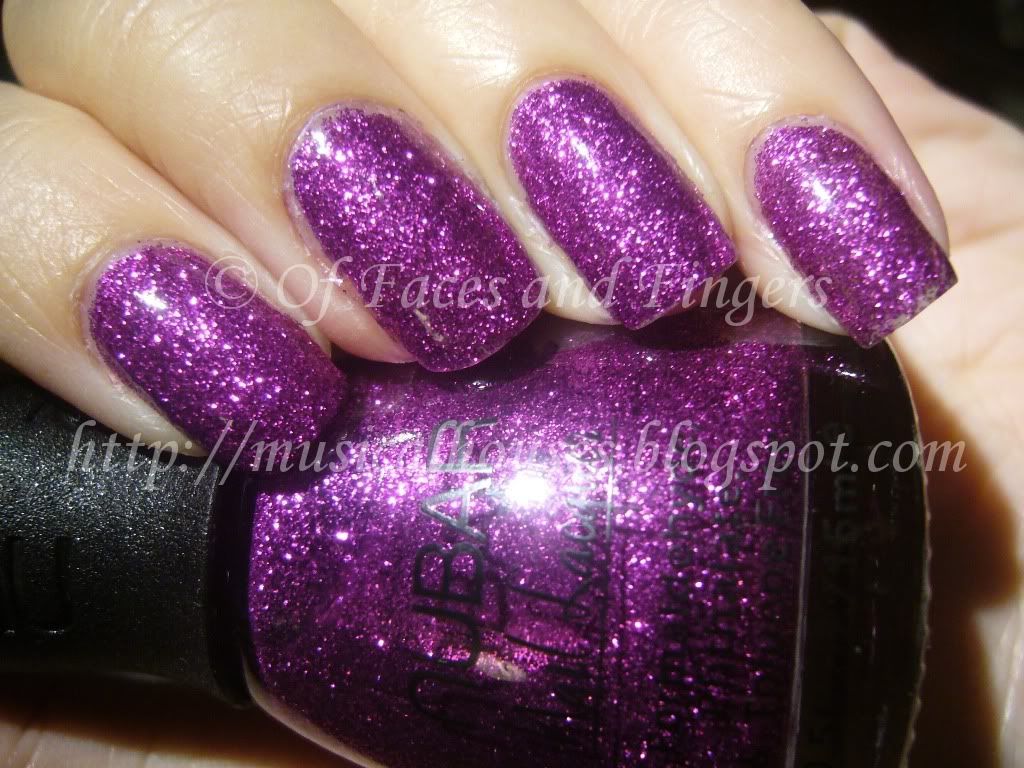
I bought Nubar's Petunia Sparkle, thinking it would look like a nice bright purple. Because that was what ALL the swatches I saw on blogs showed me. Purple. Straight-up purple. Nevermind that Nubar's own swatches showed a pink - I was thinking, bloggers don't lie, right? And they're usually much more accurate than lousy website swatches.

WRONG. In this case, all of you lied to me! :P But I don't blame you guys - it's just one of those polish that's a major PITA to photograph accurately, as I soon found out for myself.

See, when I took my photos of Petunia Sparkle, they all turned out like this:

Nubar Petunia Sparkle

Looks purple, right? That's the colour I saw in all the blog swatches I was reading, and that's the colour I thought I would get when I bought it.

But noo, it doesn't look like that at all - definitely not on me, at least. On me, it's more of a hot fuschia colour. Like, bright fuschia. Almost-neon-but-not-quite-but-still-full-of-bling fuschia.

This is how it REALLY looks like on me. And while I rarely edit my photos (I never photoshop them, although I do occasionally edit indoor photos for colour accuracy) I had to colour-edit this one picture below, because it was necessary. Despite my 2343252523 shots of Petunia Sparkle, it just kept showing up purple on my camera. But on me, it's not purple at all. It's really a lot more pink, a lot less purple, but still really hot.


See, see, see? I told you it was necessary, right? I know purples tend to photograph blue most of the time, and usually I can visually compensate for that, but somehow for this colour, it photographs so much bluer that the colour seems to be a different colour altogether! Of course it's still one hot sizzling colour - but when I bought it, I was really expecting it to be purple, not pink.

And it's really funny, because there I was thinking, "All those bloggers lied to me!" But when I tried to photograph it myself, ALL of my shots turned up purple, forcing me to resort to colour-editing. But I colour-edited them because I just wanted to show you guys what the colour really looked like on me. I don't want anyone who might buy nail polish based on my photos thinking it's a purple, because on me it's definitely fuschia!

(Before anyone starts thinking that I'm one of those bloggers who photoshops my cuticles and erases my pimples, I'd like to state my blog policy on photo-editing. My policy on photo-editing is that I do it to enhance colour accuracy, and that's it. I don't edit anything other than colour, period. I don't make my cuticles look neater, or my face look more contoured, and if you look my photos I think that's pretty obvious. It's a distinction I'd like to make clear, because I am indeed aware of the controversy that could potentially surround a post like this.)

Wednesday, June 16, 2010

Eyeko Petite, Coral and Vampira Polish Swatches!

The last time I tried Eyeko's polishes, I wasn't impressed at all. Not one bit. This was back when Eyeko was still carried at my Superdrug last year. I saw their polishes in their cute bottles that looked like little milk jugs, picked up 3 or 4, tried on Pretty Polish, and promptly gave it away. It was sheer, streaky, annoying and took 4 coats to even out. And the cute milk jug bottle? It looked really eye-catching, but didn't help polish application one bit, since the polish tended to get clogged up around the too-wide rim of the bottle, and the flat cap was hard to hold.

Enter 2010, and Eyeko seems to have reformulated their polishes. These ones that I've tried were much better, both in terms of packaging. Gone are the annoying milk jug bottles with the too-wide rim and hard-to-hold cap. These ones are thinner, and sleeker, and the rim and cap are normal to hold and use. The formula also seems to have improved - out of the three I've swatched, only one was sheer, and it was billed as a polish for French manicures, so that's to be expected. There are also some interesting and surprising dupes here.

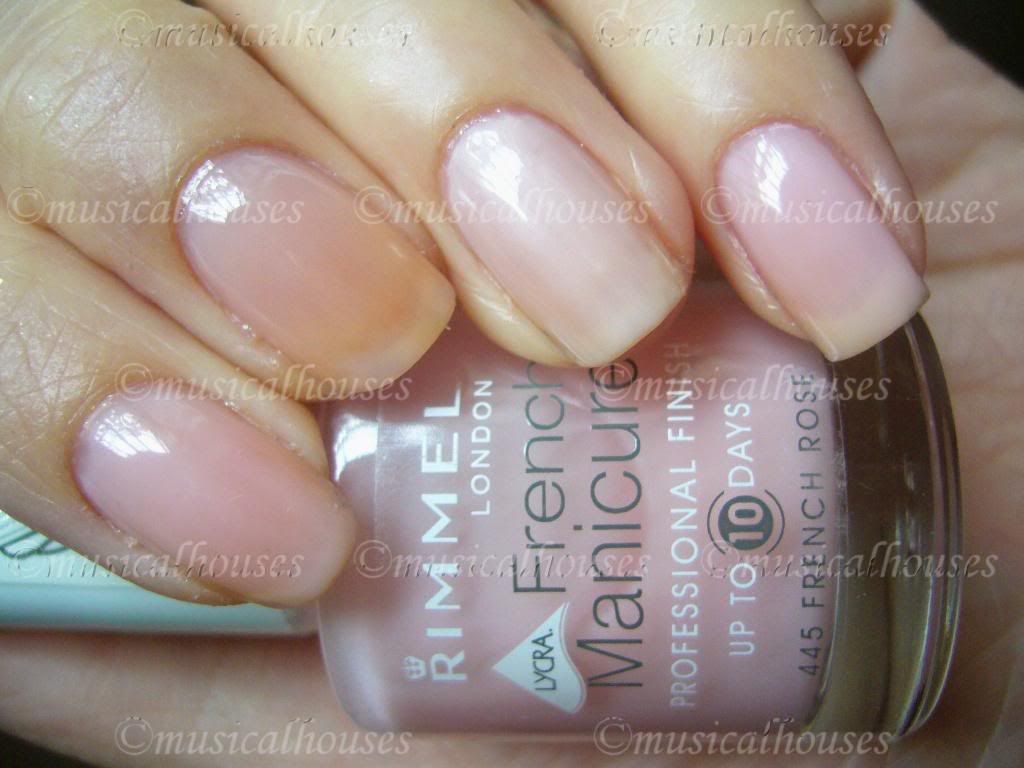
First up, we have Petite Polish, for French Nails (don't you just love how Eyeko tells you what sort of effect their polish is supposed to give? I think it's kinda cute). This one is sheer, as billed. One coat was a barely noticeable pale milky sheer pink, two coats still left VNL (visible nail line) but was still sheer. This swatch is two coats, in natural light. Pardon the stained nails:

Eyeko Petite Polish

As you can see, this is a far cry from my past experience with their Pretty Polish. While that one was impossibly streaky, this was actually even with just two coats. Streakiness is a major downfall of many a sheer french pink, so consider me impressed, even if the colour isn't devastatingly unique.

Speaking of not being unique, there are similar colours, and a close-but-not-quite-dupe in other lines:

Eyeko Petite Polish, Rimmel French Rose, Nails Inc Elizabeth Street

L-R: Eyeko Petite Polish, Rimmel French Rose, Nails Inc Elizabeth Street, Eyeko Petite Polish

I used two coats of each for the swatches to ensure consistency. As you can see, Nails Inc Elizabeth Street is the most opaque of the lot, reaching near-full opacity in 2 coats. Rimmel French Rose is the sheerest of the lot, showing the most VNL, while Eyeko's Petite Polish is sort of in between, but closer to the Rimmel French Rose polish.

I think these are great for French manicures, and also very work appropriate - barely anyone is going to notice you're wearing polish with these.

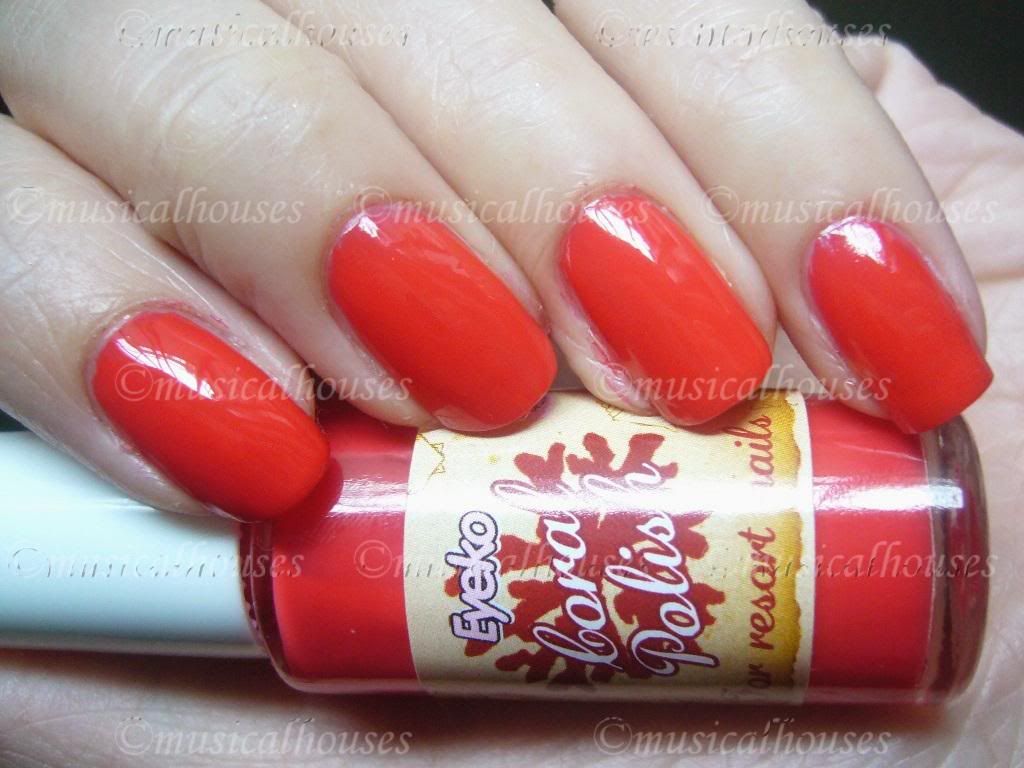
Next up, we have a stunner in Eyeko's Coral Polish, for Resort Nails. This one really gives a very summery, holiday feel, and was opaque in two coats:

Eyeko Coral Polish

This is really very pretty isn't it? I generally stay away from most coral colours, because they usually carry too much orange for my taste, but this is on the red side of coral, and thus doesn't make me look as jaundiced as it potentially could. I also liked the application on this one, it applied well and was smooth. I really love this one, it's not neon, but it's bright, summery and happy.

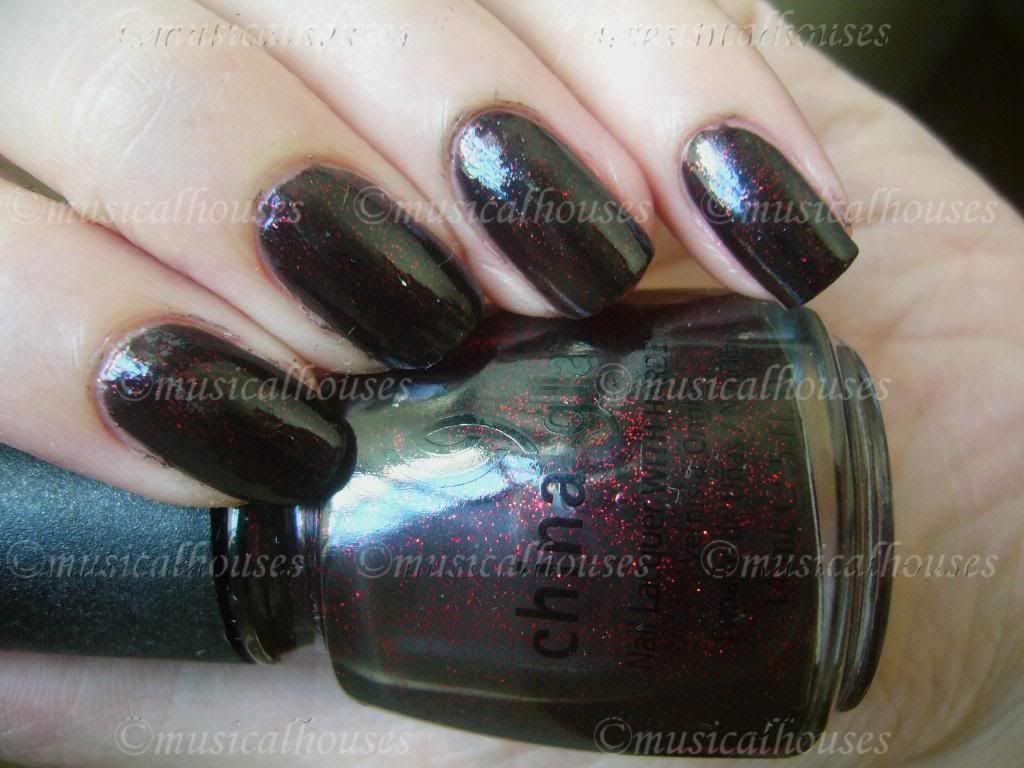
Lastly, we have Eyeko Vampira Polish, for Goth Nails. Although I'm not quite sure if black automatically equals goth, considering that China Glaze's Lubu Heels is pretty much a classic in the nail polish fanatic's world, and it's a very similar colour. Vampira Polish, as is Lubu Heels, is a sheer black with red glitter, which is pretty much opaque in two coats. If you can't see the red glitter bits, feel free to click on the picture to view the humongous full size version, complete with messy cuticles (don't say I didn't warn you):

Eyeko Vampira Polish

You know I love me my vampies, so you know I'll love this. Black with red glitter? I'll take it!

But how does Eyeko Vampira Polish compare to China Glaze's cult favourite, Lubu Heels? They look awfully similar, could they be dupes? Well, I know you'd be wondering, so I generously swatched them for you :P LOL! These swatches are two coats of each:

Eyeko Vampira China Glaze Lubu Heels Polish

L-R: China Glaze Lubu Heels, Eyeko Vampira Polish, China Glaze Lubu Heels, Eyeko Vampira Polish

As you can see, they are pretty much dupes, colour-wise, right down to the size and density of glitter. I know the China Glaze diehard fans are going to howl at the presence of a dupe of one of their cult favourites, but to be fair, the China Glaze version was easier to apply, and didn't pull or streak as much. So they might be dupes colour-wise, the China Glaze had a better application. But for anyone in the UK who can't get their hands on China Glaze, the Eyeko is definitely a good substitute.

After my previous mishap with the older Eyeko polishes, I swore I'd never buy anything Eyeko again. These polishes have redeemed Eyeko in my eyes. None of these colours are super unique, but they are good basics with good quality, and worth a look at.

These products were provided to me for review purposes. I am not affilated with the company. This review is my complete and honest opinion.

Thursday, May 6, 2010

Rimmel Blue Me Away and Nails Inc Trafalgar Square NOTD

Sometimes, you just want to wear something weird. And clashing. And really ugly. And sometimes, it ends up sort of growing on you.

Like this NOTD, from a few weeks back. It all started when I decided I suddenly wanted to wear blue nail polish. If you know me, you'll know I'm not THAT big a fan of blues, for some reason. I don't even know why, especially given that I LOVE purples, and purples are essentially half blue? But that day I decided I wanted to wear blue. So I dug out Rimmel's Blue Me Away. It's a beautiful blue with fine red-orange shimmer. It's pretty cool, actually - it's rare to see a blue with shimmer of a contrasting colour, since most blues I've seen have silver shimmer.

So I put it on. While I like Rimmel's Lycra Pro Finish range, and their Lasting Finish Pro Enamel range, Blue Me Away was from the 60 Seconds Nail Polish range, and applies less well. I also don't like the brush as much - while the other two ranges have brushes with a curved end (which I particularly like), the brush on this one is cut across horizontally, and it is a little stubby. But it's nothing that can't be dealt with.

After putting it on, I decided that it wasn't weird enough. So I decided to put glitter on top of it. And I thought, why not put a red glitter on top, since there's already red shimmer in the polish?

So I dug out Nails Inc Trafalgar Square (which does seem quite a lot like China Glaze Ruby Pumps, another cult colour), and applied it on top. And as usual, this applied like nearly all the other Nails Inc colours I've tried before - without a single flaw.

Rimmel Blue Me Away Nails Inc Trafalgar Square

There. Are your eyes begging you to spare them the sight of my nails yet? I don't know why I like it, but I do. But I'm pleased to tell you that this lasted for a good 4 days before the first chip came on :P

Saturday, April 10, 2010

Sally Hansen Purple Pizzazz: NOTD

By now, if you've been reading my blog long enough, you'll know I love purples. And that I also love jellies (although I know of plenty of nail fanatics who don't, because they don't love the lack of coverage), and in particular, I love glitter suspended in a good jelly. There's something about the transluscence of a jelly that just lends itself to tons of glitter being embedded in the jelly finish. It's like looking at stars in a night sky...you know, glitter bits suspended in a jelly polish.

And which is why I LOVE today's NOTD, which is Sally Hansen's Purple Pizzazz. Not only is it purple (well it's bluple, a cross between purple and blue, but I think it leans more purple), and not only is it a jelly, but it also has glitter in it! Ooh purple jelly with glitter...Mmmm.

Anyway I was totally unable to capture the beauty of this in photographs. The next time I wear it I so need to try harder. As you can see, this was 2 not-so-thin coats, and you can still see some VNL (Visible Nail Line). I'm personally okay with a little bit of VNL, but if you're not one of them, you might want to layer this over black, or another colour, or just pile on more coats. Personally, I really like this.

Sally Hansen Purple Pizzazz

Appliction on this one was pretty good, and wear time was the average of 3-4 days. I didn't have any problems with the brush, the formula, or the wear time, so you can bet I'll be keeping this around in my stash. I actually had to beg a friend of mine to send it to me from faraway USA, because Sally Hansen in the UK has a pitably limited range of colours, and this was totally worth it. Of course, if VNL, glitter and jellies aren't your thing, this probably isn't a colour you should be looking at. But if you like any of the above, this one won't disappoint.

Monday, March 22, 2010

China Glaze Lubu Heels and Color Club Perfect Plum NOTD

Today's NOTD is the cult favourite, China Glaze Lubu Heels, together with Color Club's Perfect Plum. Lubu Heels, named after the shoes, are a hot favourite, due to its unique combination of a black jelly base and red glitter. Perfect Plum isn't so much plum as it is red, which is why I used it as an accent colour on the ring finger. And as you can tell by the terrible cuticles, this is also an old NOTD. Trust me, you and I both wish I could photoshop the cuticles out, but my skills really don't reach those heights of digital manipulation.

Here's a shot of it in natural light, two coats of Lubu Heels on all the fingers, except the ring finger, and two coats of Color Club Perfect Plum on the ring finger:

China Glaze Lubu Heels Color Club Perfect Plum

While you can tell Lubu Heels isn't just black-black because the red glitter is still somewhat visible through the black jelly, but I still kind of wish the black jelly was a little bit less opaque, so that we could see more of the red glitter. Perfect Plum, meanwhile, isn't so much plum as it is a beautiful jewel-toned red with shimmer.

Here's a shot of it indoors:

China Glaze Lubu Heels Color Club Perfect Plum

I think that Lubu Heels is one of those colours that looks better indoors than outdoors, because the red glitter really shows through much more indoors - here you can see how beautiful it really is. You can also see the shimmer and glow of Perfect Plum in here.

Application was good for both Lubu Heels and Perfect Plum, and wear time was also decent - about 3-4 days, which is average for me. I didn't have any quality issues with either polishes in either way.

Friday, January 29, 2010

Asos Paints by Ciate: Mary-Kate NOTD: Black Blah

So a long time ago in this post I said I would show you guys my NOTDs of the Asos Paints by Ciate when I eventually got around to doing them. Well I did, and here you are.

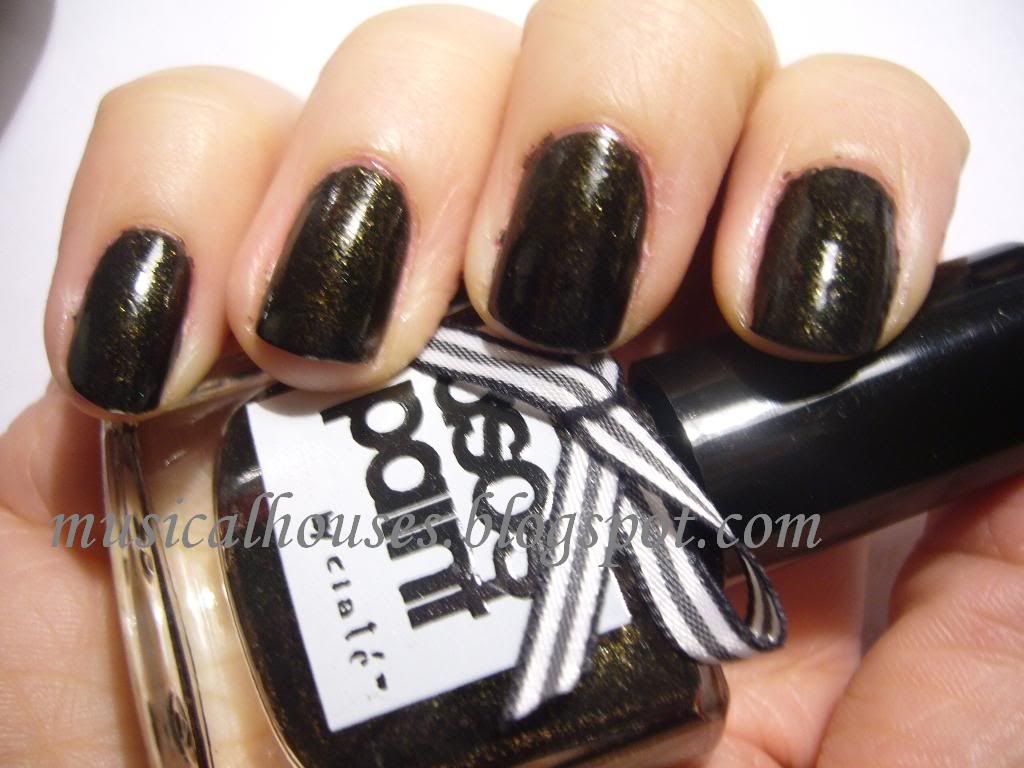
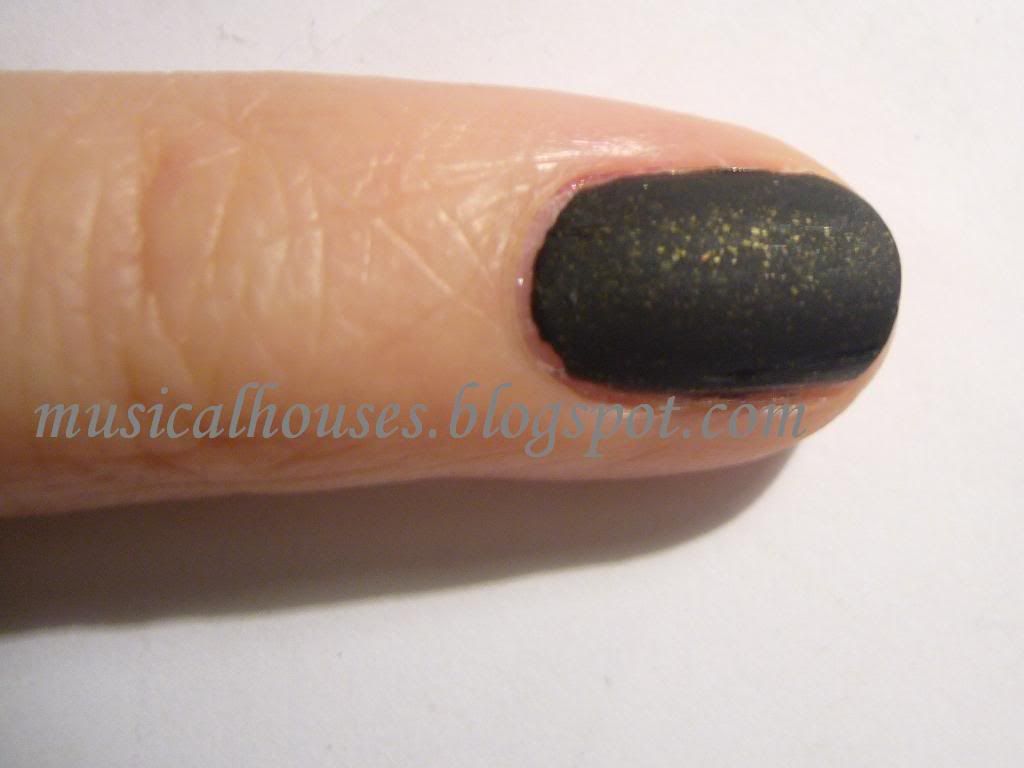
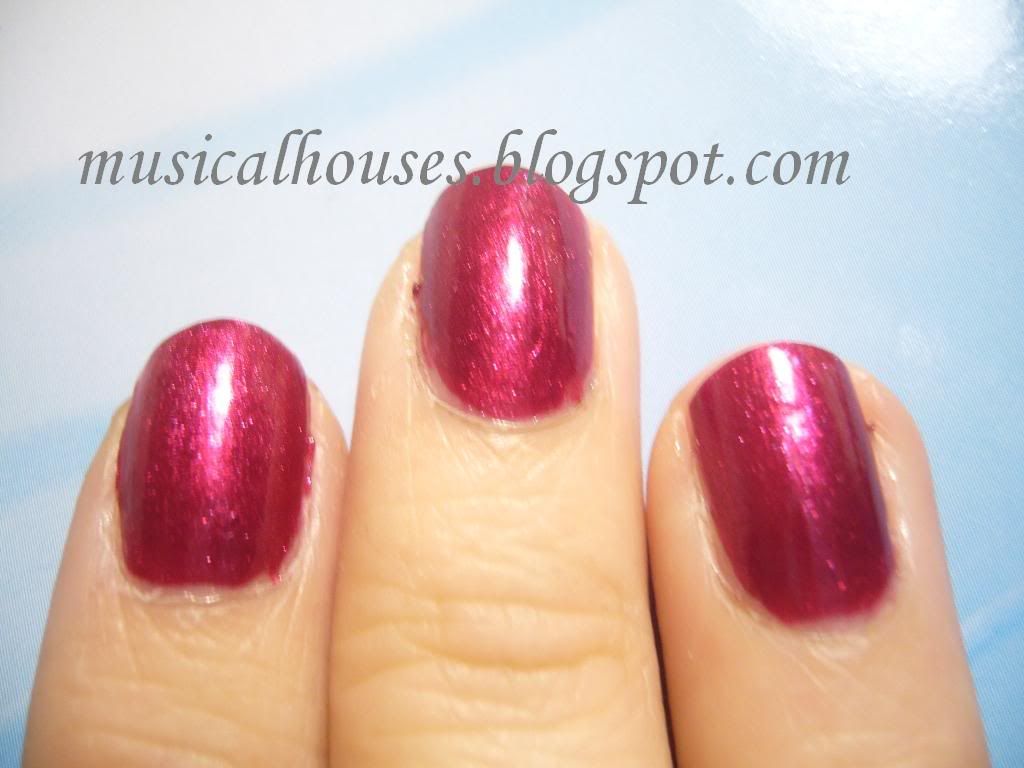
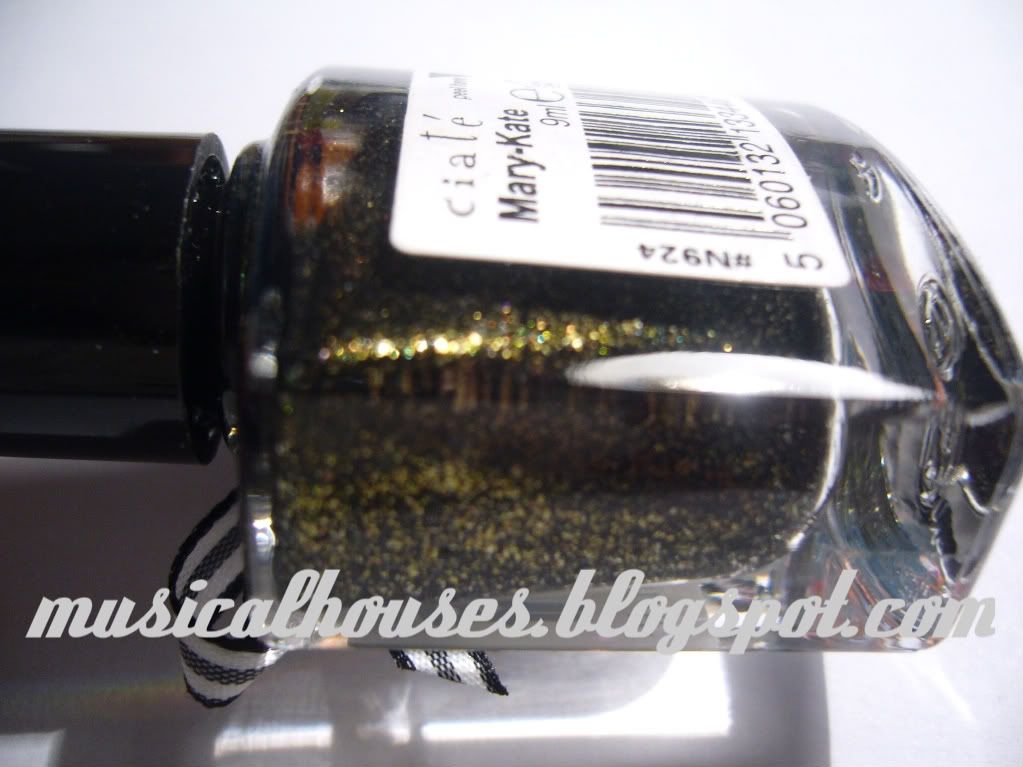
The first one (because my nails are nubbins now and that's the perfect excuse for wearing black) is of course Mary-Kate, the black I was so excited about. In the bottle it was a black with gold glitter that looks a little yellow or orange in some lights, and I was hoping that it would be a jelly, for that super cool glitter-suspended-in-black-jelly effect a la ChinaGlaze's Lubu Heels. And honestly, this one had the potential to one up Lubu Heels, because the glitter is a lot more noticeable in the bottle.

Well you notice I said "had". Turns out the black base was a creme, not a jelly, so although this polish is positively LOADED with glitter, most of it got buried under the opacity of the creme. Now opacity isn't a good thing - those of you who know me know that I LOVE polishes that are opaque in one coat, as they do double duty as nail colour and Konad colour, but when it comes to glitter in a black base, I personally feel a jelly or a sheer finish is best for showing off the glitter. Anyway, this one was still cool, but didn't live up to it's full potential.

Check out this photo. Once again, this was pre-cleanup, so please forgive the mess everywhere. I was just so excited to show you guys a pic of these that cleanup couldn't wait! I know, I'm such a slob when it comes to painting neatly. I'm learning!

Asos Paints Ciate Mary Kate

Ah, Mary-Kate. I'm so sad for you. It's not that you can't see the glitter - as you can see, when the glitter catches the light it does sparkle - but why is this in a creme and not a jelly base?! It almost makes me want to cry, because that is such a waste of good gold glitter. Seriously, when you remove this thing you'll realize how glitter packed it was - it does tend to get everywhere, as is common with glitters - but you only really see the top layer of glitter when it's actually on your nail. The rest are just buried in the opaque creme base and are invisible.

Anyway, this one was a pretty awesome polish otherwise. It was opaque in one coat, although I did two, and the formula on this was smooth. I was really impressed! In fact someone mentioned on a forum that she thought these applied better than the regular Ciate, and I wouldn't be surprised, because this was really smooth and nicely pigmented. The only thing is that the brush was a bit unwieldy for me, which resulted in a greater amount of mess than usual. I personally thought that this was an awesome formula ruined by a terrible brush, but then again brushes are very much a personal preference (you know, like how some people like the OPI Pro-Wide brushes and some don't), so my word isn't final authority, of course. It doesn't dry smooth of course, like most glitters, but that isn't an issue for me, and isn't anything a couple of layers of topcoat can't fix. Wear time was good on this one - I didn't experience any major chipping or tipwear issues.

And because you know I love to mattify everything with glitter in it, here's a lousy swatch of it with RBL Matte Topcoat over. (Sorry for the one-finger and lousy swatch, I did it after I took off the polish from most of my fingers. That also explains why the polish is seeing some wear.)

Asos Paints Ciate Mary Kate

I think it's pretty cool mattified. But I also wish it had a jelly base so it'd be even more cool mattified. Still, can't complain - it's opaque enough to Konad with, and it does have a pretty good formulation. I hope Ciate polishes in general are this nicely formulated, I'm looking forward to trying out the rest of my bottles.

Bookmark and Share

Monday, January 25, 2010

Nails Inc Half Moon Street and $OPI Absinthe Makes the Heart: My Nails are Nubbins!

The main reason why I hate travelling is because it ruins my nails. (I know, I have a problem.) This is what happened after a 12-14 hour flight:

Nails Inc Half Moon Street

Just to compare, this is how they were before the flight (they were longer, but I was waiting for them to grow out a lil more before I filed them into the right shape, hence the uneveness in length and shape):

Sephora by OPI Absinthe Makes the Heart

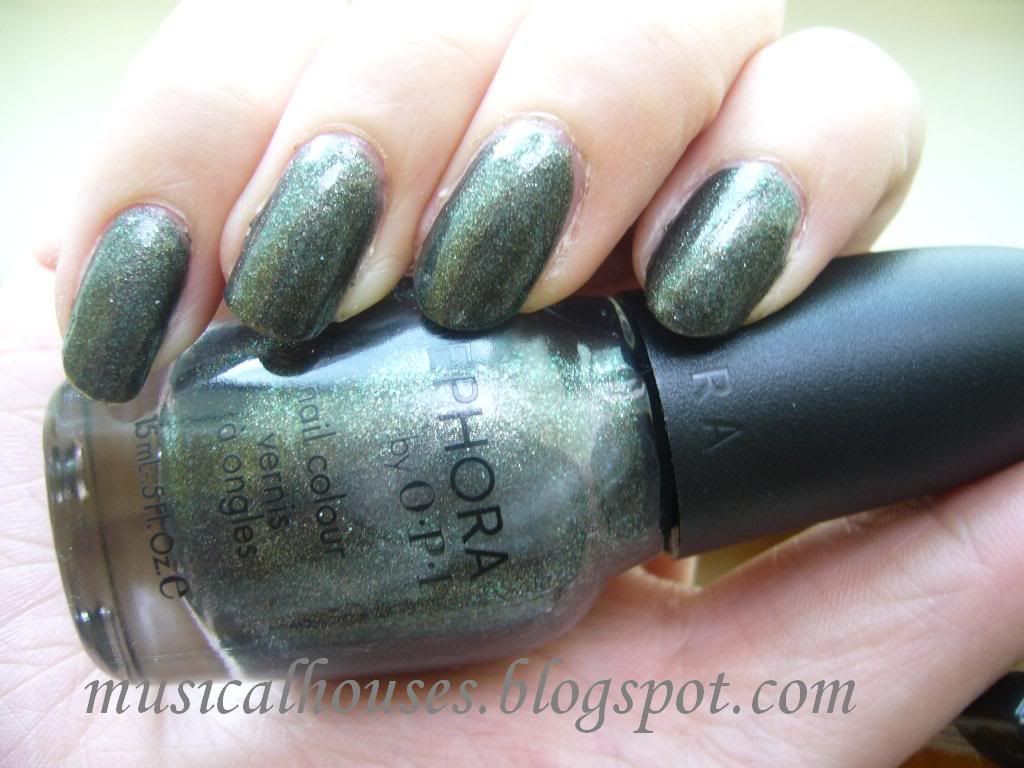
That NOTD was $OPI Absinthe Makes the Heart. That one I love. I don't normally like greens, because I'm a colour wimp, but I LOVE this one. It's a greyish green - or a greenish grey - with super cool foil effect, and a good amount of glitter. I really love how it looks, and I think it would look cool with a matte topcoat over it too. Somehow, my skintone seems to draw out the extreme colour possibilities in it - on me, sometimes it even looks positively emerald green, while other times it looks like a metallic gunmetal grey. I really like this one. It's like, deep, jewelled green with tons of grey. Cool. It applied a little sheer, so this is 3 coats. 2 would have covered most areas, but I wanted to cover everything.

Anyway, back to the sad state of my travel-worn nubbins. They're all short and uneven now. I'm hoping they'll grow out soon. It just makes me want to cry, because that was 3.5 weeks of growing out my nails down the drain (yes, my nails grow slower than snails move, and they break and peel, so that was my record length so far). If only there was a way to travel that wouldn't ruin my nails...I'd love travelling so much more.

But since I'm all stuck with short nails for however long they take to grow out, I'm going to wear all the bold and vampy colours I can while the nubbins last. So, you know, the next few NOTDs are going to be bold and dark! No more nudes!

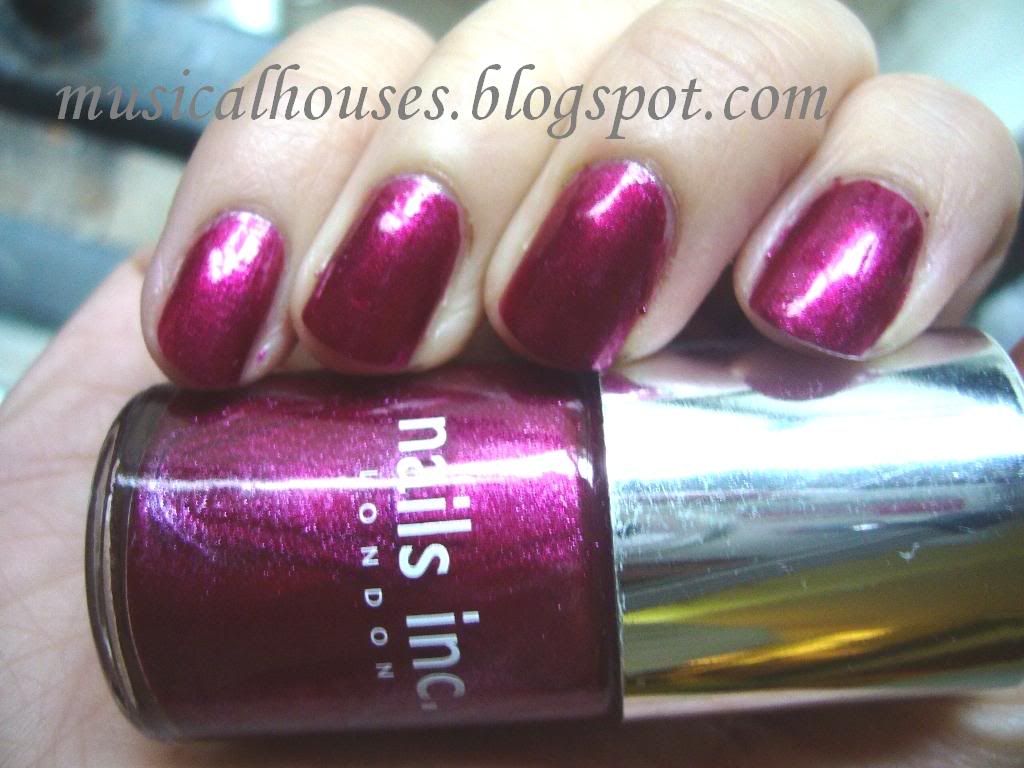
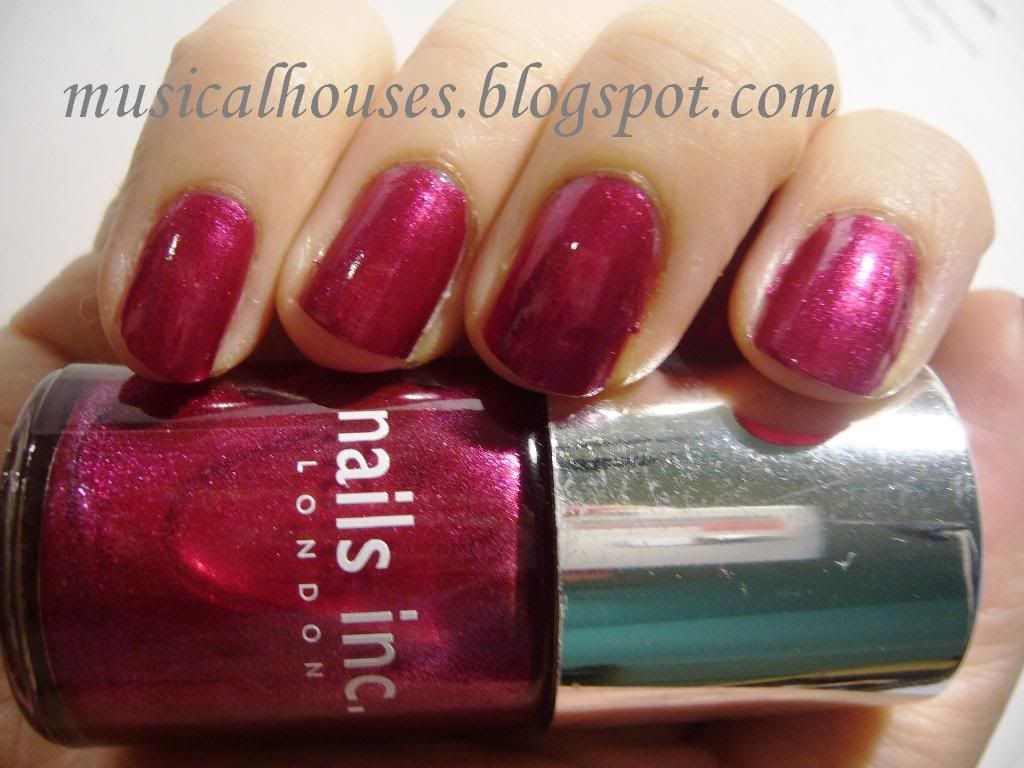
So for now, my mani is Nails Inc Half Moon Street. This is an exclusive I believe, but I cant remember what exactly it was exclusive to. I believe it was one of those "Wow-you've-spent-so-much-money-on-our-stuff-so-here's-a-little-something-for-you" free gifts they give you if you place a big order on their website, which would absolutely explain how and why I have it. Its also very beautiful. It's a glowy magenta-pinky-red type of colour, with a lit-from within look, and a finish that defies description. I'd call it a shimmer with a metallic leaning. It has superfine silver shimmer that shows up as a sort of metallic glow. Very lovely. I don't really like bright pinks in general, but this one really has me staring at it all day long.

Application, as is usual for Nails Inc, was a dream. This one was very pigmented and smooth. I did two coats, although if I had better skills I could have gotten away with one coat. Love this one.

Here it is in artificial light, and you can see the shimmer in greater detail here:

Nails Inc Half Moon Street

And because I do so love this colour, here is a close-up shot of my nails. Take a look at the glowy goodness emanating from this thing!

Nails Inc Half Moon Street

I'm really starting to like Nails Inc a lot. With the exception of Elizabeth Street which was a dud (and I'm thinking it may be a dud because it was the free polish that came with Glamour Mag, and maybe they cut corners for the freebie), every Nails Inc polish I've tried has been nothing short of fabulous. The only thing is, most of their interesting colours tend to be exclusives, leaving the permanent line of colours a little dull. They've only just started coming out with mattes, months after all the big players have made their moves, and they've yet to come out with a duochrome, a flakie, or a holo. Awww come on, Nails Inc, I'm tired of waiting already!

And since we're hurrying the world along, while we're at it, let's tell my nubbins to hurry up and grow out! I'm waiting! And my polish stash is waiting!

Bookmark and Share

Saturday, January 16, 2010

Asos Paints by Ciate Winter Collection Bottle Pics

Ciate is a UK-based brand of nail polish founded by celebrity nail technican Charlotte Straughan, and is hard to find, even within the UK (or at least in Central London, where I'm at). I end up ordering most of mine online. They also aren't very well-known or popular (unlike fellow UK-based nail polish brand Nails Inc), but those who are in the know will have at least heard of them. They also have the cutest bottles ever. I don't have enough Ciate to form a good opinion of their quality in general, but I've heard raves from some, and I've also heard from others that it's a hit-and-miss brnad (like every other). In general they seem pretty good though.

Ciate also has a line of nail polish specially created for ASOS, called Asos Paints by Ciate, kind of like how Sephora has their Sephora by OPI collection. These have a similar packaging, but it's not exactly like the regular Ciate collection. The bottles are smaller, being 9ml instead of 13.5ml, and the bottles are also square instead of rectangular, and have a shorter handle. Each season, ASOS also releases a limited edition Asos Paints by Ciate. I just got the Winter 2009 Asos Paints by Ciate collection, because it was on sale at Asos, so that explains why I'm reviewing these after the fact. I'm sorry, but I'm not gettin' any swag down here, so everything I review either comes from my own pocket, or me squatting at counters and swatching their testers. What can I say, it's tough being a small-time blogger, LOL.

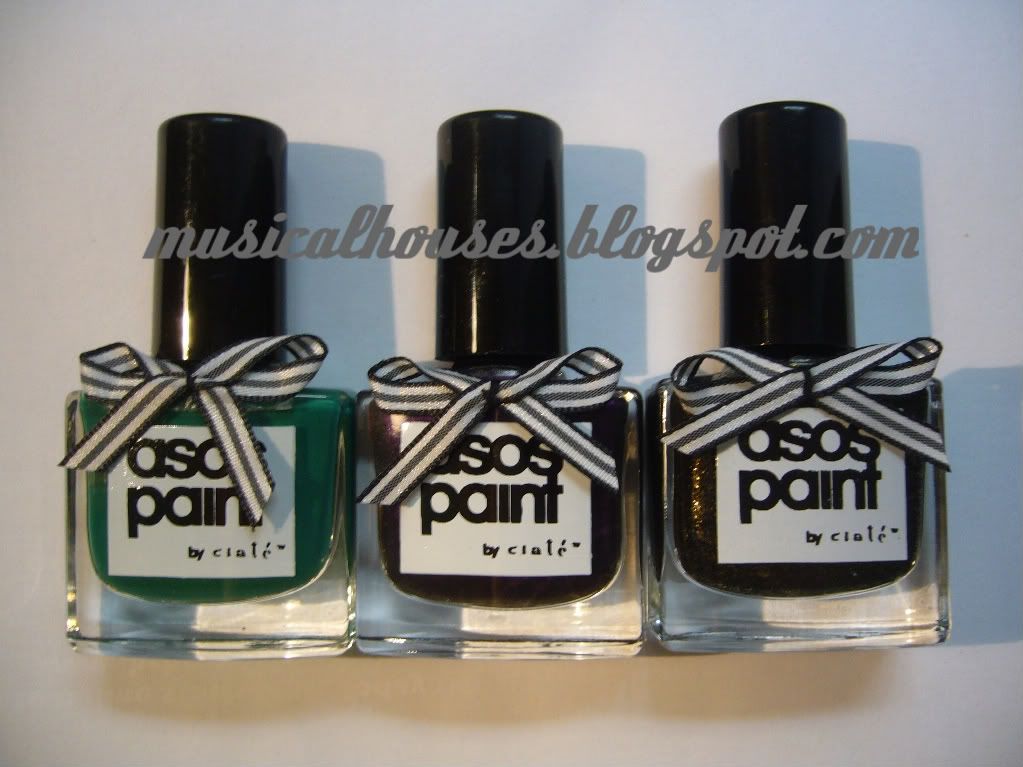
Anyway, the Asos Paints by Ciate Winter 2009 collection consists of 3 pretty exciting colours that are awesome all-year round. I haven't gotten around to trying them out yet, but here are bottle pictures! I know bottle pictures aren't preferred, and most people would rather see on-nail swatches, but I couldn't wait (and not just because I'm overdue). This collection's pretty cool - it's a good digression from the usual pale pinks and sheers. Without further ado, here are pictures!

Asos Paints by Ciate Winter Collection

Here's the entire collection altogether. This photo isn't very great, the individual bottle pictures are more accurate.

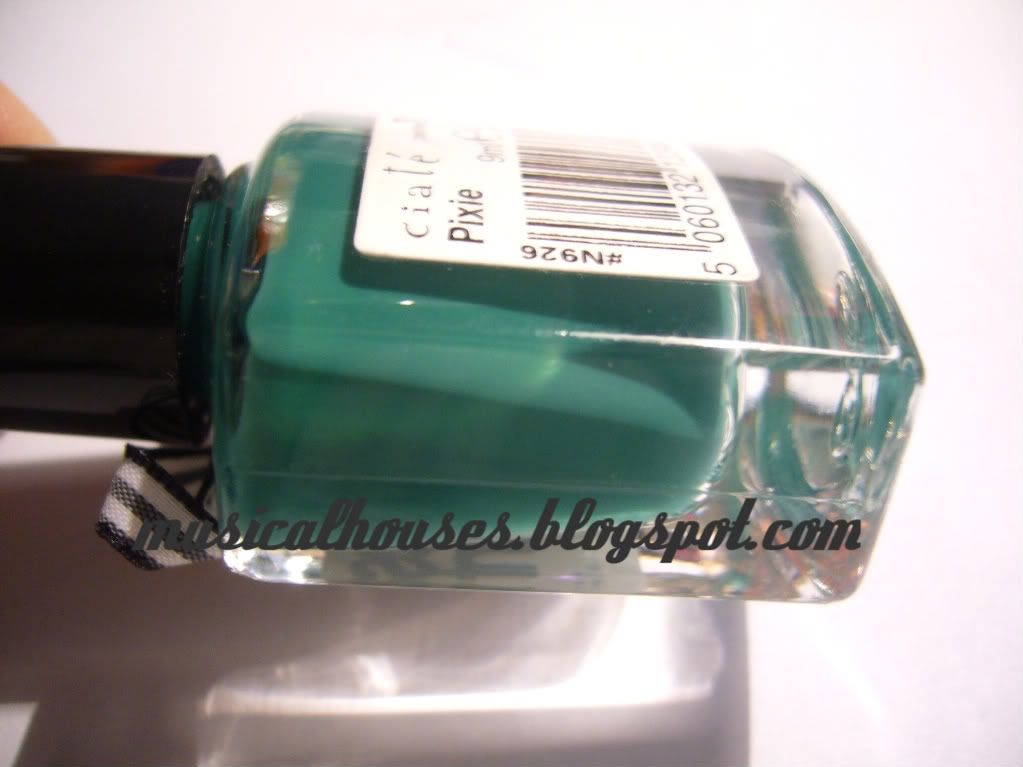
Pixie Asos Paints by Ciate Winter Collection

First up is Pixie, a emerald-jade green, that's NOT a Chanel Jade dupe. It's a darker, deeper and more jewel-toned green, more emerald and less pastel. I LOVE this colour, and I don't even normally like greens! This is a creme finish, very smooth looking.

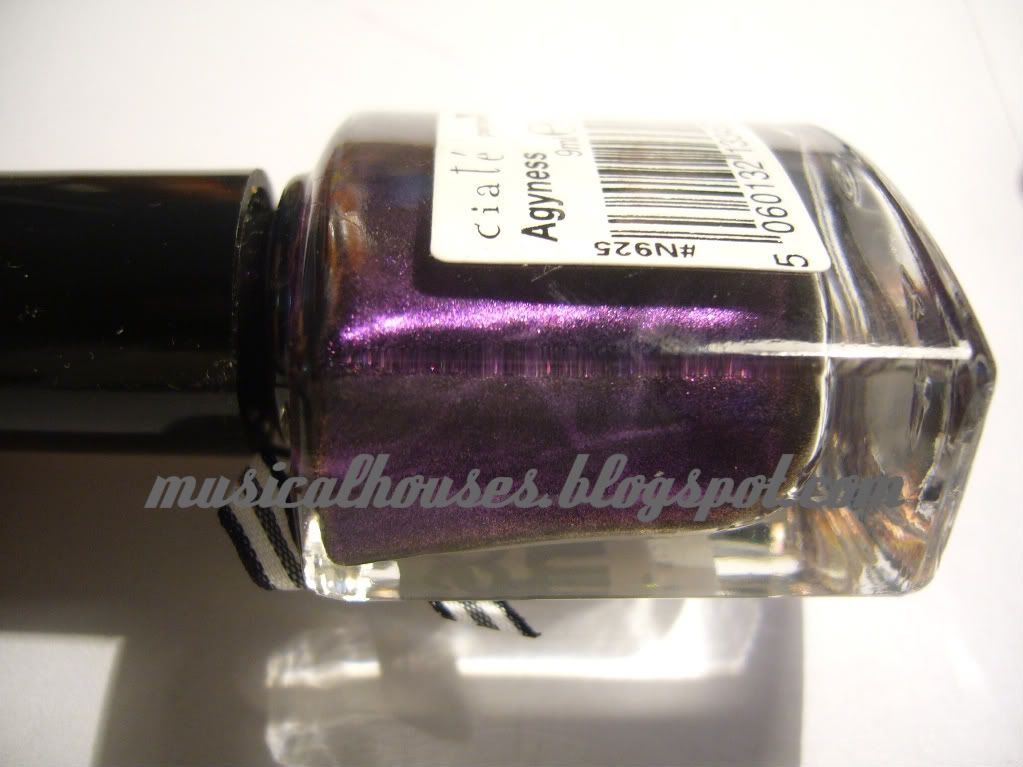
Agyness Asos Paints by Ciate Winter Collection

Next up is Agyness, a medium-to-dark royal purple with multicoloured shimmer. I love purples, so this is right up my alley.

Mary-Kate Asos Paints by Ciate Winter Collection

Lastly, we have Mary-Kate, which is a really awesome black with fine glitter. I can't really discern all the glitter in this colour, but from the bottle it looks to be gold, but it also has hints of orange and green. Super cool. It's hard to tell if the black is opaque or jelly-ish, but I'm hoping it's a jelly! I totally want to try this one out. This is probably my favourite of the bunch! It kind of reminds me of $OPI 212, except that 212 has bigger chunks of glitter. The glitter in this one isn't too big.

So that's it for today, and when I do get around to trying this out (my untrieds list of nail polish is so long right now), I'll be sure to do an NOTD post!

Bookmark and Share

Sunday, December 20, 2009

Pink Bling! GOSH FrouFrou: NOTD

This is another great NOTD! GOSH Froufrou:

Here's my NOTD swatch, and as usual pardon the general lack of skills and pre-clean-up state of my nails:

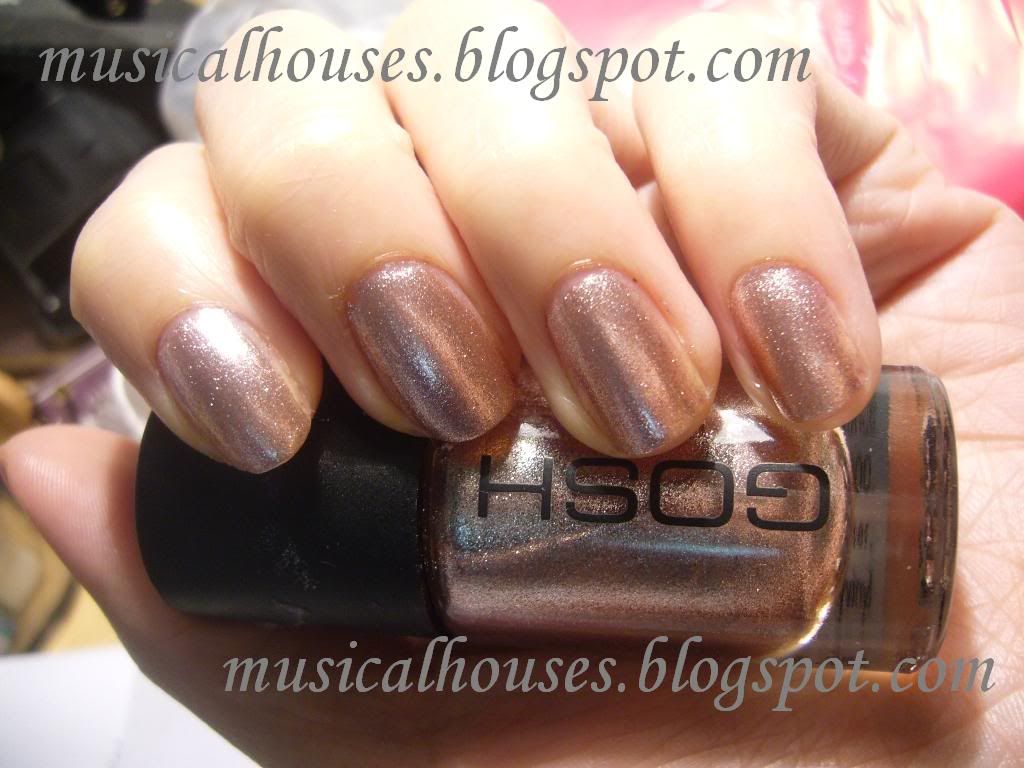
GOSH FrouFrou nail polish NOTD

I really love this colour because it's such a great pink, and it goes with everything, but it's far from boringly neutral. In fact, this is really bling, without crossing the line and becoming tacky or overly blingy (although I'm pretty sure some people would tell me that there's no such thing as over-blinged when it comes to polish!). I believe it is many flecks of small light pink glitter suspended in a clear base, but the pink flecks are so numerous and so tiny that when you put it on your nail it gives the illusion of having pink nail polish that's glittery or frosty. Really cool. If you want your nail to be totally covered, 3 coats would probably be optimal, but this is 2 coats - as you can see, the glitter is dense enough to cover almost all the nail, but if you look closely you can still see some bald spots where the glitter didn't cover, but the spots aren't visible from far away though. I'd hesitate at calling work safe though - this could probably pass in some environments, but its glittery nature makes it a bit hard to pass off in a really stern office environment, even if the base colour is inoffensive and neutral.

And as usual, this one has the ridiculously-fast-drying quality that all the GOSH polishes I've encountered seem to have. I also had no application problems with this. I'm really starting to like GOSH a lot for nail polishes.

Speaking of nail polishes, tomorrow I will give you a nail polish comparison post, like I promised yesterday. I'm comparing the various nude/beige polishes I have, so stay tuned! :)