Tuesday, July 26, 2011

Certainly Red

Here's my first blog post wearing a red lip! Ta-da! Really trying to break out of my shell and wear some bolder lips. I have a bunch of reds but rarely use them--need to change that habit!


Tried winging it out a little further than usual!

Bare Escentuals Summer all over lid, Urban Decay Buck in Crease, Nars Galapagos in Crease, Nars Mekong in Outer V, a little Urban Decay Half Baked on middle of lid 


Face:
Laura Mercier Oil-Free Tinted Moisturizer in Nude & Sand (mixed)
Laura Mercier Secret Camouflage
Mac Mineralized Skin Finish
Laura Mercier Translucent powder
Mac Refined Golden Bronzer
Nars Madly & Illamasqua Lover Blush
TheBalm Mary-Lou Manizer
Anastasia Brow Powder in Brunette

Eyes:
Bare Study Paint Pot
Bare Escentuals Summer
Urban Decay Half Baked, Buck
Nars Galapagos, Mekong
Rock & Republic Skintight (highlight)
Covergirl Lashblast
Bobbi Brown Gel Eyeliner

Lips:
Revlon Certainly Red Lipstick
A little bit of clear gloss and Mac Melon Pigment

What do you think of the red lips? I always shy away from them! What's your favorite red lippie!?Thanks for looking!

EOTD: Katy Perry Grammy’s 2011 makeup & Sleek Monaco palette

Hey everyone!

Did this look today after seeing this picture from Katy Perry at the 2011 Grammy awards. I loved the purple and green combination with the glitter and decided to recreate it.


(Click for larger view)


For eyeshadows I mainly used the Monaco eyeshadow palette from Sleek from their Mediterranean collection.


Here’s a list of all the products I used and how I used them:

- Urban Decay Primer Potion: all over the lid up to the brow, blended out with my finger.

- MAC Brun: to fill in my brows, with an angled brush (MAC 268).

- Sleek Bamboo (Monaco palette): as a browbone highlight, applied with a flat shader brush (MAC 239)

- Sleek Martini (Curaçao palette): inner corner highlight, applied with a pencil brush (MAC 219)

- Sleek Sand Walker (Monaco palette): applied with a blending brush (MAC 217) right above the crease, as a transition colour between the purple and the brow highlight.

- Sleek Lotus Flower (Monaco palette): on the lid and blended into the crease, applied with a flat shader brush (MAC 239).

- Sleek Midnight Garden ( Monaco palette): softly applied with a tapered blending brush (MAC 226) in the outer corner over the purple to make it a little darker and add some depth. Also on the outer forth of the lower lashline over the lime green with a pencil brush (MAC 219).

Sleek Kiwi Zest (Monaco palette): on the lower lashline with a short bristle shader brush (MAC 214).

Urban Decay 24/7 eyeliner in Mildew: on the lower waterline and smudges between the lashes.

- NYX cream glitter (Paradise palette): applied over the purple with my finger.

- L’Oreal Super Liner: along the upper lashes.

- Max Factor False Lash Effect mascara: few coats on the top lashes, one coat on bottom lashes.

- False Eyelashes from Claire’s (no name or number) with Duo lash glue.


Hope you like it and thanks for stopping by!

X
Tanja

Sleek Oh So Special and Curaçao I-Divine Palettes

Hello folks!

Sleek makeup recently came out with a new collection: The Caribbean collection. The collection consists of an eyeshadow palette, a blush and a tinted lipbalm. I only picked up the eyeshadow palette. After I bought their Storm palette when I was in London, I started collecting their palettes. I think the quality of the eyeshadows is amazing for the prize (around £7 or €9 or $12).

This palette from the Caribbean collection is called "Curaçao" and is filled with bright and fun colours.
Lets have a look:

Sleek Curaçao palette (click for larger view)


Like all the Sleek palettes, these eyeshadows are nicely pigmented. The matte shadows are usually a little less pigmented than the shimmery/metalic ones. The darker matte colours usually show up better I find. Over a base or primer they work great though.

I swatched each row on bare skin and over Urban Decay's Primer potion.


Top row, bare skin, flash


Top row, over UDPP, flash


Bottom row, bare skin, flash


Bottom row, over UDPP, flash


My favorites of this palette are Green Iguana, Purple Haze, Green Martini and Singapore Sling.
Not all the palettes I have from Sleek have names for the colours but I'm glad all these new palettes do.


Sleek also came out with another palette, with more neutral colours, which is called "Oh So Special". I believe this is part of their permanent line since it isn't part of a collection.
This palette has got some great shadows to create any kind of neutral look with. It has some matte and some shimmery colours, going from really light to black so you could do an every day eye look with this but also a really dark smokey eye. If you can't get your hands on the Urban Decay Naked palette or it's too expensive, definitely check out this palette!

Sleek Oh So Special palette (click for larger view)


Here are the swatches, with and without primer.

Top row, bare skin, flash


Top row, over UDPP, fash


Bottom row, bare skin, flash


Bottom row, over UDPP, flash


My favorites: Glitz, Celebrate, Boxed and Wrapped Up.
I'm not too crazy about the matte pinks in this palette. Not as eyeshadows anyway, but I've found they work nicely as blushes.
I love how pigmented the matte black (Noir) that comes with a lot of these palettes is. I won't have to buy a matte black in a looong time, haha.


I'll probably do some eye looks with these palettes in the future, so look out for that!


x
Tanja

REVIEW: Masks and Eyelashes

Product Rating : ★★★★☆

If you guys watched my daily skincare routine video, I mentioned about these face masks that I use (the korean ones).  I usually buy them for $4-$5 at the cosmetic corner at a nearby Korean grocery store.  I found a online shopping mall "Luna Beauty" that sells these for $3 BUT they are currently on sale for $0.99!!!


We look scary so decided to blur out the picture hehe. 


Sandara Park (2ne1) with her mask "nonono don't touch my mask!"


STEPS for applying sheet masks:

1.  cleanse your face
2.  apply your face lotion
3.  apply your toner
4.  apply your acne medication
5.  apply the mask sheet on your face
6.  wait 15 minutes
7.  take off the mask (face will feel alittle moist)
8.  let it dry naturally (air dry). 
Don't wash it off because that is all the good stuff for your face!

** For cooler & fresh mask, put your mask package in the fridge for about 5 minutes, and then apply it to your face.  My husband and I always do that... feels soo cooool!


 DARKNESS KOREAN FALSE EYELASHES

Product Rating : ★★★★★

For all of my makeup tutorials, "Darkness" Korean eyelashes are what I always use.  They are not very expensive, feels light, natural, easy to apply, soft, blends well, only have to trim alittle bit (depending on how long your eyes are), can reuse many times, comes with glue.  I bought this style few days ago to get the more "dolly" look.  It is alittle bit more harder (but still very natural) then the ones I use everyday from this same company.


It comes with TWO glues inside.  The white one seems to not work for me that well and my eyelashes come off.  The yellow glue works GREAT for me even though I only apply a small amount on the eyelashes (barely any).  It stays on ALL day, even when I cry. hehe


Here are the natural ones that I wear everyday from "darkness".  It feels so light and looks so natural, I can't even feel the eyelashes on my eyes.  I like how it is shorter in the corners and gets longer towards the end. 


Here is a comparison of the "natural everyday eyelash" and "dolly look eyelash".
I wouldn't recomment wearing the dolly one everyday because they are alittle more harder and dramatic. =) It is a great eyelash if you want to go for the "dolly look".  Overall, the darkness eyelashes are all GREAT!

These eyelashes are also sold on Luna Beauty website for sooo much cheaper!  I also buy these eyelashes from the cosmetic corner for $5 (with tax), but on this website they are selling them for $2.95 - $3.50

They have A LOT of other great korean beauty products, so you should definitely check it out!


I'm ending this post with a picture of Taeyeon from SSND.
I absolutely love her hair in this picture! (Her hair color and front braids)


Personality by your lipstick shape ♥


I saw this online and thought it was pretty cool!  I am the last personality!

My Favorite MAC Lipsticks

Product Rating : ★★★★★
(Viva Glam Gaga Lustre, Creme Cup, Ravishing, Speed Dial, Lady Bug)


(Viva Glam Gaga Lustre, Creme Cup, Ravishing, Speed Dial, Lady Bug)


These are my top 5 favorite lipsticks from MAC.  I love MAC lipsticks because they stay on almost all day, very light, and applys very smoothly.  I usually don't buy red lipsticks, but this one from MAC "Lady bug" is very sheer and looks very natural.  I wore this lipstick on my natural red lipstick video back in April. =)  The lipstick that I am currently wearing EVERYDAy is the "Ravishing" - one in the middle.  It is a very light and natural coral color and it looks great with everything!


Very simple blue tips

I loved this concept, but am not as pleased with the results. It was intended to be worn to work as a not too flashy mani, but instead I took it off and redid them at like midnight. None the less I did like the idea and wanted to share it.

This is 3 coats of Sinful Colors Pearl Harbor and the tips are 2 coats of Sally Hansen's Blue me Away

I was really hopeful for Pearl Harbor, but alas another disappointing glitter. It is very hard to see the sparkles and especially hard to capture on camera.

Sleek Makeup Carribean Collection Aruba Blush: Swatch and FOTD

One of the key trends this summer has been that of orange and coral face colours. Of course, Sleek Makeup has come out with just the thing to indulge your craving for an on-trend cheek colour without breaking the bank! The Aruba Blush, part of Sleek Makeup's Carribean Collection, is the perfect shade of trendy summery orange going on right now. Just look at all that pigment!

Sleek Aruba Blush Carribean

I don't know about you, but I was a bit surprised when I first opened this. I mean, Aruba is perhaps as neon as a blush probably can get! This is easily the loudest, brightest, boldest blush colour I've seen - it would seriously put even the famed NARS shades to shame! Come to think of it, Aruba does kind of remind me of NARS Taj Mahal, although I'm not sure if they are dupes or not. But for a fraction of the exorbitant NARS price, Sleek Makeup's Aruba Blush is definitely in the same colour category, being also a bright orange-based blush.

Sleek Aruba Blush box


I know I've said this before, but I love the design on the Sleek Carribean Collection. Just look at the cute little illustrations of a boat and a palm tree. Feels like summer, doesn't it? Other than the cute design, the packaging is pretty much the same as the other Sleek Makeup blushes, consisting of a sturdy plastic case and a small mirror in the lid.

sleek aruba blush pan


As you can see from the photo above, the colour in the pan looks really scary - I thought it would be too dark or bright or just too neon for me! So I gingerly swatched it:

sleek aruba blush swatch


There, not so bad, right? The blush can be intense, but once blended out it can leave a sheer wash of colour. I'm thinking for warm-toned girls, this colour would look really pretty on. On cooler-toned girls, the orange hue can look a little weird, since the shade clearly leans warm, but if blended out, can still be wearable. After all, orange is one of the hot shades this summer.

Finally, I worked up the courage to actually try it out on my face:

sleek aruba blush fotd


There, it wasn't half as bad as I thought! When sheered out, it can definitely be used on paler girls as well. I think good application and blending is key - you definitely want to use only a little bit at a time, and blend it well. Given how little I used, I think this blush is going to last me forever, making it really great value for money.

If you're looking for a trendsetting colour, and want something cheap, or just want a more affordable version of NARS Taj Mahal, this is definitely worth checking out. If good-quality pigmented blushes are your thing (and they're definitely mine), the entire Sleek Makeup range of blushes in general would definitely be your cup of tea too.

(Product was sent for review. Review is my complete and honest opinion. I am not affiliated with/compensated by the company.)

Lancome Teint Miracle foundation- Review, Swatches , FOTD+ First Video

Hi beautiful ladies,

We all know that spotless and flawless skin is not gifted to everyone. We all bring along a soft and spotless skin at our birth time but with the cruelty of time and atmosphere most of us lose our birth skin. Sometimes some hormones of our own body are responsible for pimples, blemishes and spots. We try to reduce them by a good diet, some times medical help some creams and lotions but it takes a long way to get rid off. When we start makeup, we all want an instant way to get a flawless skin and then our foundations work for us. But which foundation? There are many foundations available in our market but it’s so difficult to choose the right one. Which one can give us not only a flawless look but remains light weight on our face? We have only some choices left now and today I’m going to introduce you the most perfect foundation for getting a spotless and satin skin look which is the just true as it's name: Lancôme Teint Miracle foundation.

Net weight

30 ml

Price

Rs 2700

Packaging

A beautiful slim & sleek glass bottle of 30 ml. Has a glad cap & it is a pump out bottle. Very handy & should be kept safe while carrying around coz it's made of glass. The pump makes it very easy to take out the required amount.

In the mirror of my own experience

When I first applied it, the words which came out after seeing its result on my face were…wow it’s just perfect. I have used many foundations but only some foundations could impress me. A lot of bottles are still waiting to use them after using one or two times because they are not right choice for my skin tone. Some of them are so heavy after applying of course they gave the good coverage but I hate to apply a foundation plaster on my face. Some were light weight but their shades couldn’t match from my skin tone. I have usually been wearing Revlon Colorstay foundation because it’s really a light weight, only on some occasion I wear its PhotoReady foundation because it’s a bit heavy. But after applying this one I have to realize that it’s not only so light in weight but also gives a great coverage to my skin. I wore it at a function which was from morning to late evening. The whole day I never felt that I had applied something on my face and after reaching home I was surprised to see that the effect of the foundation was just same as morning. I poured cold water two or three times during the day but there was not an inch of difference in the effect of my foundation. It is totally oil free, but in spite of that it doesn't make the skin dry. I felt a natural moisture in my skin. I can’t express my feeling after wearing it. It’s really a water proof foundation; I realized it while I was washing my face.

At first I tried to remove some foundation with a wet cotton wool but I was amazed to notice that not a tinch of stain of foundation was on the cotton wool, hey..that was not the end of its miracle because it got removed very easily using my Liz Earle cleanser. What else should we want from a great foundation, like this-amazing coverage to hide any imperfections on our skin, miraculously light weight, water proof & oil-free, yet removes easily using a good cleanser! So I don't think you need anything else from this magical bottle?

Good points

The packaging is so stunning like a cute perfume bottle, very handy and still safe and secure.

It’s a pump out bottle so you can get your required amount after pressing the pump very easily.

A little quantity will be enough for getting a good coverage.

It has a very high coverage foundation. Conceals all the spots of the skin. I don’t require a concealer after applying this foundation.

I can find an even, unified and flawless skin without the feeling of something heavy on my face. It’s amazingly very light weight that sometimes I feel as if I’m only wearing my moisturizer on my face. It gives an oil free, natural moist skin.

It’s great for all types of skin, if you have so much oily skin you only have to do to apply a good pressed powder after applying it.

It’s completely water proof; I don’t need to worry about it fading out neither from sweating, getting wet in rain, nor by pouring cold water on my face.

On blending

I can remove it very easily with any good cleanser. I only need to apply a good cleanser on my face, massage gently and then remove it with a moist cotton wool. I only need a face wash or foaming cleanser for removing my arrogant eye liner & mascara.

The cost of this foundation is worth its infinite qualities.

You can really get a miraculous foundation after buying it.

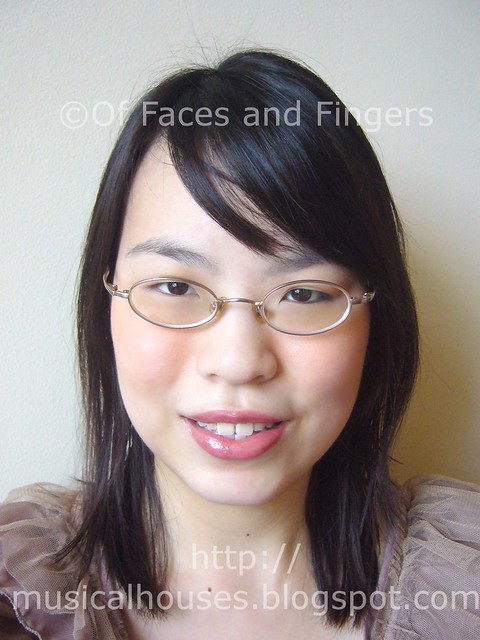
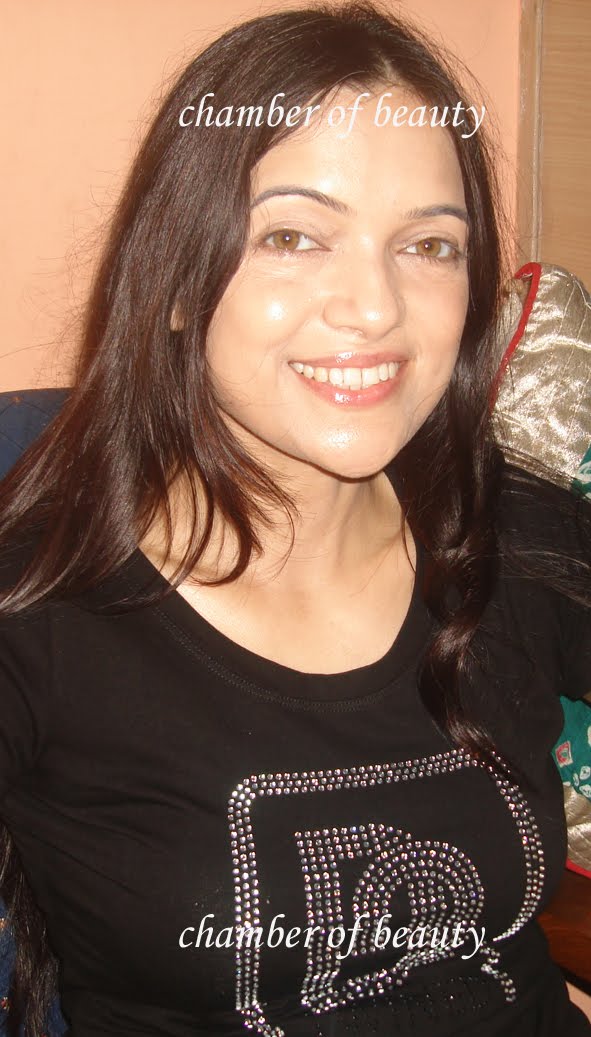
This is how it looks on me

Bare face

Using Lancome Teint Miracle foundation


Bad points

I didn’t find any bad point in this foundation. It’s marvelous!

Rating

5/5

Recommendation

I highly recommend this great foundation to my readers and visitors. You need just once a try the rest of thing you’ll feel yourself.

Purchase it again?

Of course, I would love to purchase it again and again.

Final thoughts

Now what i feel is that nothing's left to say now or rather write now....in short & sweet- Fabulous & Perfect!!!!

Finally here is a small video showing how i apply my Lancome teint Miracle foundation!

So girls, what do you think about this foundation? Have you used it ever? What do you say? In my opinion, your views are not different from me but I would love to read your thoughts in your words. Don’t forget to share with me through the comment section!

Disclaimer- Product sent by PR, honest review

Monday, July 25, 2011

New Makeup vid check it out on you tube snicky82

harley davidson, black tips with irises, butterflies with glitter. up for 7/25/11

french manicure with iris flowers
HARLEY DAVIDSON TUTORIAL HERE
FRENCH MANICURE WITH IRIS FLOWERS


Golden Steampunk Stamping

I really love the whole steampunk idea. I think it is an interesting and unique style and would love to get to learn more about it when I have more time, but until them, nail polish will have to fill the void!

This is wet & wild The Gold and the Beautiful with a design from my master plate over top.

I loved this effect, which is great since I honestly was not in love with this gold color at first. I am beginning to understand though, that every color can look good, if used correctly.