These are my top 5 favorite lipsticks from MAC. I love MAC lipsticks because they stay on almost all day, very light, and applys very smoothly. I usually don't buy red lipsticks, but this one from MAC "Lady bug" is very sheer and looks very natural. I wore this lipstick on my natural red lipstick video back in April. =) The lipstick that I am currently wearing EVERYDAy is the "Ravishing" - one in the middle. It is a very light and natural coral color and it looks great with everything!
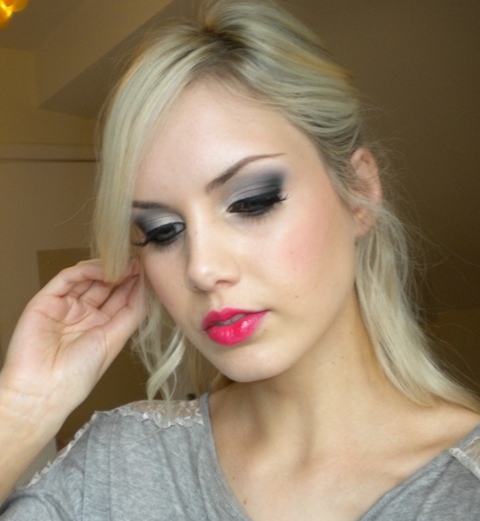
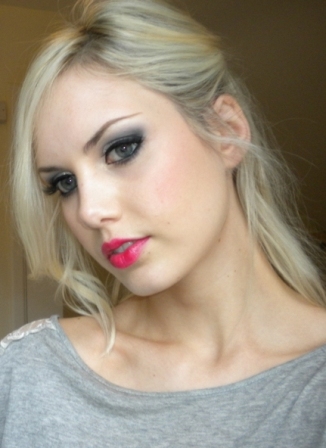
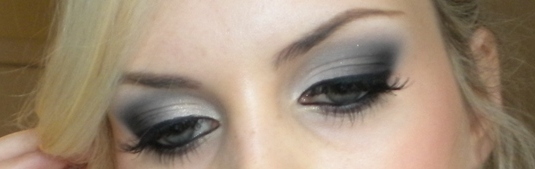
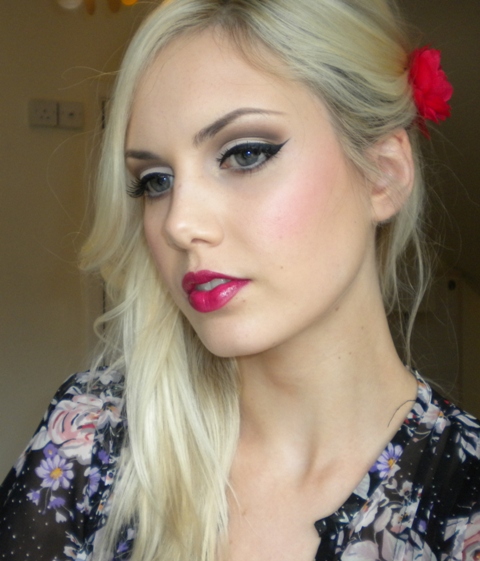
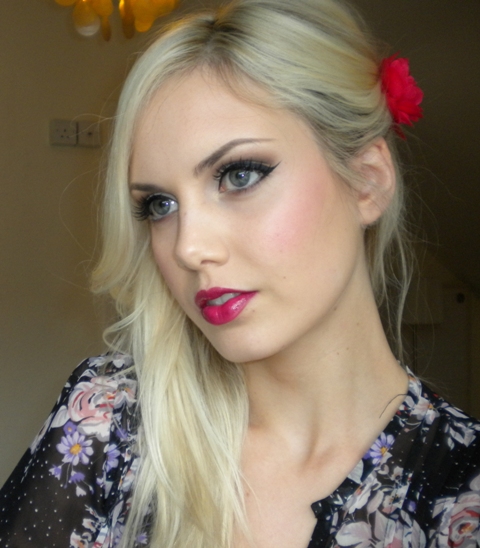
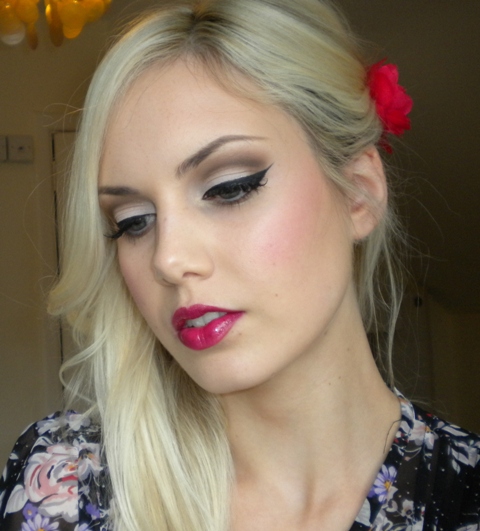
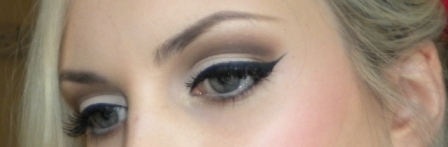
Something a bit more fun today - dramatic grey eyeshadow with a pop of bright pink on the lips to brighten things up! You could tone it down with a nude lip though too if you wanted. Hope you enjoy it!
~ Products Used ~
Face:
Chanel Pro Lumiere Foundation 20
Make Up For Ever Lift Concealer #3
Make Up For Ever Star Powder on cheekbones
MAC Prep & Prime Powder
MAC Matte Bronzer
MAC Pink Swoon Blush
Eyes:
MAC Painterly Paint Pot
MAC Vanilla, Gesso, Scene & Typographic
Make Up For Ever Star Powder #902
Clinique Cream Liner
Max Factor False Lash Mascara
Ardell Demi Wispies
Laura Mercier Blonde Brow Pencil
Lips:
Dior Addict Lipstick in 865 Collection
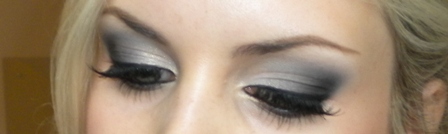
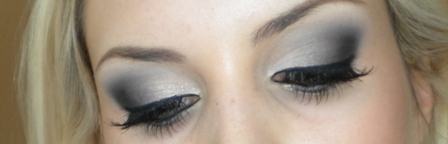
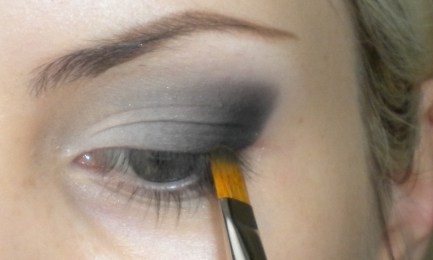
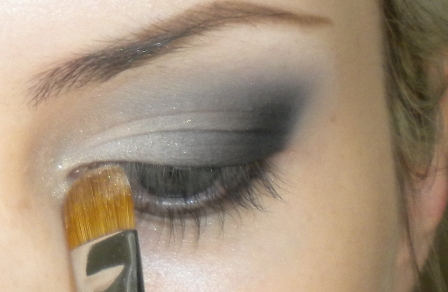
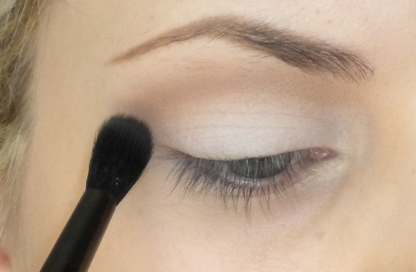
1. Apply MAC Painterly as a base. Sweep some Vanilla eyeshadow (or any shade which is close to your skin tone) all over the lid up to the brow. This ensures that the following eyeshadows will blend seemlessly. Next take some Gesso eyeshadow and appy it to the inner half of the lid.
2. Take MAC Scene eyeshadow or another medium grey shade and, with a flat brush, apply this to the outer half of the lid. Now take a fluffy blending brush like the MAC 217 and blend this across the lid into the Gesso shade.
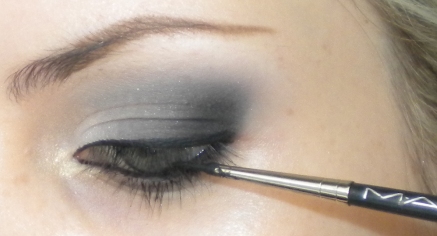
3. Now take a dark grey (I'm using MAC Typographic) and apply this to the outer corner of the eye on a flat brush. I created an angled shape with this. Use the same flat brush to sweep the eyeshadow across the lid into the medium grey shade. So there should be a nice graduation of colour now from light to dark. 4. Take some more Vanilla eyeshadow and use this to blend around the edges so that they're not so harsh. I used a MAC 222 Brush for this. 5. Take some of MAC Scene and run it under the eyes. Now take some shimmer (I used a Make Up For Ever Star Powder) and press this over the area where the Gesso eyeshadow was applied on the inner corner. Take it around the tear duct area too. 6. With a gel or liquid liner, line your top lash line. Apply some black liner to your waterline too. Add mascara to top and bottom lashes. Apply some false eyelashes and that's it!
Here's the finished eye make-up again.........
I hope everyone had a great week/weekend. I received my Visa for Australia a few days ago which is equally exciting and extremely scary! It definitely hasn't quite hit me yet that I'll be moving there very soon. Trying to think of how I'm going to manage packing everything is really beyond me at the moment. It will definitely be very nice to be going somewhere with some lovely sunshine though. I'm going to be passing through California too for a few days on my way there which I absolutely can't wait for. I lived in California for a few months several years ago and I love the place so it will be so nice to be back there. Beats Ireland any day! :D
Here’s a look I did with MAC’s Rare Find mineralized eyeshadow from the Semi Precious collection. I’m actually really glad I picked this up cause it’s so pretty. It looks even better in real life than it does on the picture.
These are the products I used and how I used them:
- Urban Decay Primer Potion: all over the lid up to the brow, blended out with my finger.
- MAC Brun eyeshadow: to fill in my brows, with an angled brush (MAC 268).
- MAC Vanilla eyeshadow: as a browbone highlight, applied with a flat shader brush (MAC 239) and inner corner highlight with a pencil brush (MAC 219).
- MAC Rare Find mineralized eyeshadow: all over the lid, applied with a damp flat shader brush (MAC 239, I used Fix + to wet my brush, but you could also use water) and used dry to blend it out just above the crease with a fluffier brush ( MAC 217). Also applied wet on the lower lashline with a short bristle shader brush (MAC 214)
- Urban Decay 24/7 eyeliner in Zero: on top and bottom waterline and smudged between the lashes.
- Max Factor False Lash Effect mascara: few coats on the top lashes, one coat on bottom lashes.
- False Eyelashes from Claire’s (no name or number) with Duo lash glue.
I love the shimmer in this eyeshadow and I think it looks great on its own!
You could make this look a little darker and more smokey by adding some black on the outer corner.
I was watching Hyuna's (현아 - 포미닛) ^^ new music video "Bubble Pop" and I immediately fell in LOVE with her makeup with the pink lipstick!! I don't really look good with red lipstick so I choose not to do the tutorial on her main jacket look (red lips). I enjoyed doing this makeup tutorial and I hope you guys like it too!!!
I don't know why.. but the first thing that came up in my mind when I watched this music video was "Lee Hyori" -_-
This look would have looked SOOO much better if I actually had light brown hair like her! =( BOOOO!
Products Used:
1. Too Faced - Cocoa Puff & Honey Pot
2. MAC - Cork
3. MAC - Tempting
4. Too Faced - Nude Beam
5. Urban Decay - Bourbon
6. MAC - Blacktrack Fluidline
7. Mascara - Rimmel Glam' Eyes
8. MAC - Speed Dial
Here are a few swatches for you guys on these products!
Product Rating : ★★★★★
Too Faced - Nude Beam
I LOVEEEEEEEEEEEEEEEE THIS! So shimmery! hehe
Product Rating : ★★★★★
(left) MAC - Cork, Tempting & (right) Too Faced - Cocoa Puff
Product Rating : ★★★★★
MAC - Speed Dial
omg.. I am in loveeeeeee with this pink lipstick that I purchased from Mac.
It looks great with my everyday makeup. It isn't TOO hot pink and
it look great with my skin tone color!
Here is a swatch of the MAC - Speed Dial
Ehgyo Ssal "애교살" - the kind of puffy part under their eyes.
All the top korean PRETTY celebrities are known to have these.
It's different from bags and dark circles that you get from when you are tired.
A lot of people from korean get surgery to make ehgyo ssal under their eyes.
People with BIG eyes normally have this ^__^
My husband has ehgyo ssal AND a beauty mark.. eh.. not fair!!! ㅠㅠ
This is the latest tutorial that I've decided to re-upload from my old channel. This is one of my favorite looks when I created it last year, I love the contrast of the gold and purple. This is also one of my sister's favorite looks which she often asks me to recreate on her.
EYES: - Two Faced Shadow Insurance - Indianwood paint pot - Amber Lights eye shadow - Inglot #430 (true gold) eye shadow - Goldmine eye shadow would work too, although it wouldnt be as dramatic - NYX "Milk" jumbo eye pencil - Naked "Blue Duochrome" pigment - this comes from the Ivory Stack and actually has a number but I don't remember what it is. If you have Vellum eye shadow it would work too - Cork eye shadow - Brown Down eye shadow - Carbon eye shadow - Vanilla eye shadow - Non-Conformist fluidline - Inglot #379 (matte blue-purple) eye shadow - you could also use Parfait Amour eye shadow - Smolder eyeliner - Blacktrack fluidline - Ardell "Demi Whispies" lashes (optional)
CHEEKS: - Inglot #35 (neutral cantaloupe with silver shimmer) blush - Inglot #57 (neutral pink-based brown with silver shimmer) blush
NARS Cactus Flower - A watermelon red with gold shimmer
Topshop Flush - A bright warm pink
MAC Something Special - A soft pinky-peach
Graftobian Raspberry Wine- A rosey-red shade
Has anyone else tried any of these? Let me know what you think of them or what your recent favourites are! I always love checking out new ones being the blush addict that I am :D
Hey guys. Sooo I know MAC pigment eyeshadows are very expensive. I wanted to share a website with you guys where I buy my pigment samples. They have almost about EVERY SINGLE MAC PIGMENT here and it's about $3-$4. When I want to test out different colors, it is not worth the money to go spend $10-$14 on a single pigment eyeshadow.. so I purchase samples instead. They have many other beauty cosmetic products as well!
How I ever overlooked Saddle is beyond me! I thought I had every neutral shade that MAC owned! I was watching You Tube a while back and saw someone(actually a couple of gurus) using this eyeshadow as a bridge color. I looked through my MAC neutral palette and couldn't find it! Where could it be? I know I have this color! Well after a long hard search....No Saddle! I was pretty sure I had it! So I added it to my bag on MAC's online website along with Texture another shade which is similar and also I thought I had. Both are great bridge colors and makes for great contour colors in the crease as well as a lid color if you want to have a no makeup look.
I'm so excited that now this color is in my kit as well as in my personal arsenal of shadows! I haven't stop using it since the day I ordered it and can't wait to try it on a few clients. I have a bridal consultation coming up and I'm looking to incorporate the shadow into the look.
Also this shadow makes for a great contour color on the nose and through the cheek bones on lighter complexions. I have used it for my nose contour on myself so that I don't get that too dark of a contour look. It's a great add to any neutral palette!!
Rebel is one of those lipsticks which can work on absolutely any skin tone, from the palest to the darkest. It looks great sheered out to a stain too or made into a gloss by mixing a tiny amount in with some clear lipgloss. It's really versatile and tends to be a favourite among make-up artists. I paired it with very neutral eyeshadows here but I think the defined crease and winged black liner still inject just enough drama to balance out the deep lip. You can of course also use this eye make-up with just about any lip colour!
~ Products Used ~
Face:
Chanel Pro Lumiere Foundation 20
MAC Pro Longwear Concealer NW20
MAC Pearl Cream Colour Base
MAC Prep & Prime Powder
MAC Matte Bronzer
NYX Blush in Pinky
Eyes:
MAC Painterly Paint Pot
MAC eyeshadows in Vanilla, Gesso, Wedge,
Embark, Carbon
Urban Decay Buck eyeshadow Make Up For Ever Star Powder
Clinique Cream Liner
Make Up For Ever Concealer Pencil
Maybelline Volume Express Mascara
Ardell Demi 102 Lashes
MAC Dirty Blonde Brow Pencil
Lips:
MAC Plum Lip Liner & Rebel Lipstick
MAC Clear Lipglass
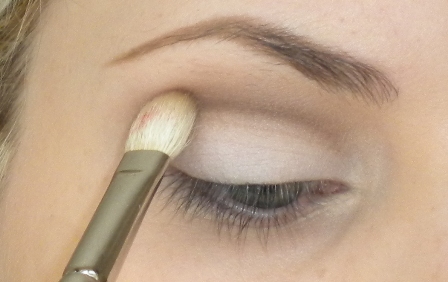
1. Appy MAC Painterly Paint Pot as a base. Next, apply a good amount of MAC Vanilla eyeshadow all over the lid all the way up to the brow. Doing this ensures that the shadows which will be applied later will blend really easily.
2.Apply MAC Gesso eyeshadow to the lid on a flat brush, keeping it below the crease.
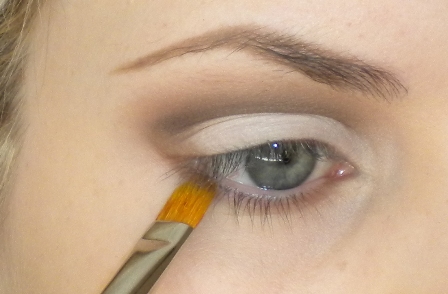
3.On a large fluffy brush like the Illamasqua Blending Brush sweep some MAC Wedge eyeshadow onto the area slightly above the socket line.
4.On a pointed brush (I'm using one by Louise Young) apply a darker brown shade into the crease. I mixed Urban Decay Buck and MAC Embark to get the shade I wanted. The pointed brush should create a very defined line in the crease with the eyeshadow.
5.Take a MAC 217 or a similar blending brush and blend the top edge of the darker brown where it meets the lighter brown shade. Now just keep applying more dark brown and blending it. You can apply more of the lighter brown too if it begins to get lost.
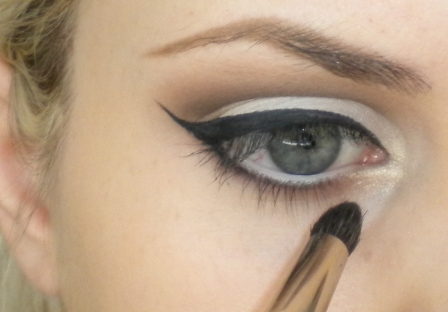
6.Run some of the Urban Decay Buck eyeshadow underneath the eye on a flat brush like a MAC 242. I also applied a tiny bit of MAC Carbon eyeshadow very close to the lower lashes on an angled brush to define my lash line. If you already have dark lashes and a dark lash line you may not need to do this.
7.Line your top lash line with a cream/gel or liquid liner. I used Clinique Cream Liner on a MAC 210 brush.
8.Line your waterline with an off white pencil. I used Make Up For Ever's Concealer Pencil. On a small brush, apply a shimmery eyeshadow to the tear duct area as a highlight. I used a Make Up For Ever Star Powder for this.
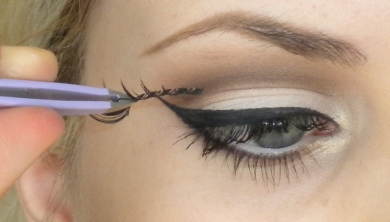
9.Apply mascara to top and bottom lashes. Add some false lashes and you're done!
Here's the finished look. The eye make-up is really quite simple - it just requires some good blending work!