
Currently the items that I use for my manicure and pedicure are all from the company "Natural Look" because I feel that if you use products from the same line work better because they are designed to work together in the same step system.
I am in no way affiliated with Natural Look and I bought all these products with my own money.
Step One - Cuticles:


I use the spoon and of a cuticle pusher to push back my cuticles. I then apply the Natural Look Erase cuticle remover and wait 2 minutes before using the blade on the cuticle pusher to remove my cuticles.
I NEVER cut my cuticles. The cuticle protects the nail from bacteria that could infect the nail and cause damage and cutting it creates a risk of bacteria getting in.
I NEVER cut my cuticles. The cuticle protects the nail from bacteria that could infect the nail and cause damage and cutting it creates a risk of bacteria getting in.
Step Two - Filing:


Next I file my nails using a 180/180 grit file, the one I use is the Grey Fox file from EzyFlow. I shape the free edge of my nail and then lightly file the surface of the nail to remove any ridges. I then use a nail brush to dust away any filing dust.
I then use a double sided buffer with a 220/280 grit, the one I use is the Sand Shark buffer from EzyFlow. I use the 220 grit side first to buff the surface of the nail and then do the same with the 280 grit side, brushing away the filing dust at the end of each step.
After the double sided buffer, I use a shine buffer to buff my nails to a high shine, the one I use is the Killer While buffer from EzyFlow.
NOTE: Make sure to remove the filing dust in between each file to prevent scratching the surface of the nail
Also, don't file to harshly or too often, this will make the nail thinner and more prone to breaking
I then use a double sided buffer with a 220/280 grit, the one I use is the Sand Shark buffer from EzyFlow. I use the 220 grit side first to buff the surface of the nail and then do the same with the 280 grit side, brushing away the filing dust at the end of each step.
After the double sided buffer, I use a shine buffer to buff my nails to a high shine, the one I use is the Killer While buffer from EzyFlow.
NOTE: Make sure to remove the filing dust in between each file to prevent scratching the surface of the nail
Also, don't file to harshly or too often, this will make the nail thinner and more prone to breaking
Step Three - Soak Feet:


Next, I fill a foot spa with warm water and pour some Natural Look Cool Feet Softening Soak. This softens the skin and cuticles and contains tea tree, peppermint, eucalyptus, lavender and chamomile. which are used for their antiseptic and therapeutic qualities. To this I add a tablespoon of Natural Look Cool Feet Deep Sea Salts which also contains tea tree, peppermint and eucalyptus. I soak my feet in this for 15 minutes.
Step Four - Exfoliate:

I suffer from really dry feet so I use Natural Look Cool Feet Stimulating Scrub which contains papaya, to deep cleanse, remove and prevent rough, dry skin build-up. I massage this into my feet and then wash away using warm water.
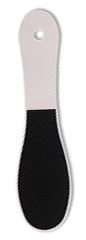
After washing away the scrub, I the course side of a double sided foot file to remove any callused dead skin. I thin use the finer grit side of the file to smooth the skin. I then wash away the dead skin with warm water.
Step Five - Moisturize:


After drying off my feet, I apply Natural Look Cool Feet Massage Lotion and massage it into my hands. This moisturizers is thicker than any other I have used which I find better because you use less. It also sinks into the skin faster than any other hand cream I have used and protects from damaged caused by weather, water and chemicals. Massaging your feet will help to improve circulation. This contains peppermint to help nutralize foot odor, tea tree oil and chamomile to soothe rubbed toes and skin irritations and Lanolin and aloe vera to soften hard skin.
The final step to my pedicure is to apply Natural Look Nourish cuticle oil which helps to keep your cuticles soft and nourished. Using this will also help retain moisture in your nails so that they are more flexible and less prone to breakage.
Hopefully this written tutorial has helped you, if I get enough interest in this I may film a video tutorial and post this later.


