Showing posts with label Red. Show all posts

Tuesday, June 28, 2011

China Glaze Lubu Heels + Nails Inc Trafalgar Square = Awesome Bling!

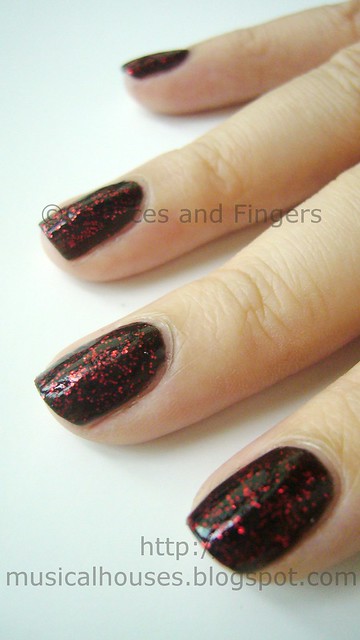
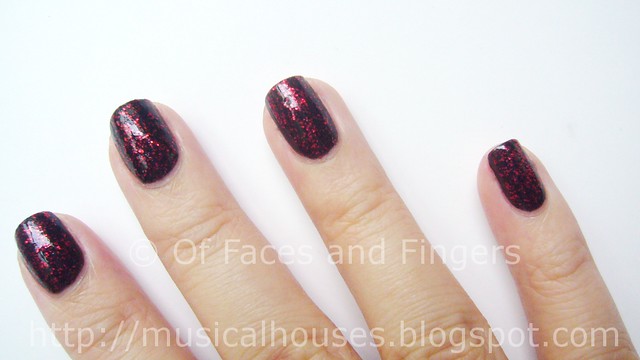
Don't you just love how cool my nails look right now? I love how this looks - just like red stars in a deep, black sky, or burning embers in a bed of lava. This look was actually two polishes layered together. For the base, I used China Glaze Lubu Heels, a black jelly with small red glitter, one of the classics in their permanent collection. However, it wasn't quite blingy enough for me, so I layered Nails Inc Trafalgar Square over it. Nails Inc Trafalgar Square consists of large chunks or red glitter in a clear base - perfect for layering over Lubu Heels!


I'm always been a fan of both China Glaze and Nails Inc, and both of these were polishes I bought awhile back but never used as often as I liked (although I've previously used Trafalgar Square in another NOTD, one that's really old.)

China Glaze Lubu Heels Nails Inc Trafalgar Square 3


Both these brands generally work very well on me, and the application for China Glaze and Nails Inc was quite trouble-free for glitter polishes. As always, since the glitter does tend to clump up in some places, you do need to work a little with the brush to try to ensure as even a distribution of glitter as possible. Otherwise, I had no issues with application.

Both China Glaze and Nails Inc wear well on me, so this lasted for around 3-4 days before chipping. That's pretty decent for me, so I have no complaints about lasting power.

China Glaze Lubu Heels Nails Inc Trafalgar Square 2

I love my nails, and I love the glitter and bling. Although I don't always use glitter polishes, I can't wait to do another manicure like that again!

Monday, May 23, 2011

Nails Inc Paddington + Nail Art Pearl Rhinestone = Classy But Fun NOTD

I don't always get to do nail art, so whenever I bling up my nails, I get all excited! So please humour me while I start off this post with a photo of my awesome blinged up nails.

Nails Inc Paddington Nail Art Pearls

The nail polish in question is Nails Inc Paddington, a gorgeous glossy deep red I bought in my craze to own as many Nails Inc colours as I possibly could before leaving the UK. It's distinct from Nails Inc's other famous colour, Victoria, in that Victoria is a jelly (sort of), while Paddington is a creme, and Victoria has a tinge more purple to it, whereas Paddington is more maroon.

Anyway, I first applied Paddington, which applies like a dream, as with most of my Nails Inc polishes. I loved how absolutely classic it looked. So I decided that if I wanted to bling it up, I would have to use something equally classy - and lo and behold, I took out this little baby.
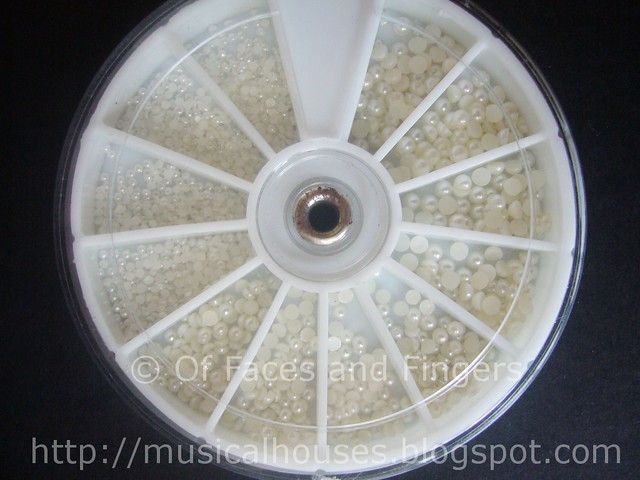
nail art pearl 1


This humble-looking set of nail art pearls is available from Born Pretty Store, which has been quite popular among nail bloggers lately for their vast array of nail art products. The store simply has everything, from shatter polish to nail art tools, and of course, nail art decorations like this set of pearls. This set of pearls is the 3 sizes nail baby pearl rhinestone decoration wheel, available for a very reasonable price.

The pearls come in three sizes, so you can pick and choose to form various designs, or to suit very large or small fingers. I've taken the liberty of photographing a pearl of each size against a ruler, so you can guesstimate how large these are. The smallest pearl is really quite tiny, while the largest pearl is pretty big.

nail art pearl 2


For this look, I used just the medium-sized pearl. For round items like nail art pearls or rhinestones, I find it best to pick and place them on the nail by using a damp toothpick, a tip I learned from some other nail bloggers. Basically, you dampen the end of a toothpick, and touch the surface of a pearl or rhinestone. The pearl or rhinestone will then "stick" to the toothpick due to the surface tension of the water, thus allowing you to move the pearl and hover it over the nail until you are fully satisfied with its position. Then, you can lower the pearl or rhinestone on to the surface of the nail, and the wet nail polish will have a stronger surface tension than the water on the toothpick, so the rhinestone will stick to the nail even after you lift your toothpick. Nifty, right? Sometimes I also use a pair of tweezers, when I can't find a toothpick lying around.
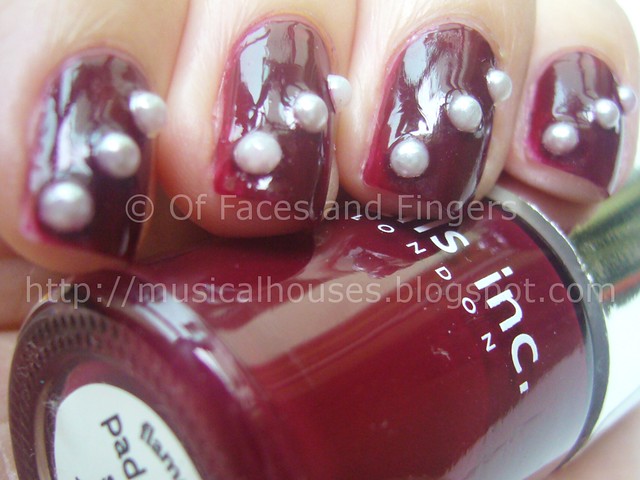
nails inc paddington nail art pearl 2


Another tip I've found handy when working with nail art is that topcoat is needed over the pearls and rhinestones, otherwise they will fall off within a couple of days. I typically use two coat of topcoat over the nail art. I first use a slow-drying topcoat, and then apply a second coat of fast-drying topcoat, like Seche Vite, over it. That way, the pearls and rhinestones stay firmly in place for as long as possible, without me having to wait for hours for my manicure to dry. With this method of slow topcoat and fast-dry topcoat, my manicure is typically ready to go after half an hour. Meanwhile, in the interim half-hour, I can use my hands, but carefully.
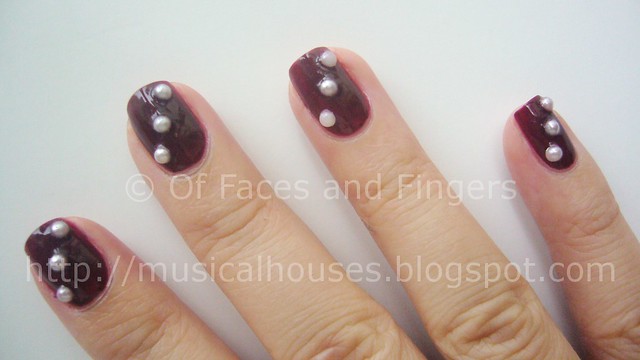
nails inc paddington nail art pearl 3


Lasting power of the manicure was very good. If you've been a longtime reader of my blog, you'll know I'm an absolute hoor for all Nails Inc polishes, since they work very well on me. Nails Inc's Paddington applied smoothly, and stayed on for 3-4 days before chipping, which is about usual for me. I only wish that Nails Inc was cheaper, and available outside the UK! In my humble opinion, the Nails Inc formula is the best there is in nail polish - outstripping even - dare I say it - RBL. I personally find the consistency smoother in Nails Inc polishes, and the application less streaky. Okay, now I'd better run before the RBL fans stone me.
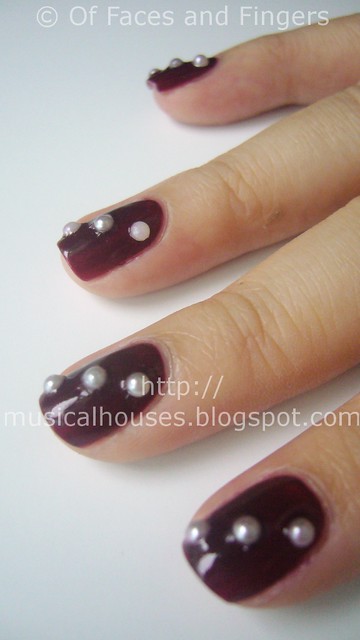
nails inc paddington nail art 4


I don't know about you, but I am absolutely loving my nail art, although it was a little more time-consuming than your average manicure. I love the combination of deep red together with white pearls, and I love how it looks classy with the deep red colour, but still a little fun with the pearls! I'm not going to lie - I simply couldn't stop looking at my nails when I had this manicure on.

(Nail art product was sent for review. Review is my complete and honest opinion. I am not affiliated with/compensated by the company.)

Wednesday, February 2, 2011

Chinese New Year Nails: Year of the Rabbit KOTD!

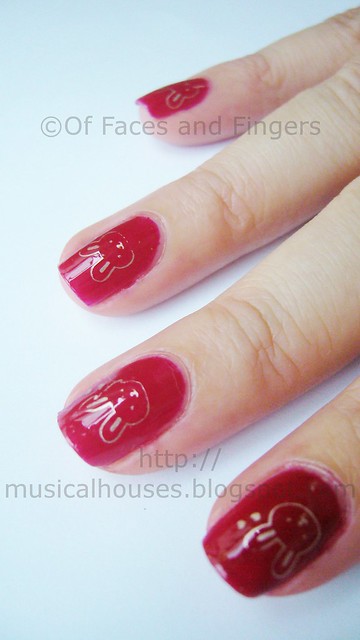
I know I just posted a Chinese New Year NOTD just awhile back, but hey, since Chinese New Year comes only once a year, why not do another one? This time, I have cute little rabbits on my mani, you know, because it's the year of the rabbit!

Year of the Rabbit

The absolutely adorable kawaii rabbit imprint is, of course, thanks to the wonders of Konad! I'm using plate S10, and it's full of kawaii animals. There's a rabbit, a cow, a cat, a bear, a dog, and so on. Very cute, if you ever want to do a zoo-inspired mani.

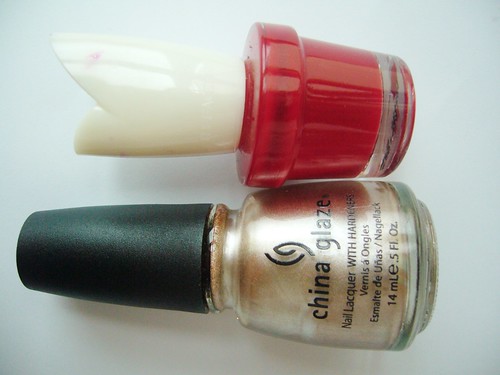
face shop rd302 chg  hi tek


The polishes were different this time, because after the glitter of the last CNY (Chinese New Year) NOTD, I decided I wanted this one to be a creme. So the base was a colour from the Face Shop's Nail Talk range, RD302. The first coat produces a pinky-red colour not unlike Benefit's Benetint, but in nail polish form. The second coat produces the primary straight-up red you see in the photos. It also comes in a very kawaii bottle, although the bottle is quite tiny.

The konad colour was China Glaze Hi-Tek, a gorgeous orangey-gold chrome that is absolutely beautiful for konading. I love the China Glaze Khromes, and if you're a konader, you need the entire Khrome collection, since they all konad very nicely.

year of the rabbit nails 2


As you can see from the photo, my konading skills are obviously quite lousy - there's a konad fail on some of the fingers. Oops. But still, my mistakes don't detract from how cute the rabbits are!

And just so you can really see all those rabbits on my nails up close, including my mistakes:

year of the rabbit nails 3


Since the year of the rabbit comes once every 12 years, I may as well get a kawaii rabbit on my nails while I still can, right? Happy Chinese Year, everyone! :D

Saturday, January 29, 2011

Chinese Lunar New Year Nails Using Color Club X'mas!

Chinese New Year is upon us soon, and in the spirit of celebrating the lunar new year, I thought I'd dress up my nails for the occasion! I went with the predominant colours of Chinese New Year - red and gold. And in the spirit of festivities, the brighter and gaudier the colours are, the better they are! LOL! So, I hunted around in my stash for the brightest, blingiest red and gold nail polishes I could find.

And lo and behold: I found these shades of red and gold glitter, perfect for the New Year!

color club enchanted holiday wish list red


But wait! Aren't those from Color Club's last Christmas collection? If that was your reaction, you're sharp - those are indeed the latest Christmas polishes from Color Club's Enchanted Holiday seasonal collection. Specifically, that gorgeous red is Wish List Red, and the gold is Enchanted Holiday. But whatdayaknow, those Christmassy shades of red and gold just also happen to be just right for Chinese New Year! Who says you can't do bling on both occasions?

So, since I had done the Christmas bling on my nails, I decided to do some Chinese New Year bling too. But since I had to wear this to work, the bling had to be a lot more toned down than I would have liked - I couldn't risk blinding my clients!

Here's the watered-down bling for the year of the rabbit. In the end I settled on a gradient manicure, using Wish List Red as a base, and layering Enchanted Holiday on the top:

Chinese lunar New Year nails

Isn't that awesome? It makes me feel all in the mood for firecrackers, red packets and dumplings! And the best part is - you can actually replicate a look like that for Christmas, because you're using the same colours! Talk about killing two birds with one stone!

Color Club Wish List Red is a gorgeous jelly-like red base with dense amounts of red glitter. I really like this one, it kind of reminds me a little bit of China Glaze's Ruby Slippers. Very pretty, and very eye-catching. Enchanted Holiday consists of gold glitter, but more sparsely distributed in a clear base. I also liked this one, and I think it'll be perfect for layering over other polishes.

Both polishes were a litte bit on the thick side, which is not my usual experience with Color Club. It could just be that the base formulation was made thicker to ensure even dispersal of glitter in the polish. Still, they applied well, and dried fast. As with most glitters, you may wish to use two coats of topcoat instead of one if you want a finish that's smooth to the touch. I made do with just one, though.

chinese new year nails


I'm so psyched about my nails, and I think they're a great way to celebrate the lunar new year! If you've been looking for nail colours for Chinese New Year, but can't seem to find any, Color Club's Wish List Red and Enchanted Holiday would be perfect. If, on the other hand, you don't celebrate Chinese New Year, but still wish it was Christmas, now you have the perfect excuse to continue wearing Christmas colours!

(Product provided for review. Review is my honest and complete opinion. I am not affiliated with/compensated by company.)

Wednesday, October 27, 2010

Vamp

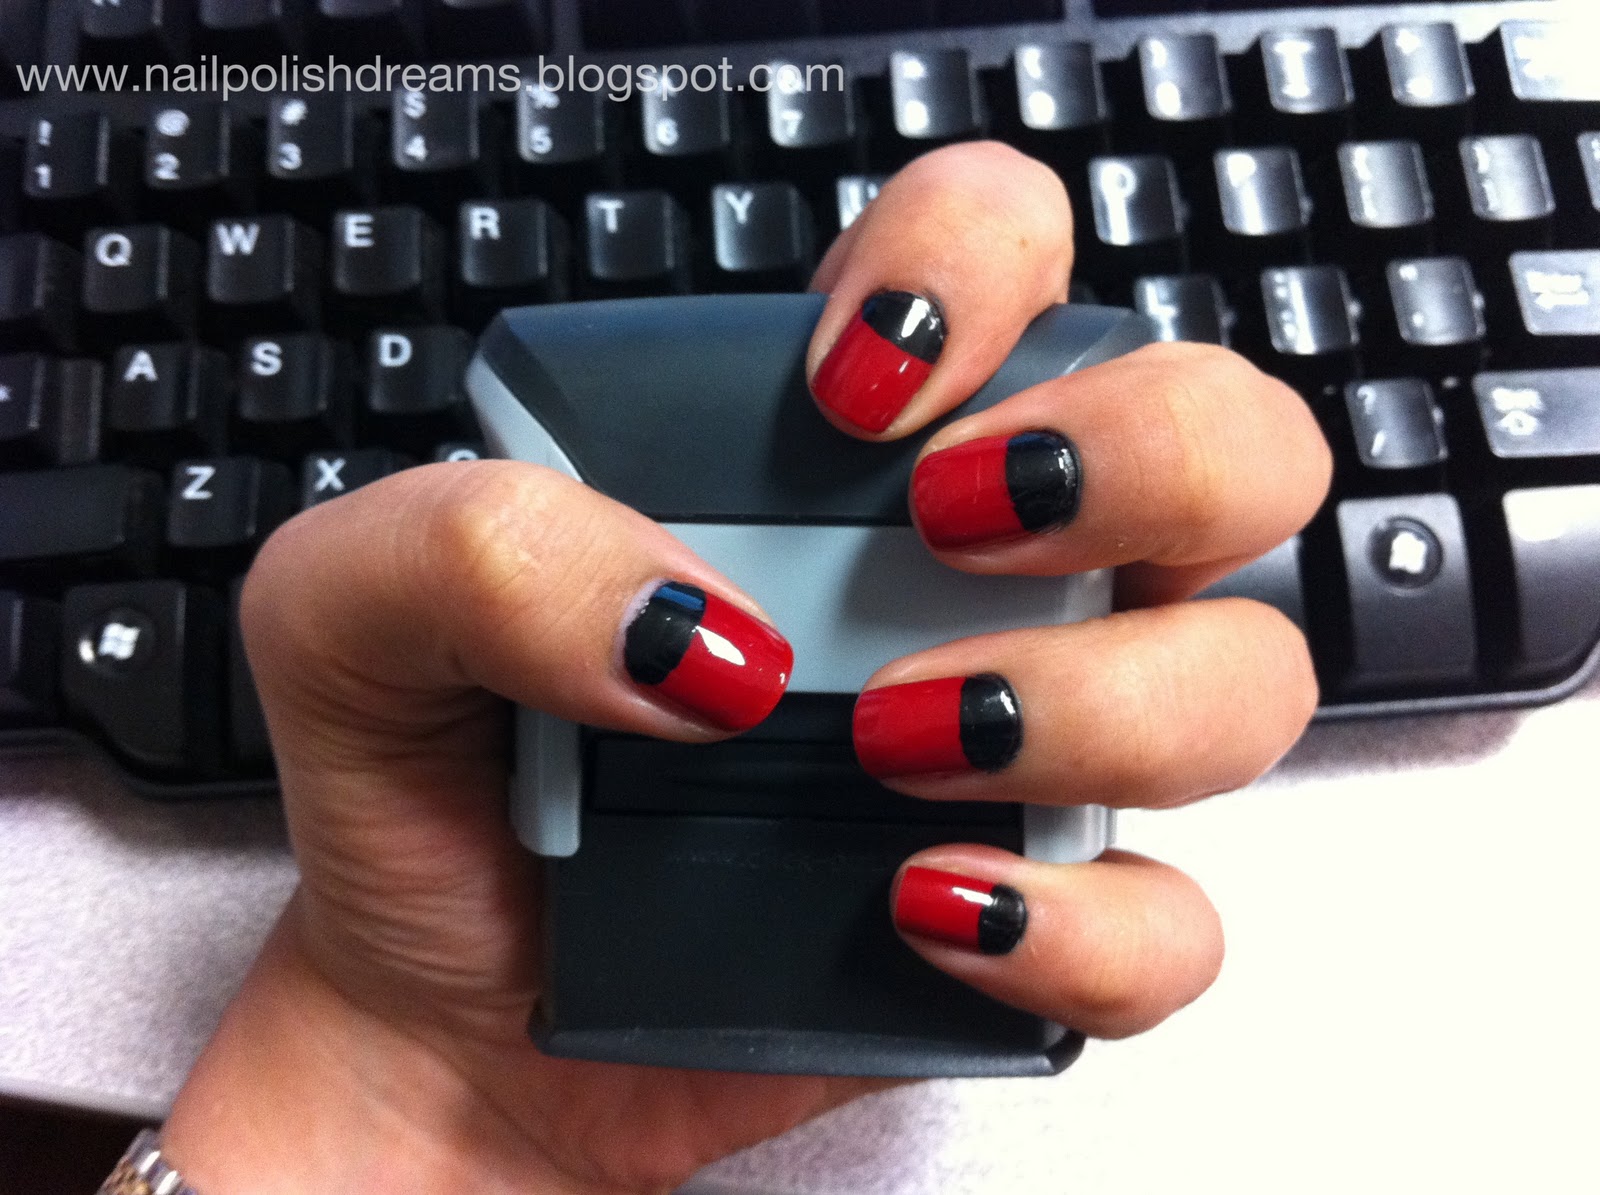
This is what i'm wearing as a "Halloween Mani", it is not as out there as an Orange-Black combination, or as jack-o-lantern patterns, but I think of it as a bloody, vampy, more sophisticated version of a halloween mani.  I started out with blood red nails as a base (Remember I was wearing those Incoco decals?) but you can wear any color that you like, maybe a shimmery orange.  Then, for the crescent moons, I used a nail art pen from Sally Hansen in Black Creme.  Nail pens are very easy to use and you can create so many looks with them, the possibilities are endless! So basically you just draw a half circle in the upper area of your nail and fill it out with the black pen (or you can use some other nail polish brush, it's up to you).  Sorry about the small pics,  I couldn't find my camera so I had to use my phone.


I wore the crescent moon mani for a day, then I decided to add some dots to make it more fun, and this is the end result.


Very simple, but I got so many compliments at work! I hope you guys like it.  I think it looks great by itself, I added dots, but you can add maybe a cool decal, or a rhinestone, or you can invert the colors in one of the nails, use different colors, do a little something different so you can make it your own. 


Sunday, October 24, 2010

Incoco Review


I've been intrigued by Minx nails for the longest time, without being able to try them, because there are NO nail salons that have them where I live.  The designs always look amazing, they seem convenient and very original.  
A few days back, I came across Incoco dry nail appliqué at my local drugstore.  They promise a professional looking mani that lasts up to 14 days, in minutes. The deal is, you need to buff and clean your nails before you apply it, then file off the excess paper.  For more info, go to www.incoco.com
I bought "Passion" which is a red creme that, truth be told, I found boring but I wanted to try them out and the store only had 2 or 3 creme shades.
Well, the application was no piece of cake.  While it's not very complicated, I thought it was going to be faster.  It probably took me the same amount of time as if I had applied liquid nail polish, maybe even more.  Also, since I'm new at this, my nails ended up with a few wrinkles, and when I was applying the paper, it kind of moved, so my sides are a bit jagged.  That was a drag, and as I was applying the nails, I had a bad feeling about them.  But when I was done, and took a long look at my nails, BAM! instant love!  They look perfect! They have the most amazing shine to them, the color looks intense, and they look very clean.  Now, this is my first day with them, I shall keep you updated about how they look as the days pass by.  So far, I think they look gorgeous.  See for yourselves.  

UPDATE: This is my fifth day wearing the appliqués.  So far, my free edges have chipped, but the wrinkles that I initially had disappeared within the first 24 hours and the nails looked perfect until yesterday.  I'm pretty sure the mani will look descent for quite some time, but I doubt I could go 14 days without changing it.  

Sunday, August 8, 2010

NOTD: Happy National Day Singapore - Sorry I Ruined Your Present

Part of the reason why I don't do Youtube videos is because I don't think many people would understand my English accent easily. I'm not American, and thus widely understandable (thank you MTV and Hollywood), and I'm not British, and thus slightly less comprehensible but still forgivable on account of having a cute and adorable accent. (Yes, I've come across many a non-Brit who think the Brit accent is cute. Believe it! :P ) Instead, I'm from a tiny country in Asia, called Singapore. And though English is the default language I use (I study, think, work, curse, and converse with just about everyone I know in English), I seriously doubt anyone outside of Southeast Asia would be able to understand my accent with ease, despite my fluency in the language. And although three years of living in Chicago have given me the ability to quite passably imitate an American accent, well...I don't wanna, even if it's just on Youtube. I'd feel like I was selling out, somehow. I mean, after all, how you talk is a part of who you are, right?

Anyway, I'm telling you this because my NOTD (Nail of the Day) has something to do with my native Singapore! This is because it's a Singapore-themed mani! You see, 9th of August is Singapore's National Day - the Singaporean equivalent of America's 4th of July, so it's a meaningful date in Singapore's history. And, it's a public holiday, which makes it awesome! :P

So, to display my love for my country (and for public holidays, LOL), I thought I'd base my NOTD on the Singapore flag, step out of my comfort zone, and try some freehand nail painting for the first time.

This is what the Singapore flag looks like:


You'd think it would be easy, right? I mean, the Singaporean flag doesn't have 50 stars and 13 stripes, and it doesn't have a red-on-white-on-blue Union Jack. It consists of two colours, and a handful of geometric shapes. So, I thought, it should be easy! This would be the perfect way to try out freehand nail art for the first time!

Well, turns out I suck at freehand nail art. That, and also, one should not begin a mani at 12.30am in the morning. This is the proof:

Singapore National Day Mani

Yeah, well, I know it sucks. Sorry Singapore, but I tried my best. I mean, the moon looks like a 5-year-old drew it on for me, and those squidges of nail polish are supposed to be stars, and I blurred whatever design was there because I didn't wait long enough before putting on a topcoat (hey, I did say I started my mani at 12.30am!). Still, happy birthday, I guess. It's the thought that counts, right? Right? *Crickets chirp*

For the base I used Eyeko Saucy Polish. That polish is really pigmented and thick. It's opaque in 1 coat, and I think I should konad with it next time. For the really horribly drawn on crescent moon and pseudo-stars, I used LA Colors Art Deco white art polish, which I'm ambivalent about. While I have no problems itself with the polish formula, which is thick, viscous, and dries quickly, thus making it ideal for nail art, I don't really like the brush. The bristles are a bit too long and thus hard to control. And I'm saying that because I actually mean it, and not because I'm trying to make up excuses for my sorry NOTD. :P

Singapore National Day Mani

Well, what can I say, except maybe please don't laugh at me? I know it's bad. Oh well, at least I got the colours right.

Wednesday, July 14, 2010

Eyeko Rain Polish and Saucy Polish NOTD, Swatches and Review!

Eyeko has released two new nail polish colours, Rain Polish for City Nails, and Saucy Polish for Naughty Nails. These are limited edition and come in slim, small bottles, housing 8.5ml of polish. That's a slightly smaller bottle than average, but these bottles still pack a punch in terms of pigment - in fact, both of these can be one coaters if you're careful with how you apply your coats.

Eyeko Rain Saucy Polish

Rain Polish is quite aptly billed as being "for City Nails" (the way Eyeko tells you what effect their polish is supposed to give your nails never fails to make me chuckle, it's so cute!), and indeed it does kind of remind me of cities - particularly the ever-cloudy skies of London. When I first started living in London, I was struck by how it was always overcast, and the sky was never blue (well, it was Fall back then). It was always some weird shade of blue-grey, and it was a couple of months before I saw my first glimpse of blue sky in London.

So what did that all have to do with the polish? Well, Eyeko has done an awesome job of capturing the grey-blue colour of the skies I saw in their polish. This colour is just the colour of those skies, which I think is pretty cool. And it's a beauty, too! It's a cross between a blue and a grey, and I can't decide if it's a blued grey or a greyed blue. It's a muted, dusty colour, one that's really chic and stunning without being loud or neon. Awesome stuff.

Here's a swatch. This is as colour accurate as I could make it - you know how hard it is capturing accurate photos of greys and purples. But I think I pretty much nailed it!

Eyeko Rain Polish

She's a beauty, isn't she? This polish has a slight shimmer in the bottle that doesn't really show up on the nail, it kind of just reveals itself as a reflective sheen instead. This is definitely the next big hit for Eyeko.

And next we have Saucy Polish. Now this is billed as being "for Naughty Nails", but we all know reds are a classic - they just give off that 1940s movie-star vibe. Sexy, classic, and a little retro all at once. I always feel it's a pity that red nail polish, just like red lipstick, seems to have gone the way of the dodo now that girls are so cautious about wearing red.

Eyeko Saucy Polish

This is red. Straight-up neutral red. Fire engine red. Telephone box red. Hollywood movie starlet red. Colour wheel primary red. I love it! I don't normally wear reds, but I'm of the opinion that every girl needs a red lipstick and a red nail polish, and I like this one. It's a middle-of-the-road neutral that leans neither too cool or too warm - this is pretty much as neutral as red gets. And it's not too dusty or muted, but it's not so bright it's neon either. It's just right. I love it. If you're looking for a red nail polish on the cheap, this is probably as good as any other.

Application on both was pretty good. These are a little thicker than I'd like, and are not as thin as say, Zoyas, which may or may not be a good thing, depending on your preferences. These are also awesomely pigmented, which means if you're careful with application, one coat is enough. However, my swatches all show two coats, because I couldn't get the first coat to be even enough due to the slightly thick texture.

Colour-wise, I ABSOLUTELY LOVE Rain Polish. It's always going to have some sentimental value to me, reminding me of the London skies I glimpsed at when I first stepped foot into the city. The only catch is that being blue-based, it's a shade that might potentially be unflattering on girls who are really warm-toned. Still, I think it's a pretty shade worth a shot if you're game for it.

(These products were sent to me for review. I am not in anyway affiliated with or compensated by the company for this review. This review reflects my honest and complete opinion on the products.)

Thursday, May 6, 2010

Rimmel Blue Me Away and Nails Inc Trafalgar Square NOTD

Sometimes, you just want to wear something weird. And clashing. And really ugly. And sometimes, it ends up sort of growing on you.

Like this NOTD, from a few weeks back. It all started when I decided I suddenly wanted to wear blue nail polish. If you know me, you'll know I'm not THAT big a fan of blues, for some reason. I don't even know why, especially given that I LOVE purples, and purples are essentially half blue? But that day I decided I wanted to wear blue. So I dug out Rimmel's Blue Me Away. It's a beautiful blue with fine red-orange shimmer. It's pretty cool, actually - it's rare to see a blue with shimmer of a contrasting colour, since most blues I've seen have silver shimmer.

So I put it on. While I like Rimmel's Lycra Pro Finish range, and their Lasting Finish Pro Enamel range, Blue Me Away was from the 60 Seconds Nail Polish range, and applies less well. I also don't like the brush as much - while the other two ranges have brushes with a curved end (which I particularly like), the brush on this one is cut across horizontally, and it is a little stubby. But it's nothing that can't be dealt with.

After putting it on, I decided that it wasn't weird enough. So I decided to put glitter on top of it. And I thought, why not put a red glitter on top, since there's already red shimmer in the polish?

So I dug out Nails Inc Trafalgar Square (which does seem quite a lot like China Glaze Ruby Pumps, another cult colour), and applied it on top. And as usual, this applied like nearly all the other Nails Inc colours I've tried before - without a single flaw.

Rimmel Blue Me Away Nails Inc Trafalgar Square

There. Are your eyes begging you to spare them the sight of my nails yet? I don't know why I like it, but I do. But I'm pleased to tell you that this lasted for a good 4 days before the first chip came on :P

Monday, March 22, 2010

China Glaze Lubu Heels and Color Club Perfect Plum NOTD

Today's NOTD is the cult favourite, China Glaze Lubu Heels, together with Color Club's Perfect Plum. Lubu Heels, named after the shoes, are a hot favourite, due to its unique combination of a black jelly base and red glitter. Perfect Plum isn't so much plum as it is red, which is why I used it as an accent colour on the ring finger. And as you can tell by the terrible cuticles, this is also an old NOTD. Trust me, you and I both wish I could photoshop the cuticles out, but my skills really don't reach those heights of digital manipulation.

Here's a shot of it in natural light, two coats of Lubu Heels on all the fingers, except the ring finger, and two coats of Color Club Perfect Plum on the ring finger:

China Glaze Lubu Heels Color Club Perfect Plum

While you can tell Lubu Heels isn't just black-black because the red glitter is still somewhat visible through the black jelly, but I still kind of wish the black jelly was a little bit less opaque, so that we could see more of the red glitter. Perfect Plum, meanwhile, isn't so much plum as it is a beautiful jewel-toned red with shimmer.

Here's a shot of it indoors:

China Glaze Lubu Heels Color Club Perfect Plum

I think that Lubu Heels is one of those colours that looks better indoors than outdoors, because the red glitter really shows through much more indoors - here you can see how beautiful it really is. You can also see the shimmer and glow of Perfect Plum in here.

Application was good for both Lubu Heels and Perfect Plum, and wear time was also decent - about 3-4 days, which is average for me. I didn't have any quality issues with either polishes in either way.

Tuesday, March 2, 2010

Wet n Wild Megalast Infatuation: NOTD

Today's NOTD is Wet n' Wild's Megalast nail polish in the colour Infatuation 216. It's a pretty red jelly, and I would have liked it more if not for the application and wear issues. It's also easily built up to near-opacity, despite being a jelly. I don't have many red nail polishes (because why wear reds when you can wear taupes, greys, and purples?) but this is one that I like. I actually bought it when it was buy-one-get-one-free at Walgreens, and although it wasn't my colour, it was cheap so I thought, why not? Now that I'm no longer living in the US, I really miss the drugstore beauty sales. I don't think you can get buy-one-get-one-free drugstore makeup anywhere else.

Here it is in natural sunlight. This is two coats. And as you can tell by the watermark this was an old NOTD when my nails were ugly and my skills were le suckage (I mean, my skills are still bad, but this was worse):


As you can see it's a very pretty red with a very nice glow.

Here it is indoors:


You can see that it has some shimmer in it. It's superfine, and I can't tell what colour the shimmer is (gold maybe?) but it's really fine and it just shows up as a glow, even indoors. It's not a unique, OMG colour by any means, but it's a nice basic colour.

Unfortunately, despite the nice colour, the application was not too great. The brush has a tendency to dispense too much colour on the nail - hence the overly thick application you see in the photos. I guess as long as you wipe the brush before applying it should do the trick though.

Also, wear was an issue for this colour. It chipped the very next day, and it chipped in really weird places, as you can see from the NOTD pictures. Or maybe I was just especially rough with my nails. I guess wear and application vary from person to person - some people love OPIs, some find OPIs chip on them, and different people have different preferences when it comes to brushes (like how some like wide brushes and some prefer narrower brushes). But for me, I don't really like this one, and I doubt I'll be wearing it again.

Wednesday, December 23, 2009

TheBalm Stainaic Swatches: Beauty Queen and Homecoming Queen

Today I am providing swatches with Thebalm's Stainaic in two colours, out of three. Unfortunately I'm only able to swatch two out of the three colours, as this is all that was available. :(

The Stainaics are gel stains, and they are much like Benefit's Benetint and Posietint, only better, because they are less runny, and the gel-like texture makes it easier to control, as well as easier to blend. I think their gel texture also gives them a bit more time before they dry and set, which makes them much better than Benefit's competitor products, as these tend to dry really quickly, in my opinion.

The Stainaics are packaged in a wand with an applicator, much like lipgloss. I think this packaging is a little unsanitary - I'd much prefer that they be in a squeeze tube - but at least in this form of packaging, there's no chance of spilling any product, unless the entire tube breaks.


thebalm stainaic swatches beuty queen homecoming queen

L - R: Beauty Queen, Homecoming Queen

Beauty Queen is a colour very similar to Benefit's Benetint, and all its imitators. It's a rosy red colour with a berry tint, and very pretty. It's a deep red that can be sheered out or built up for colour. It would probably look better on cool-toned than on warm-toned girls, but I imagine this would look good on most people.

Homecoming queen is a very orangey peach. In fact, I think it's probably 90% orange and 10% peach - it reminds me of the colour of marmalade or orange jam. I think this would probably look good only on warm-toned girls, given how orange it is.