Showing posts with label Clinique. Show all posts

Wednesday, July 13, 2011

Defined Crease Tutorial with MAC Rebel Lipstick

Rebel is one of those lipsticks which can work on absolutely any skin tone, from the palest to the darkest. It looks great sheered out to a stain too or made into a gloss by mixing a tiny amount in with some clear lipgloss. It's really versatile and tends to be a favourite among make-up artists. I paired it with very neutral eyeshadows here but I think the defined crease and winged black liner still inject just enough drama to balance out the deep lip. You can of course also use this eye make-up with just about any lip colour!
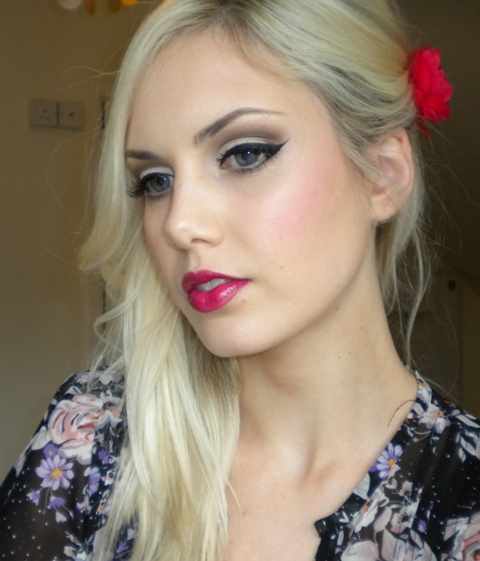
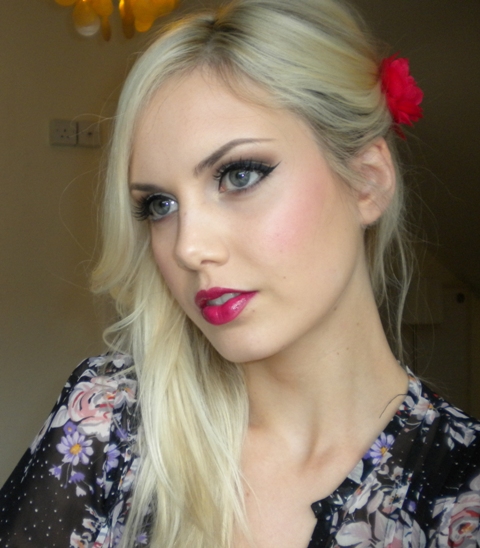
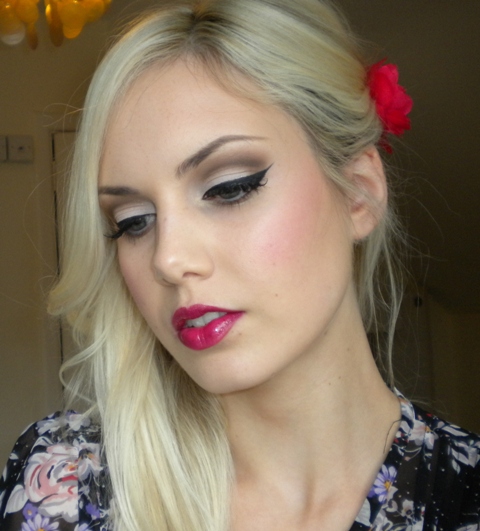


 ~ Products Used ~

Face:
Chanel Pro Lumiere Foundation 20
MAC Pro Longwear Concealer NW20
MAC Pearl Cream Colour Base
MAC Prep & Prime Powder
MAC Matte Bronzer
NYX Blush in Pinky

Eyes:
MAC Painterly Paint Pot
MAC eyeshadows in Vanilla, Gesso, Wedge, 
Embark, Carbon
Urban Decay Buck eyeshadow
Make Up For Ever Star Powder
Clinique Cream Liner
Make Up For Ever Concealer Pencil
Maybelline Volume Express Mascara
Ardell Demi 102 Lashes
MAC Dirty Blonde Brow Pencil

Lips:
MAC Plum Lip Liner & Rebel Lipstick
MAC Clear Lipglass


1. Appy MAC Painterly Paint Pot as a base. Next, apply a good amount of MAC Vanilla eyeshadow all over the lid all the way up to the brow. Doing this ensures that the shadows which will be applied later will blend really easily. 


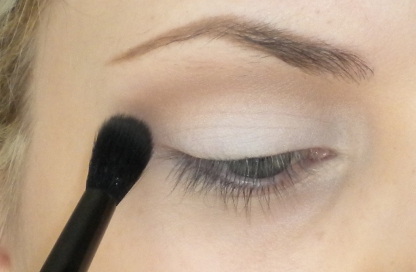
2. Apply MAC Gesso eyeshadow to the lid on a flat brush, keeping it below the crease. 
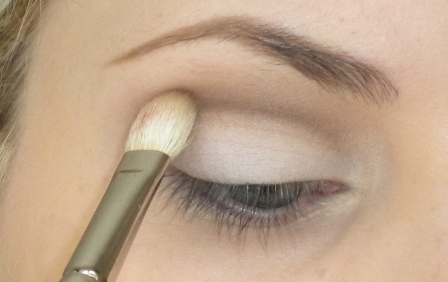
3. On a large fluffy brush like the Illamasqua Blending Brush sweep some MAC Wedge eyeshadow onto the area slightly above the socket line.


4. On a pointed brush (I'm using one by Louise Young) apply a darker brown shade into the crease. I mixed Urban Decay Buck and MAC Embark to get the shade I wanted. The pointed brush should create a very defined line in the crease with the eyeshadow.

5. Take a MAC 217 or a similar blending brush and blend the top edge of the darker brown where it meets the lighter brown shade. Now just keep applying more dark brown and blending it. You can apply more of the lighter brown too if it begins to get lost. 

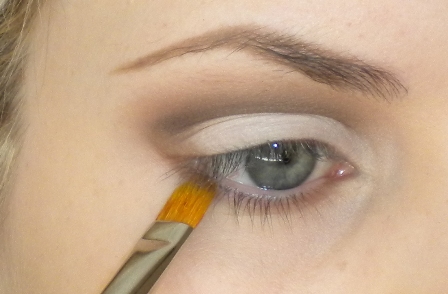
6. Run some of the Urban Decay Buck eyeshadow underneath the eye on a flat brush like a MAC 242. I also applied a tiny bit of MAC Carbon eyeshadow very close to the lower lashes on an angled brush to define my lash line. If you already have dark lashes and a dark lash line you may not need to do this.

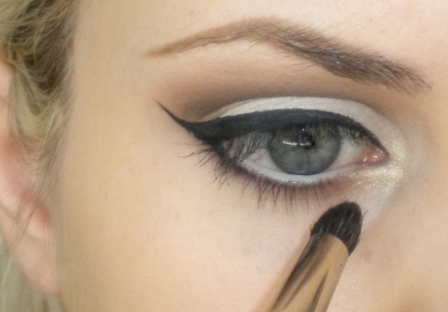
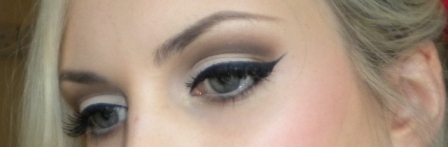
7. Line your top lash line with a cream/gel or liquid liner. I used Clinique Cream Liner on a MAC 210 brush.

8.  Line your waterline with an off white pencil. I used Make Up For Ever's Concealer Pencil. On a small brush, apply a shimmery eyeshadow to the tear duct area as a highlight. I used a Make Up For Ever Star Powder for this.

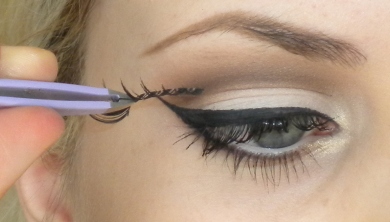
9. Apply mascara to top and bottom lashes. Add some false lashes and you're done! 


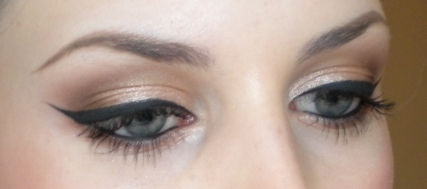
Here's the finished look. The eye make-up is really quite simple - it just requires some good blending work!

Monday, July 4, 2011

My Top 10 Make-up Products

I was tagged by the very lovely Lil Lady's Life to do my top 10 beauty products so here they are! I'm obviously always trying out new products and finding new things that I love but these are all products which I can always rely on and which I will probably keep coming back to.


1. Chanel Pro Lumiere Foundation - A gorgeous foundation which gives medium coverage and has a lovely healthy, slightly dewy finish. It photographs beautifully too despite it containing SPF. This is probably best suited to normal-dry skin types. It's apparently being discontinued at the end of the year though so stock up before then if you like this one!

2. MAC Pro Longwear Concealer - A fantastic concealer for under eyes or to cover minor redness (not ideal for blemishes). It's got great coverage but never looks cakey or dry around the eye area. 

3. Make Up For Ever Super Matte Loose Powder - This is definitely the best loose powder I've tried. It's finely milled so it doesn't look overly powdery and it does a fantastic job of setting foundation and concealer. Shade #12 is translucent and suits fair-medium skins but this comes in a range of other shades too.


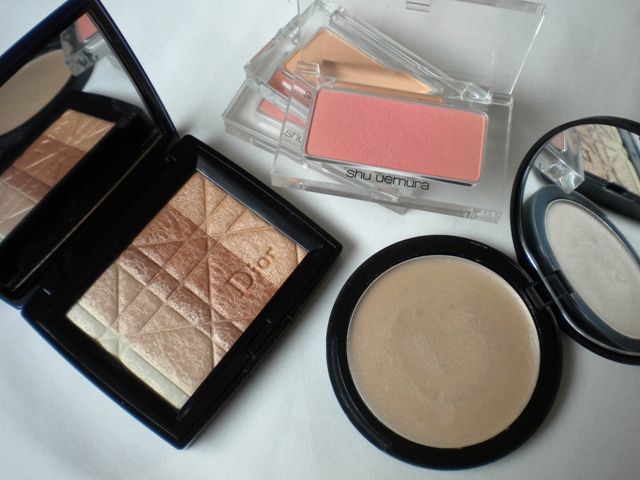
4. Dior Shimmer Powder in Amber Diamond - A beautiful powder highlighter. It's got a very fine shimmer so it gives the skin a really gorgeous, sophisticated glow and doesn't look over the top.

5. Shu Uemura Glow On Blush - I can't say enough good things about Shu Uemura's blushers! Both the matte and shimmer ones are absolutely gorgeous - super soft and they apply seemlessly. My favourite shade is P Pink 30 but they have a huge range of really amazing colours. Love these!

6. Jemma Kidd Dewy Glow All Over Radiance Creme in Iced Gold - A cream highlighter which I think will always have a place among my top beauty products. You can take a look at my review of it here.


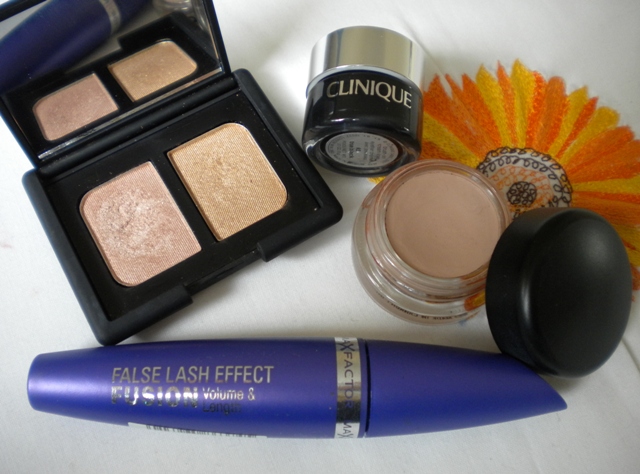
7. NARS Alhambra Eyeshadow Duo - These are two great staple lid colours. I love the quality and texture of these as well - they're buttery soft and lovely to apply.

8. Clinique Brush-On Cream Liner in True Black - I favour this over any other gel or cream liner because it stays really creamy and doesn't dry out like ones from other brands do. It's very easy to apply and can be used on the waterline too.

9. MAC Paint Pot in Painterly - Painterly is a great eyeshadow base. It acts like a concealer, covering up any redness or veins on the eyelids and leaves you with the perfect blank canvas! Eyeshadow clings really well to this too which means you get a stronger colour pay-off.

10. Max Factor False Lash Effect Mascara -This has been my favourite mascara since it came out. It gives great length and separation and never looks clumpy. The one in the photo is the 'Fusion' version. I'm not quite sure what the difference is between this and the original - they seem like practically the same product to me!


Hope you like my favourites. Feel free to do your top 10 too!


Sunday, July 3, 2011

Pink Eyeshadow Tutorial

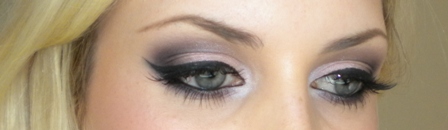
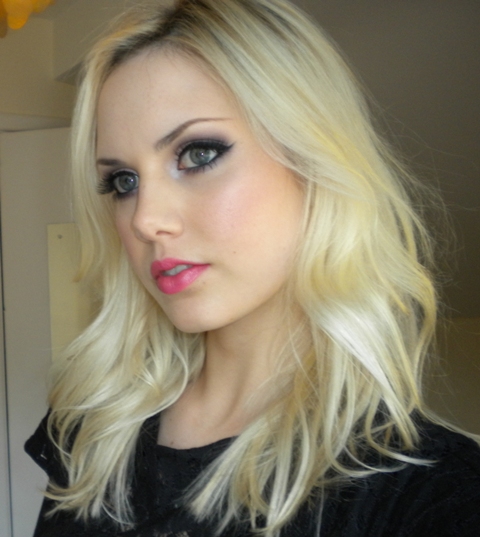
I'm still on a bit of a quest to stay away from brown eyeshadow all the time so I decided to use a bit of pink today. I don't use these kind of shades enough but I actually really love soft baby pink eyeshadow - it's a great colour for grey eyes in particular. I amped it up a bit here with some mauve and plum and lots of black liner.


~ Products Used ~

Face:
Make Up For Ever HD Foundation #120
MAC Pro Longwear Concealer NW20
Becca Shimmering Skin Perfector in Pearl
MAC Harmony Blush for contouring
MAC Mineralize Blush in Gentle
Make Up For Ever Super Matte Loose Powder

Eyes:
Clinique Quick Eyes Cream Shadow in Starlit Pink
MAC eyeshadows in Seedy Pearl, Shale, Shadowy Lady, 
Vellum & Vanilla
Clinique Cream Liner 
Max Factor False Lash Effect Mascara
Elise half lashes
MAC Dirty Blonde Pencil & Omega eyeshadow on brows

Lips:
Topshop Lipstick in Show Off


1. Apply a pink base to the eyelid. I used Clinique's Cream Shadow in Starlit Pink.
2. Use a flat brush like the MAC 242 to press MAC Seedy Pearl eyeshadow onto the lid.
3. Blend MAC Shale eyeshadow into the crease with a 217 brush.
4. Run some of that Shale under the lower lash line using the tip of a flat brush. I used the 242 again.
5. On a slightly pointed brush, apply MAC Shadowy Lady eyeshadow about halfway into the crease and blend some onto the outer corner too. The brush in the photo is by Louise Young but it didn't pack on enough colour so I used the Laura Mercier crease brush after. If you have small eyes you could use a pencil brush for this too.
6. Take some Shadowy Lady underneath the eye too - just on the outer third of the lower lash line.
7. On a small pencil brush like the MAC 219, apply some MAC Vellum eyeshadow onto the tear duct area.
8. Blend an eyeshadow which is a shade lighter than your skin tone under the brow as a highlight and to soften the edges of the crease colour. I used MAC Vanilla on a 222 brush for this.
9. Line the top lash line with a black gel/cream liner and wing it out at the end. You can have a look at my winged liner tutorial here. I used Clinique's Cream Liner on a Louise Young LY24 brush.
10. Apply the gel liner along the waterline. Line the outer third of the lower lash line with the gel liner too and before it has time to dry smudge it out with a q-tip to soften it. I went back and added a bit more Shale eyeshadow under the eye at this point too. Now just apply mascara and add false lashes if you wish. I added some half lashes by Elise. .........That's it!

Please excuse the messy hair in the above photo...I was having some issues with it! It's been quite dry lately so I'm trying to use less heat on it when I can. I think I might get some Moroccanoil to try out but If anyone knows some other really great conditioning products then please do leave your recommendations in the comments! It would be very helpful!

Hope anyone in Canada had a good Canada day on the 1st. Oh and a happy 4th July (tomorrow) to everyone in the US!

Tuesday, May 3, 2011

How To Wing Your Eyeliner

Winged eyeliner is probably my favourite thing to wear when it comes to make-up. I wear it everyday and I think I would feel a bit naked without it! Since it's something I'm wearing all the time the number one question that I get asked by other people is could I tell them how to achieve it - what is the technique and what products are the best. So I thought I would do a post about it with a little bit of a picture demonstration which I hope you will be able to follow easily enough! I'll start off first with the products and brush that I use.......


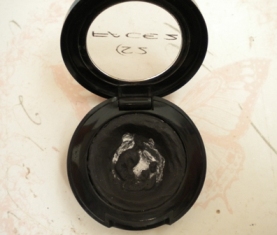
I generally use one of two products - either a cake or a gel liner. The one I'll talk about first and maybe my preferred of the two is a cake eyeliner. I use one by Face2 (as shown in the first photo above) which is an Irish brand that is stocked in our Make Up For Ever store here. For those of you elsewhere in the world I've been told that the Make Up For Ever one is very similar. So a cake eyeliner, for those of you who may be unfamiliar with them, basically looks like a poster paint. It's completely solid in the pot and you add water to it to turn it into a liquid. The reason I prefer this over a regular liquid liner is that you can mix it to the consistency that you want and also it lasts forever! I've had the one above for two years and while I've hit the metal pan in the centre there's still about half left! I also prefer it a bit more than a gel/cream liner because I find I can achieve a smoother line. The consistency that you want to mix this to should be really quite fluid but not overly watery - you want almost a creamy liquid. The one downside of a cake liner is that on darker skin tones it sometimes doesn't come out a very intense black colour like a gel liner does. While it may look black on fair skins if you're darker it may only look like a charcoal colour. So therefore you may need to go back over it a couple of times to get the intensity.

The second product which is also a great option is a gel or cream liner. The one I like to use is the Clinique Cream Liner (as shown in 2nd photo above). The Bobbi Brown one is also nice but it dries out halfway through the pot so I end up throwing half the product (and half my money!) away. The Clinique one stays creamy til the end. If you are a complete beginner with liner this type might be better for you as it's a bit more foolproof since it doesn't dry immediately giving you time to fix a mistake. The only thing I would say is to make sure you have enough on your brush. Gel and cream liners tend to be water resistant, unlike cake liner, and so are fantastic to wear on the waterline since they don't budge! They also tend to be a bit more long-wearing than the cake.


Now onto the brush.......


My favourite brush for liner is the LY24 from Louise Young. As you can see from the photo it has an extremely fine tip. I know this brand is not readily available to everyone so something similar would be the MAC 210 or any brush which is extremely fine. I've also heard of people even finding ones like this in art and hobby shops. Some other make-up artists use angled brushes and that might work for some people - whatever you find easier for you. I definitely find the original kind much easier to work with though.


So now a bit of a demonstration. I'm sure there's other ways to achieve this but this is just my technique. Don't try to do the whole thing all in one sweep without lifting your brush as you'll lose all precision. I break it down into three steps which I've shown below..........


Step 1. Draw a thin line close to your eyelashes. Don't worry about any wing just yet. This line also doesn't need to be overly neat as we'll be going over it again later anyway. It's *really* important to tilt your head backwards when doing liner because you need your eyelid to be as flat and smooth as possible so that you get a nice fluid line.

Step 2. Draw in the outer line of your wing. This should generally angle upwards in the same direction as your lower lash line. Just imagine that your lower lash line is continuing on upwards. If you have a hooded eye, however, you may need to angle your liner slightly more outwards in order to avoid the hooded area. The length of your wing is down to personal preference. If you want a dramatic liner make the wing longer and make it shorter for a more subtle one.

Step 3. Now you need to connect the wing back to the line along your eyelashes. I've mapped it out here in red. Don't start at the very tip of  your wing. Leave the very top of it alone as that part should be left extremely fine. Now connect the wing back down along your eye, gradually making it thinner as you reach the inner corner of your eye. So it should be thicker on the outer part of your eye and thinner towards the inner corner.


...........


That's it! If you need to go over it again to fix any lumps or bumps or to thicken it then you can. Now you just need to line your waterline if you want to and apply your mascara and you're done!


Here's the finished look with a lined waterline and some mascara.........


I really hope that all made sense and that is was useful to somebody! If you have any questions just write me a comment below!


Let me know if you gave it a try and how you got on!