Showing posts with label Ardell. Show all posts

Sunday, July 24, 2011

Grey Eyeshadow Tutorial

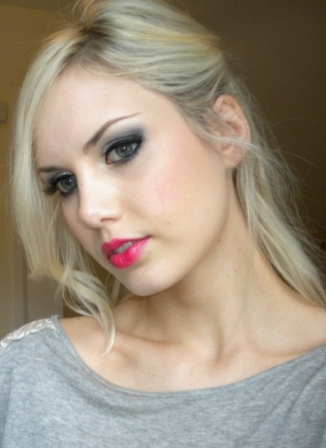
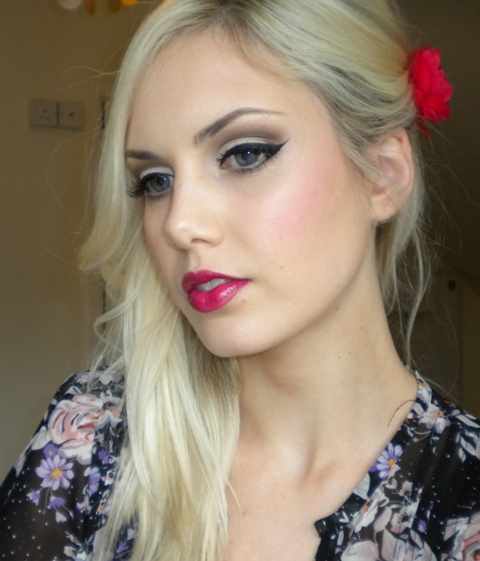
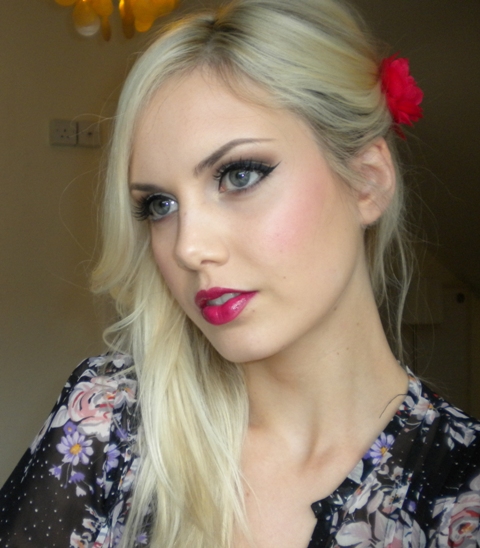
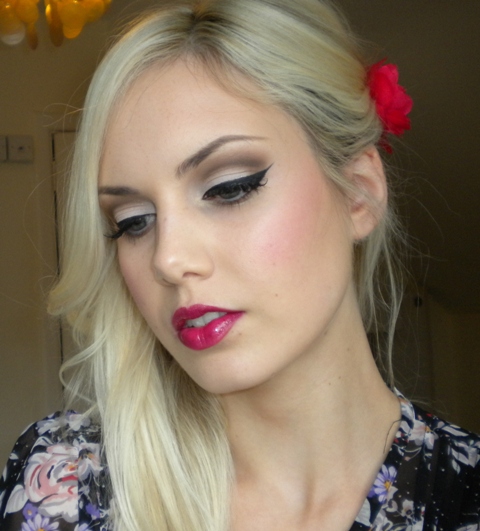
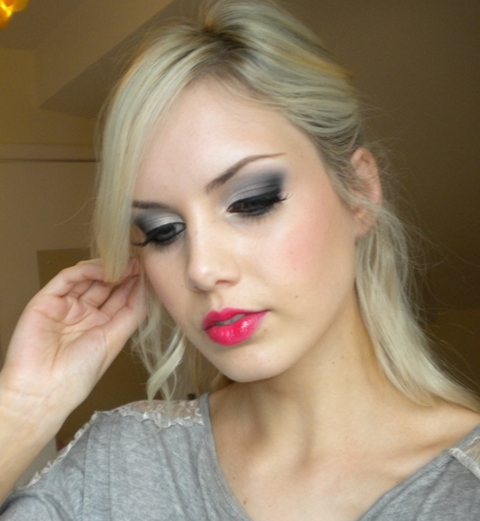
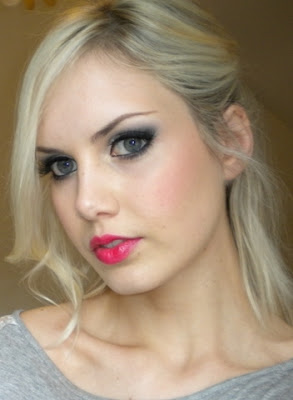
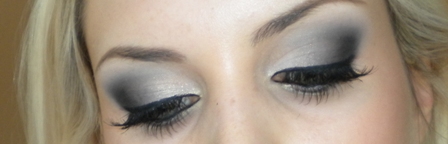
Something a bit more fun today - dramatic grey eyeshadow with a pop of bright pink on the lips to brighten things up! You could tone it down with a nude lip though too if you wanted. Hope you enjoy it!



~ Products Used ~

Face:
Chanel Pro Lumiere Foundation 20
Make Up For Ever Lift Concealer #3
Make Up For Ever Star Powder on cheekbones
MAC Prep & Prime Powder
MAC Matte Bronzer
MAC Pink Swoon Blush

Eyes:
MAC Painterly Paint Pot
MAC Vanilla, Gesso, Scene & Typographic
Make Up For Ever Star Powder #902
Clinique Cream Liner
Max Factor False Lash Mascara
Ardell Demi Wispies
Laura Mercier Blonde Brow Pencil

Lips:
Dior Addict Lipstick in 865 Collection


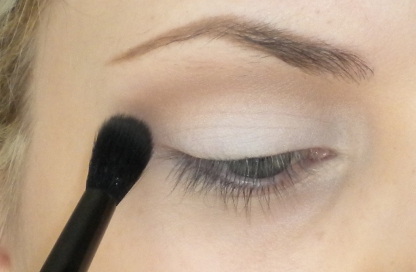
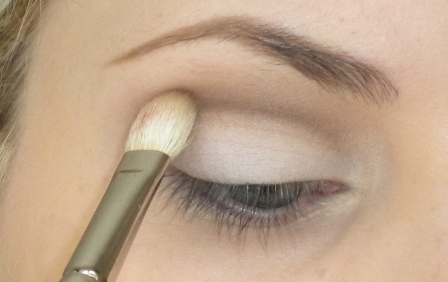
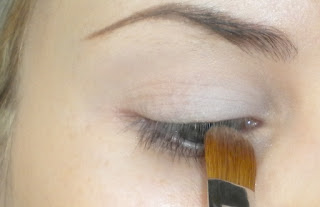
 1. Apply MAC Painterly as a base. Sweep some Vanilla eyeshadow (or any shade which is close to your skin tone) all over the lid up to the brow. This ensures that the following eyeshadows will blend seemlessly. Next take some Gesso eyeshadow and appy it to the inner half of the lid.
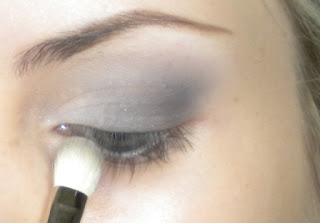
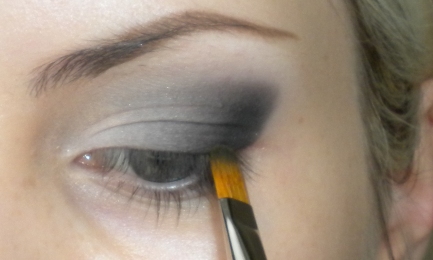
 2. Take MAC Scene eyeshadow or another medium grey shade and, with a flat brush, apply this to the outer half of the lid. Now take a fluffy blending brush like the MAC 217 and blend this across the lid into the Gesso shade.


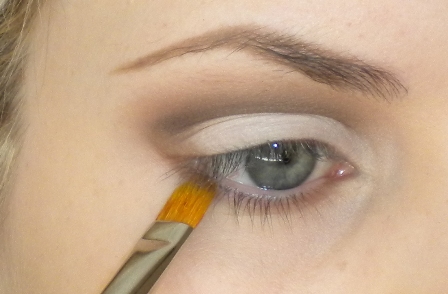
 3. Now take a dark grey (I'm using MAC Typographic) and apply this to the outer corner of the eye on a flat brush. I created an angled shape with this. Use the same flat brush to sweep the eyeshadow across the lid into the medium grey shade. So there should be a nice graduation of colour now from light to dark.
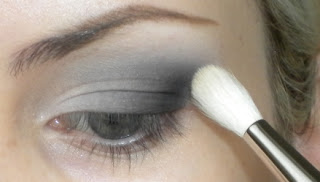
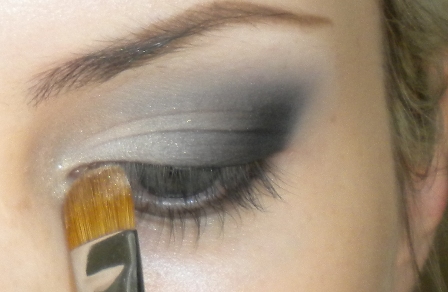
 4. Take some more Vanilla eyeshadow and use this to blend around the edges so that they're not so harsh. I used a MAC 222 Brush for this.
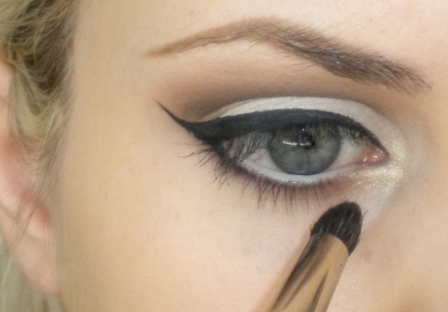
 5. Take some of MAC Scene and run it under the eyes. Now take some shimmer (I used a Make Up For Ever Star Powder) and press this over the area where the Gesso eyeshadow was applied on the inner corner. Take it around the tear duct area too.
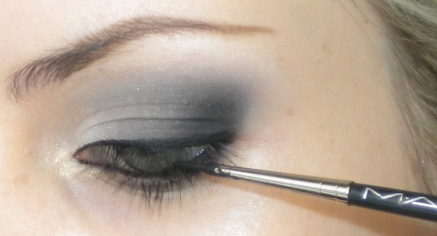
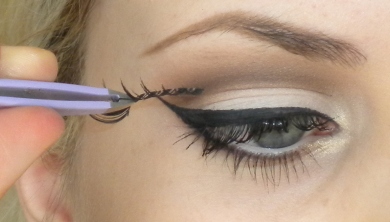
 6. With a gel or liquid liner, line your top lash line. Apply some black liner to your waterline too. Add mascara to top and bottom lashes. Apply some false eyelashes and that's it!


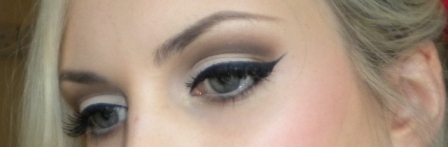
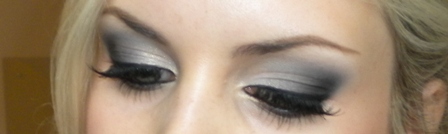
Here's the finished eye make-up again.........
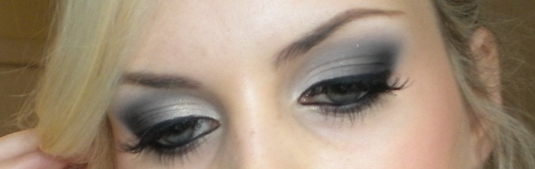


I hope everyone had a great week/weekend. I received my Visa for Australia a few days ago which is equally exciting and extremely scary! It definitely hasn't quite hit me yet that I'll be moving there very soon. Trying to think of how I'm going to manage packing everything is really beyond me at the moment. It will definitely be very nice to be going somewhere with some lovely sunshine though. I'm going to be passing through California too for a few days on my way there which I absolutely can't wait for. I lived in California for a few months several years ago and I love the place so it will be so nice to be back there. Beats Ireland any day! :D

Tuesday, July 19, 2011

Tutorial: Sunset on the Beach Look

Hey guys,

This is the latest tutorial that I've decided to re-upload from my old channel. This is one of my favorite looks when I created it last year, I love the contrast of the gold and purple. This is also one of my sister's favorite looks which she often asks me to recreate on her.


EYES:
- Two Faced Shadow Insurance
- Indianwood paint pot
- Amber Lights eye shadow
- Inglot #430 (true gold) eye shadow - Goldmine eye shadow would work too, although it wouldnt be as dramatic
- NYX "Milk" jumbo eye pencil
- Naked "Blue Duochrome" pigment - this comes from the Ivory Stack and actually has a number but I don't remember what it is. If you have Vellum eye shadow it would work too
- Cork eye shadow
- Brown Down eye shadow
- Carbon eye shadow
- Vanilla eye shadow
- Non-Conformist fluidline
- Inglot #379 (matte blue-purple) eye shadow - you could also use Parfait Amour eye shadow
- Smolder eyeliner
- Blacktrack fluidline
- Ardell "Demi Whispies" lashes (optional)


CHEEKS:
- Inglot #35 (neutral cantaloupe with silver shimmer) blush
- Inglot #57 (neutral pink-based brown with silver shimmer) blush

LIPS:
- Plastique lipstick
- Pupa Ultra Reflects lipgloss in "#07"


I hope you guys like this look as much as I do. Please send me photos if you try it out and I'll feature them on my blog. Thanks again


Wednesday, July 13, 2011

Defined Crease Tutorial with MAC Rebel Lipstick

Rebel is one of those lipsticks which can work on absolutely any skin tone, from the palest to the darkest. It looks great sheered out to a stain too or made into a gloss by mixing a tiny amount in with some clear lipgloss. It's really versatile and tends to be a favourite among make-up artists. I paired it with very neutral eyeshadows here but I think the defined crease and winged black liner still inject just enough drama to balance out the deep lip. You can of course also use this eye make-up with just about any lip colour!


 ~ Products Used ~

Face:
Chanel Pro Lumiere Foundation 20
MAC Pro Longwear Concealer NW20
MAC Pearl Cream Colour Base
MAC Prep & Prime Powder
MAC Matte Bronzer
NYX Blush in Pinky

Eyes:
MAC Painterly Paint Pot
MAC eyeshadows in Vanilla, Gesso, Wedge, 
Embark, Carbon
Urban Decay Buck eyeshadow
Make Up For Ever Star Powder
Clinique Cream Liner
Make Up For Ever Concealer Pencil
Maybelline Volume Express Mascara
Ardell Demi 102 Lashes
MAC Dirty Blonde Brow Pencil

Lips:
MAC Plum Lip Liner & Rebel Lipstick
MAC Clear Lipglass


1. Appy MAC Painterly Paint Pot as a base. Next, apply a good amount of MAC Vanilla eyeshadow all over the lid all the way up to the brow. Doing this ensures that the shadows which will be applied later will blend really easily. 


2. Apply MAC Gesso eyeshadow to the lid on a flat brush, keeping it below the crease. 
3. On a large fluffy brush like the Illamasqua Blending Brush sweep some MAC Wedge eyeshadow onto the area slightly above the socket line.


4. On a pointed brush (I'm using one by Louise Young) apply a darker brown shade into the crease. I mixed Urban Decay Buck and MAC Embark to get the shade I wanted. The pointed brush should create a very defined line in the crease with the eyeshadow.

5. Take a MAC 217 or a similar blending brush and blend the top edge of the darker brown where it meets the lighter brown shade. Now just keep applying more dark brown and blending it. You can apply more of the lighter brown too if it begins to get lost. 

6. Run some of the Urban Decay Buck eyeshadow underneath the eye on a flat brush like a MAC 242. I also applied a tiny bit of MAC Carbon eyeshadow very close to the lower lashes on an angled brush to define my lash line. If you already have dark lashes and a dark lash line you may not need to do this.

7. Line your top lash line with a cream/gel or liquid liner. I used Clinique Cream Liner on a MAC 210 brush.

8.  Line your waterline with an off white pencil. I used Make Up For Ever's Concealer Pencil. On a small brush, apply a shimmery eyeshadow to the tear duct area as a highlight. I used a Make Up For Ever Star Powder for this.

9. Apply mascara to top and bottom lashes. Add some false lashes and you're done! 


Here's the finished look. The eye make-up is really quite simple - it just requires some good blending work!


Thursday, June 30, 2011

Tutorial: Smokey Olive and Gold Look

Hi guys,

This is the long awaited new tutorial that has been a long time coming. Sorry it has been so long since I have been able to upload one but I haven't been feeling up to doing much lately because the winter chill has really gotten to me. Anyway, enough excuses and on to the look!

This is a really simple gold and olive-green smokey look that would be perfect for any time of the day/night. It is created using a limited edition product (Techtonic mineralize eye shadow from the Flashtronic Collection ['07]) but this colour can easily be duped with any other olive gold eye shadow.


EYES:
- Indianwood paint pot
- Gorgeous Gold eye shadow
- Techtonic mineralise eye shadow
- Inglot #731 (matte olive) eye shadow
- Humid eye shadow
- Vanilla eye shadow
- Nylon eye shadow
- Blacktrack fluidline
- Smolder eyeliner
- Ardell "117" lashes

CHEEKS:
- Inglot #34 (peach with gold shimmer) blush

LIPS:
- Hug Me lipstick
- Inglot #545 (orange with multicolour reflects) lipsgloss


I hope you enjoyed this look, please let me know if you try it out :)


Wednesday, June 22, 2011

Smoky Plum & Gold Face Of The Day

I don't usually veer away from brown or neutral eyeshadow too often but I did this look on a girl a while ago and thought I'd give it a go on myself. I felt like doing something a bit different to what I would usually do which I think is always a good idea every now and again to prevent falling into a make-up rut! I can see this look being a good option for a night out!


Face:
Chanel Pro Lumiere Foundation 20
MAC Pro Longwear Concealer NW20
MAC Prep & Prime Powder
Dior Bronze Matte 002
Dior Amber Diamond Highlighter
NARS Deep Throat Blush

Eyes:
MAC Powersurge Eye Kohl as a base & on waterline
MAC Patina on lid
MAC Vanilla Pigment on inner corner
MAC Sketch & Shadowy Lady mixed together in crease
MAC Beauty Marked (tiniest bit) to darken outer corner
MAC Reflects Gold pressed over Patina on lid
Clinique Cream Liner on top lash line
Chanel Sublime Mascara
Ardell Demi 102 lashes
MAC Dirty Blonde Pencil & Omega eyeshadow on brows

Lips:
MAC Vegas Volt (tiny amount sheered out with finger)
MAC Love Nectar Lustreglass


The lids were much more shimmery but my camera has a great habit of not picking that up!


I hope everyone's having a good week so far. I'm off to see Bridesmaids in the cinema later which I'm looking forward too. It'll be a good distraction from all the rain we've been having here lately. It's been raining practically non-stop for weeks now ): I think I can officially say that summer is non-existent in Ireland!!

If anyone would like to request a look, tutorial, review etc. please feel free to do so! You can leave any requests in the comments or on Formspring which is located on the side of this page.


Thursday, May 19, 2011

Tutorial: Smokey Silver with a Purple Pop

Ok, I'll be honest, I'm kinda cheating with this look considering I posted it on my other channel (GothidgeAngel) back in March of this year, but I really didn't want to see such a pretty look go to waste.

This is just a simple silver smokey look with a pop of purple on the lower lash line to give it something a little extra.


EYES:
- Two Faced Shadow Insurance
- Copperplate eye shadow
- Electra eye shadow
- Scene eye shadow
- Typographic eye shadow
- Carbon eye shadow
- Bourjoise "Gris Perle" duochrome eyeliner
- Parfait Amour eye shadow
- Inglot #439 (medium purple with blue iridescence) eye shadow
- Fascinating eyeliner
- Naked "Purple Duochrome" pigment from the Ivory Stack
- Smolder eyeliner
- Inglot black liquid liner
- Ardell "Demi Whispies" lashes

CHEEKS:
- Inglot #55 (medium purple pink) blush

LIPS:
- Plum Dandy lipstick
- Sportsgirl Light-up Lipgloss with Lights in "No Curfew"